Model Importer
YAHAHA Studio allows you to import 3D models, opening up a whole new range of possibilities for game development. While this feature is still in its alpha testing phase, we are excited to showcase how to import a 3D model into Studio in this tutorial.
Prepare a 3D model
Prepare a 3D model in the Filmbox (FBX) format that you want to import to Studio. Your model can consist of static meshes or include skeleton data with animations. However, you need to make sure it meets the model requirements.
Upload your model to Studio
Once your 3D model is ready, upload it to Studio:
-
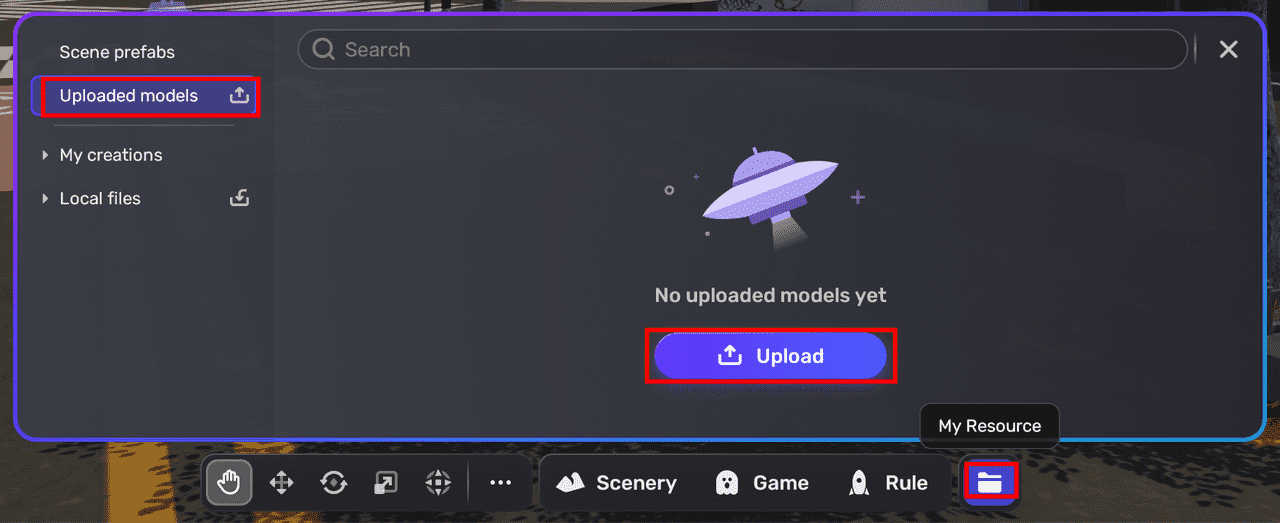
In Studio, choose My Resource>Uploaded models>Upload.

-
Select the FBX file to import and click Open.
-
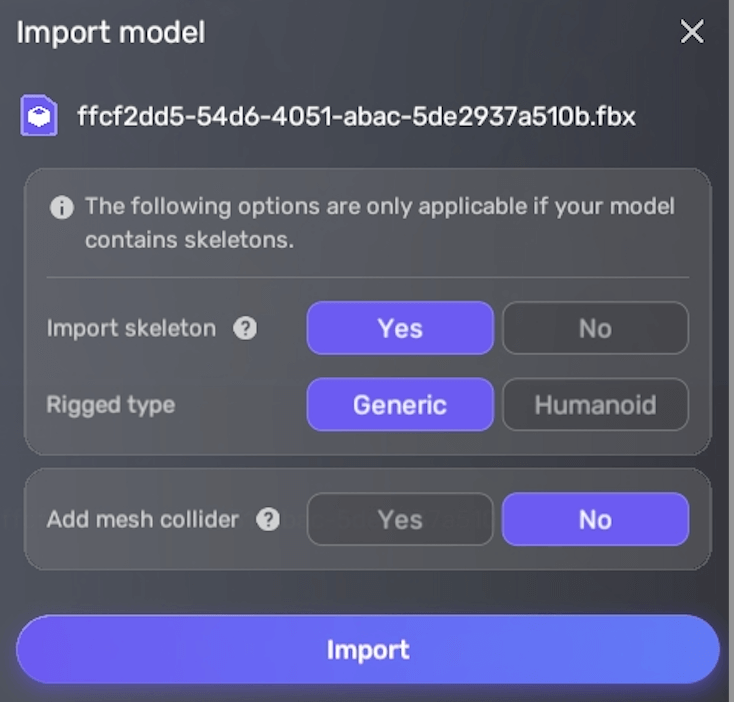
In the Import model dialog, configure the following settings:

Property Description Import skeleton Determines whether to import skeleton data for animating objects or characters. Set to Yes to import skeleton data if the model contains it; if set to No, only meshes, materials, and textures will be imported directly from the file. Configure this property based on the presence of skeleton data in your model. Rigged type Choose the appropriate method for adding a skeleton or structure to a 3D model to enable animation. Select Generic for simple bone structures suitable for basic movements and animations, or Humanoid for complex rigs with advanced controls. This property is only visible when Import skeleton is set to Yes and should be configured based on the rigged type of your model. Add mesh collider Determines whether to automatically add a mesh collider. Adding numerous mesh colliders may negatively affect game performance. For optimal results, use a primitive collider (for example, box, sphere, or capsule collider) within Studio. Note: FBX files containing 3D models with animations and bones, processed by third-party skinned mesh renderers, will have capsule colliders generated upon import. -
Click Import in the dialog to begin the import process. A window displaying upload status will appear in the top right corner.
-
After importing the FBX file, click it again to add it to the scene.
-
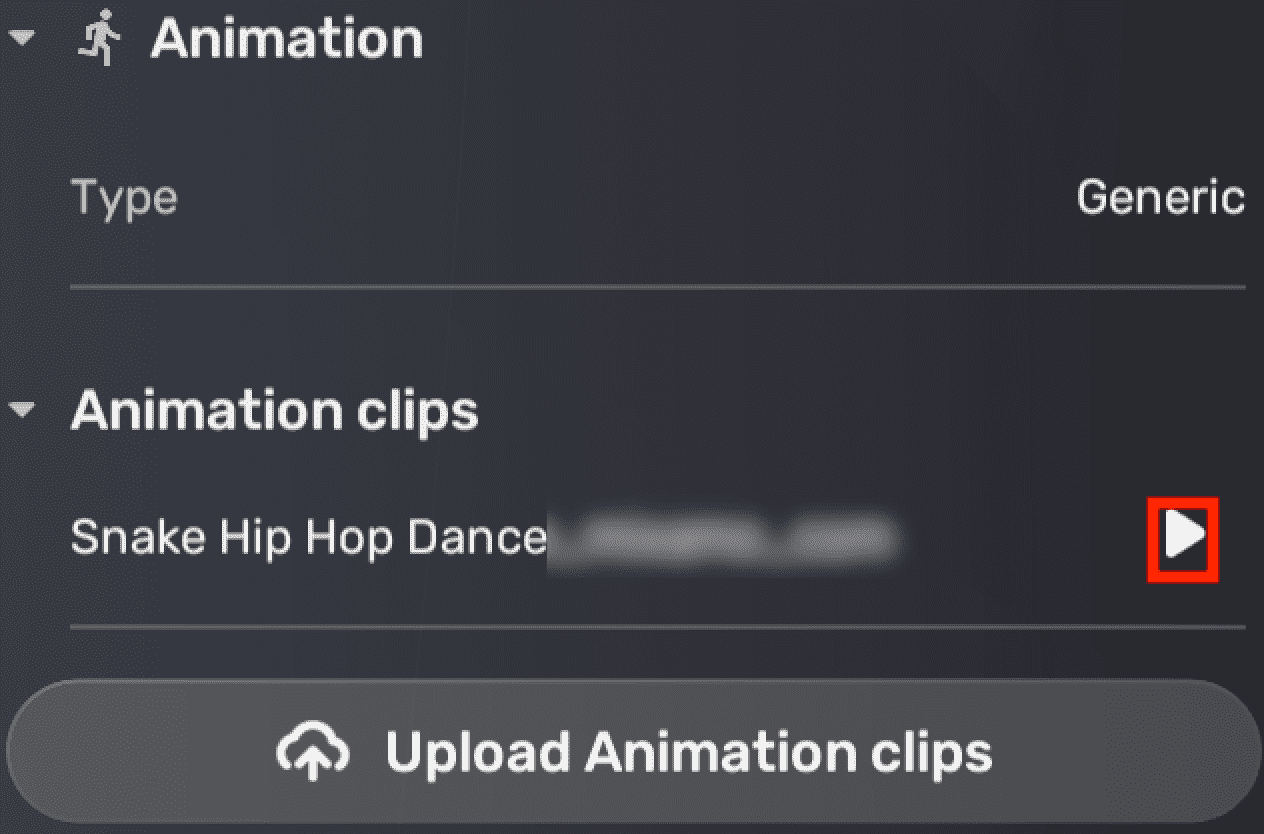
Optional: If your model includes animations, an Animation pane containing information about the imported animation will appear in the Properties window. Verify the animation preview.

-
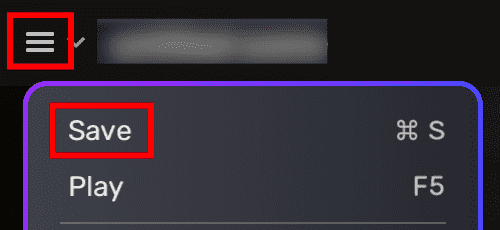
In the


Saving the scene only takes a few seconds, but publishing it to Asset Library requires you to wait until Cloud Build is finished, which usually takes less than 20 minutes. The duration, however, may vary depending on the server workload at the time.
Note that Cloud Build is a powerful YAHAHA service that automates the compilation, building, and packaging of imported assets. Once Cloud Build is complete, you can access the imported assets across devices using your Studio account; you can also publish these assets or the whole game to Asset Library to reach a wider audience.
Troubleshooting
If there are any issues with model imports in Studio, an error message will appear to alert you. The following table lists the error messages you might receive and their meanings:
| Message | Meaning |
|---|---|
| File not found | Check whether the file exists. |
| Invalid format | Only the FBX format is supported. |
| Failed to read file | The FBX file is invalid. |
| File too large | Maximum file size: 20 MB. |
| Upload failed | Check the network connection status. |
| File is empty | An empty file cannot be imported. |
| Failed to collect asset info | - |
| Cache not found | - |
| Failed to load | Try again later. |
| Failed to create container | - |
| Uploaded mesh count exceeded the allowed limit (100). | - |
| Uploaded triangle count exceeded the allowed limit (100000). | - |
| No mesh files detected | Check whether the mesh files exist. |
| Animations do not match with the generic rigged skeleton. | - |
| Animations do not match with the humanoid rigged skeleton. | - |
| No more animation clips allowed. Recommended animation clip count: 30. | The number of imported animation clips reached or exceeded the recommended limit (30). |
References
- To animate your 3D model after importing, read Animating a model.
- To edit the material of your 3D model after importing, read Materials.


