Working with the camera
In this tutorial, we will walk you through the process of adding and configuring a camera using YaCameraAPI, whether through Lua scripts or Node Graph. You'll learn to:
- Set up a camera in Studio.
- Modify camera settings with Lua scripts.
- Modify camera settings with node graphs.
Our focus will be on an RTS camera, and we will demonstrate how to modify three camera properties: distance to the target, controllability via user inputs, and field of view (FOV). However, the concepts we discuss here can be applied to other camera types and more camera properties as well. So, let's dive in!
Setting up the camera
The default camera in Studio is a third-person camera, a camera that follows the player from behind. A preview of the camera and default settings are as follows:

If you are building a strategy game, you may want to change the camera to an RTS type with the camera positioned above the world as follows. Then you need to first own an RTS camera component and then add it to the scene through an interface operation in Studio; scripts can not be used to do so.

To switch to RTS camera:
-
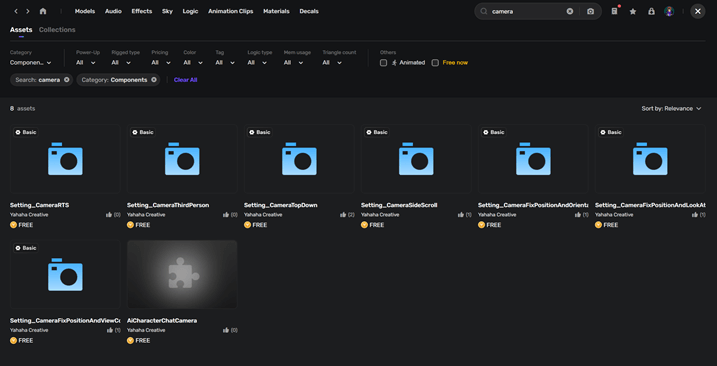
In Studio, go to Asset Library.
-
Choose Logic>Components. Search camera in the search bar. All camera components released by the official team Yahaha Creative will be displayed.
-
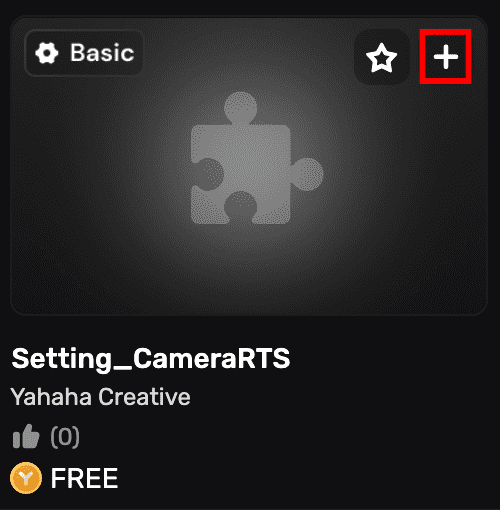
Hold the pointer over the Setting_CameraRTS component and click + to add it. You now have this component.
-
Close Asset Library and go back to Edit Mode. Click an object in the scene and then click

-
To apply your camera to the scene, select + Feature>Assets>Setting_CameraRTS>RTS camera, find the component,then click it then it will add to the Properties window.
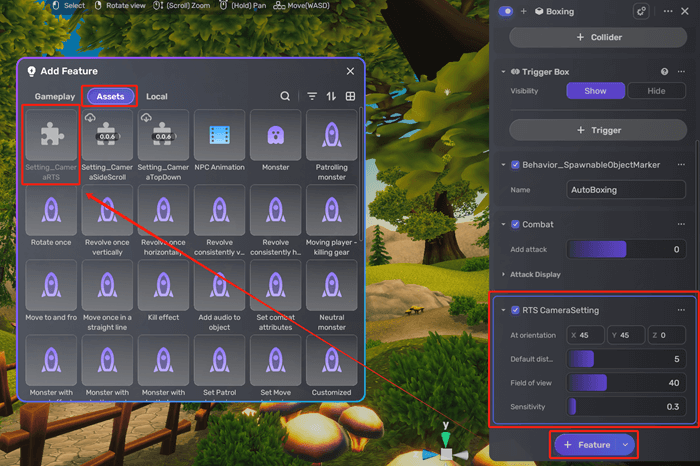
Now the RTS camera with the following settings is ready for your scene.
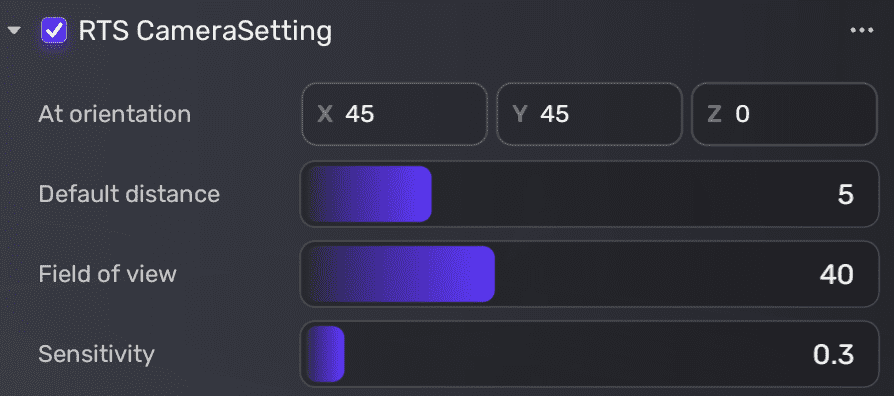


For more details on each parameter, visit RTS CameraSetting.
Note that it's recommended using only one camera component in a scene to ensure smooth gaming. To switch between different perspectives, you may need to remove the current camera and add a new one.
Modifying the camera settings
If you want to modify the RTS camera settings, you have two main options available:
Modifying the Camera Settings with Lua Scripts
Prerequisites
Make sure you have the following prerequisites:
-
Visual Studio Code is installed and integrated with your Studio. If you haven't done this already, follow the instructions in How to start coding to download and integrate.
-
A trigger is added to an entity. To set the trigger:
a Select an entity in the scene. This entity will be a trigger for your Lua script. In our example we selected a plant.b Click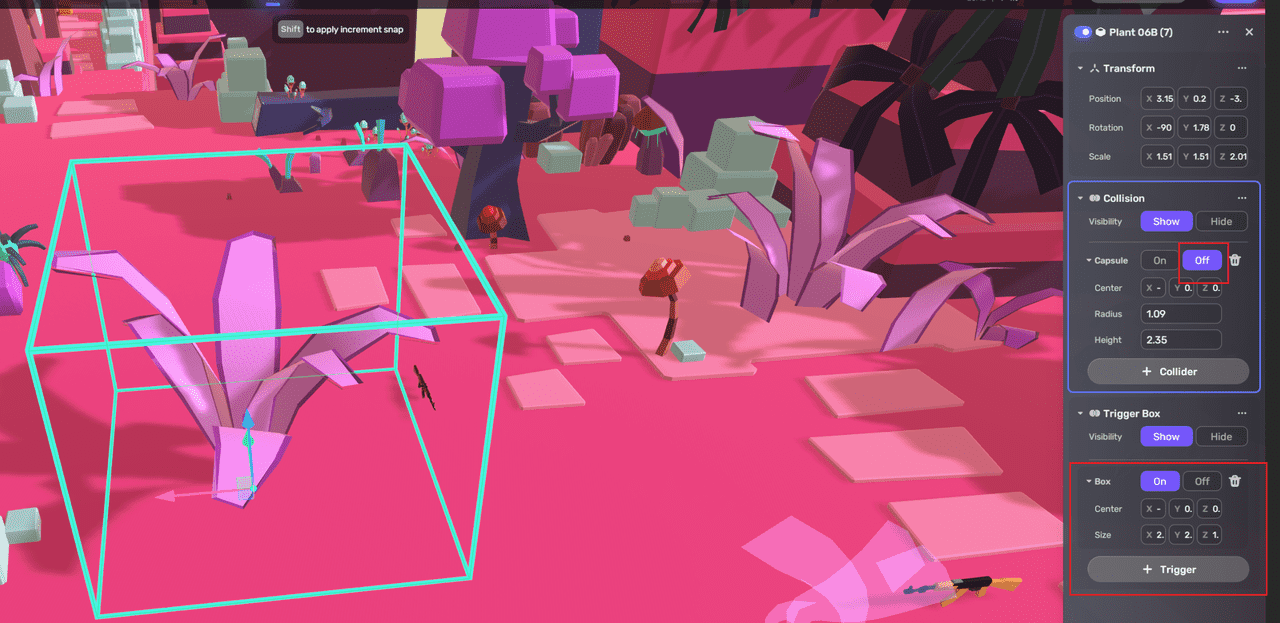
-
Add a new Lua script to the entity. If you're not sure how to do this, check out Creating or adding scripts.

Setting the camera distance
To set the distance between the camera and the target, call the SetCameraDistance function.
If we want to set the distance to 100, we can use the following code:
PhysicsAPI.OnTriggerEnter(function(trigger,entity)
--The logic below will take effect when the character enters any trigger box
YaCameraAPI.SetCameraDistance(entity,100)
end)
Save the script and playtest it in Play Mode. The following images showcase the effect of the function when you enter the trigger box:
| Before | After |
|---|---|
 |
 |
Setting if the camera can be controlled by user inputs
To determine whether the camera can be controlled by user inputs, call the SetCameraControllable function.
To disable a user from controlling the camera, we set the controllable parameter to false:
PhysicsAPI.OnTriggerEnter(function(trigger,entity)
--The logic below will take effect when the character enters any trigger box
YaCameraAPI.SetCameraControllable(entity,false)
end)
Then save the script and test it in Play Mode. The user will not able to zoom in or out, change the camera position, or exert any other form of control over the camera and disrupt the intended game experience.
Setting FOV
Call SetCameraFov to set the camera's field of view (FOV) value. In our example we use the following code to set the FOV at 80:
PhysicsAPI.OnTriggerEnter(function(trigger,entity)
--The logic below will take effect when the character enters any trigger box
YaCameraAPI.SetCameraFov(entity,80.00)
end)
Save the script and playtest it in Play Mode. The following images showcase the effect of the function when you enter the trigger box:
| Before | After |
|---|---|
 |
 |
Modifying the Camera Settings with Node Graphs
Prerequisites
Make sure you have the following prerequisites:
-
Visual Studio Code is installed and integrated with your Studio. If you haven't done this already, follow the instructions in How to start coding to download and integrate.
-
A trigger is added to an entity. To set the trigger:
a Select an entity in the scene. This entity will be a trigger for your Lua script. In our example we selected a plant.b Click -
Add a new node graph to the entity. To add a node graph:
a Click the the drop-down arrow on the +Component button and select Add node graph.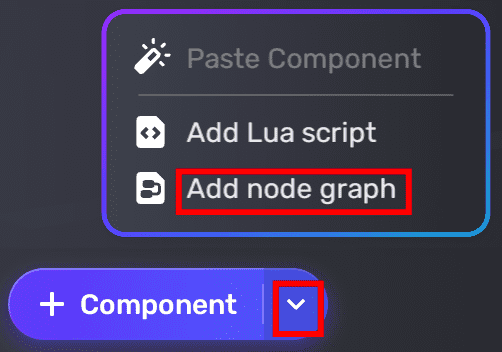 b Click + New node graph to create a new node graph and enter a name for it. The name can only contain letters and numbers. In our example we created a node graph named ConfigureCamera.c Click the Edit button to launch your code editor.
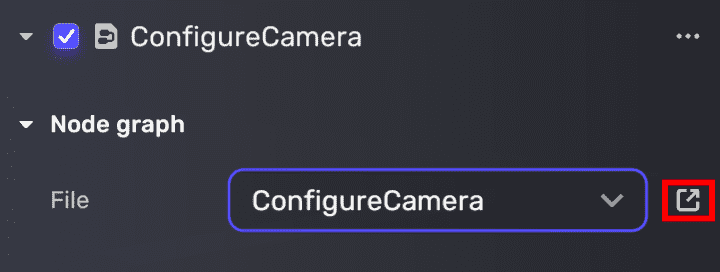
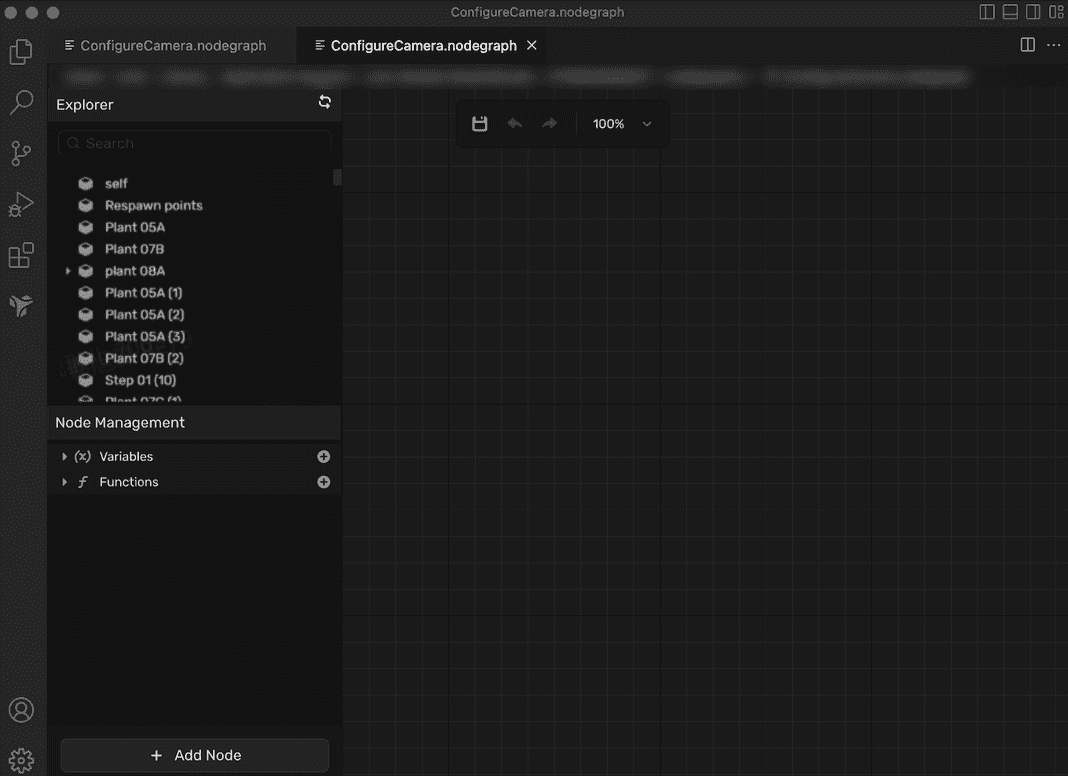
After opening the code editor, you may need to click the Edit button again to confirm that you are in the editor view, as shown in the following example:


Setting the camera distance
-
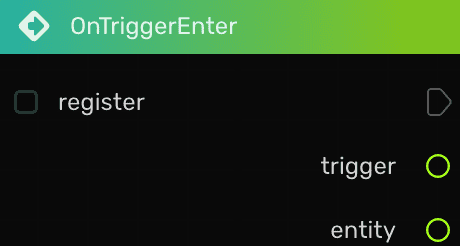
Right-click a blank space in the Editor to bring up the Add Node search box. From there, type onTriggerEnter and select the first search result. Note that the second search result includes entity and YaEntity parameters, which are not applicable in this context.
-
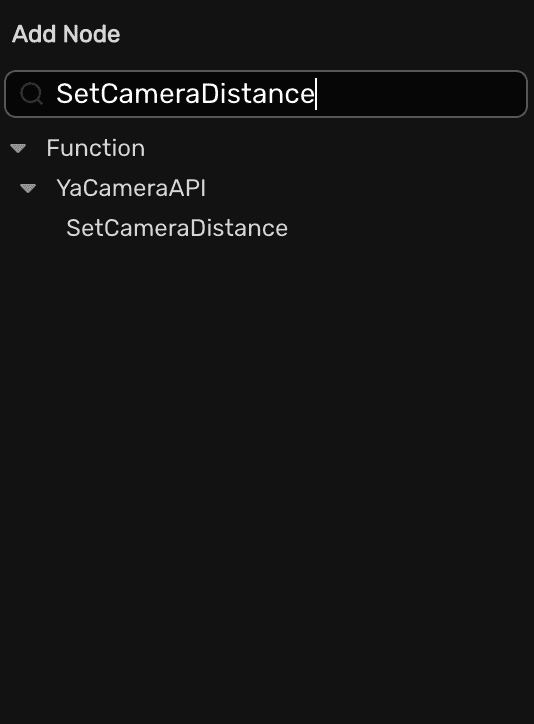
In the Add Node search box, type SetCameraDistance and select the search result.
-
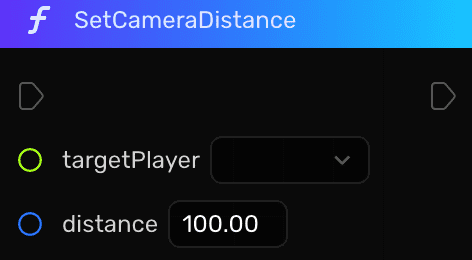
Set a desired distance between the camera and the target. In our example we set the distance to 100.
-
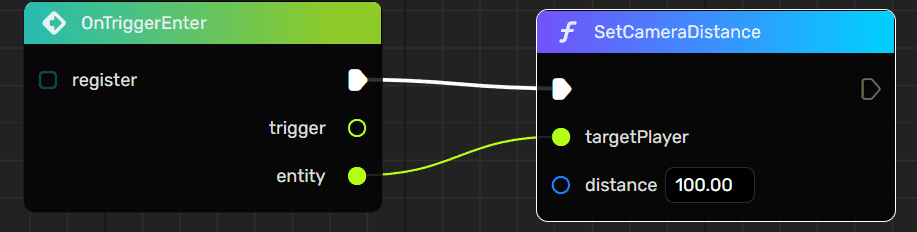
Draw a line between two nodes and link entity to targetPlayer. Note that the logic will take effect when the character enters any trigger box.
-
Click
 to compile and save the node graph. Then playtest it in Play Mode!


The following images showcase the effect of the function when you enter the trigger box:
| Before | After |
|---|---|
|
|
Setting if the camera can be controlled by user inputs
-
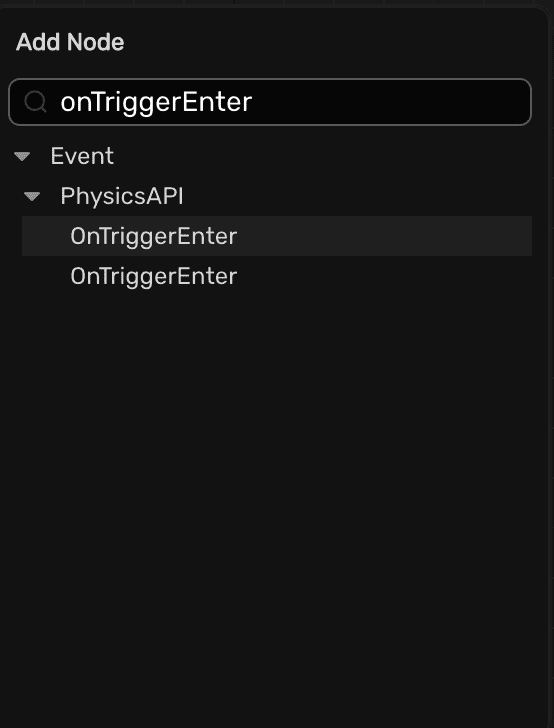
Right-click a blank space in the Editor to bring up the Add Node search box. From there, type onTriggerEnter and select the first search result. Note that the second search result includes entity and YaEntity parameters, which are not applicable in this context.
-
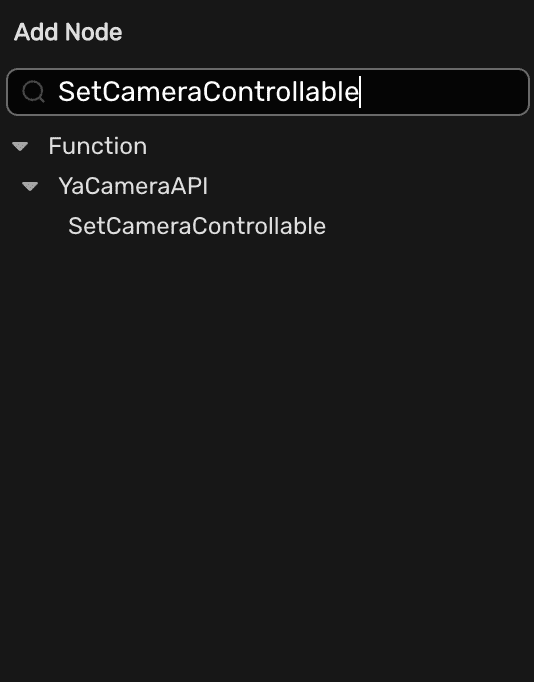
In the Add Node search box, type SetCameraControllable and select the search result.
-
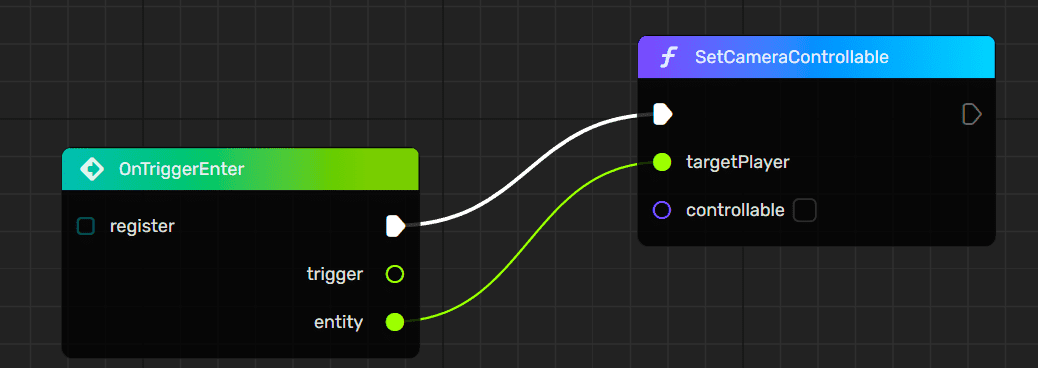
Select controllable if you want to enable user inputs. In our example we leave the box blank.

-
Draw a line between two nodes and link entity to targetPlayer. Note that the logic will take effect when the character enters any trigger box.
-
Click
to compile and save the node graph. Then playtest it in Play Mode!


Setting the camera FOV
-
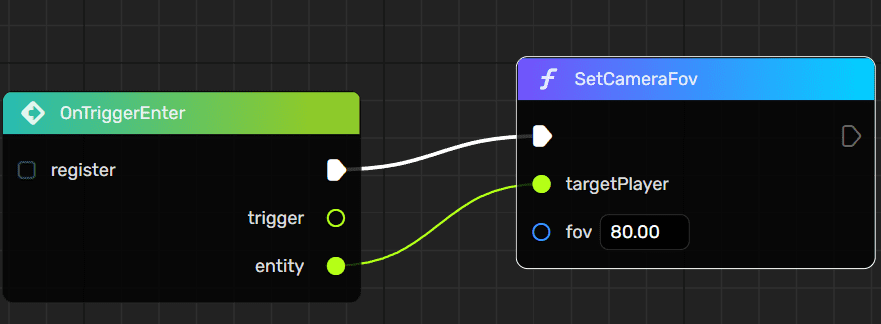
Right-click a blank space in the Editor to bring up the Add Node search box. From there, type onTriggerEnter and select the first search result. Note that the second search result includes entity and YaEntity parameters, which are not applicable in this context.
-
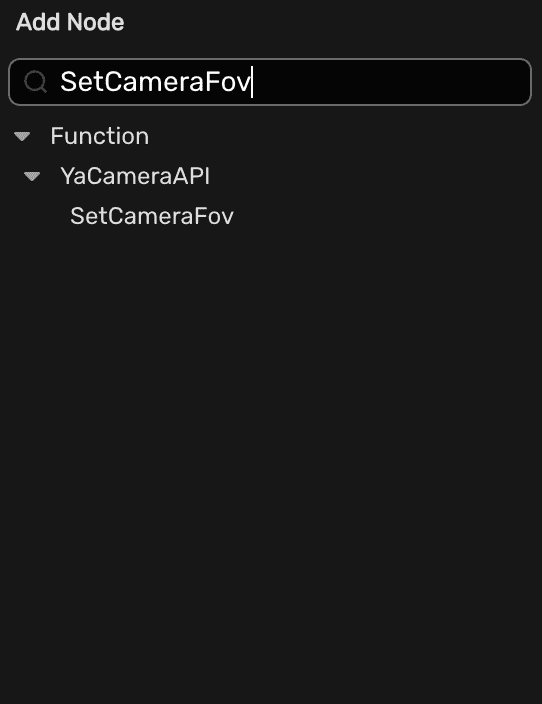
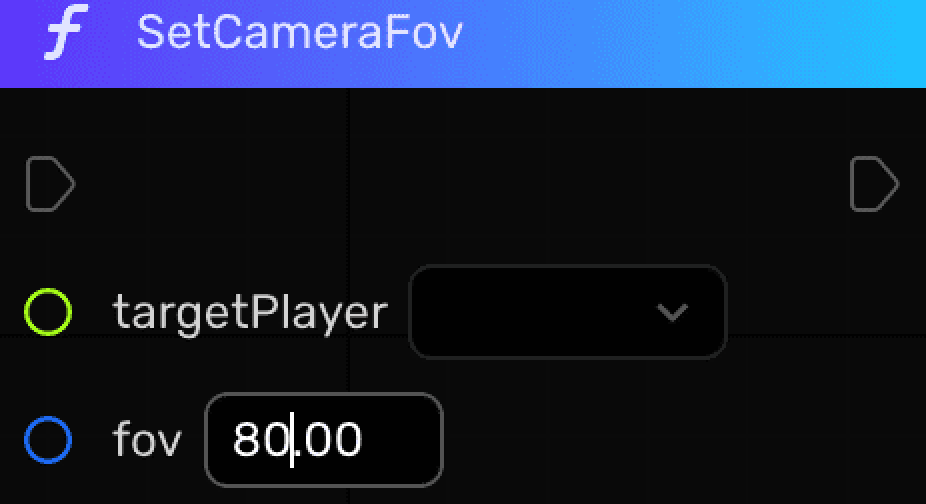
In the Add Node search box, type SetCameraFOV and select the search result.
-
Enter a desired FOV value. It can be between 1 and 179. In our example we set the FOV value at 80.
-
Draw a line between two nodes and link entity to targetPlayer. Note that the logic will take effect when the character enters any trigger box.
-
Click
to compile and save the node graph. Then playtest it in Play Mode!


The following images showcase the effect of the function when you enter the trigger box:
| Before | After |
|---|---|
|
|
Reference
While YaCameraAPI provides a wide range of functions, not all of them can be used with every type of camera. To assist you in identifying which functions are compatible with a specific camera type, the following table outlines the incompatible combinations.
| Third-Person Camera | RTS Camera | Side-Scroll Camera (2D and 3D) | Top-down Camera | FixPositionAndOrientation Camera | FixPositionAndViewControllable Camera | FixedPositionAndLookAt Camera | |
|---|---|---|---|---|---|---|---|
| SetCameraOrientation | NA | NA | NA | ||||
| SetCameraPosition | NA | NA | NA | ||||
| SetCameraDistance | NA | NA | NA | ||||
| SetCameraFollowAt | |||||||
| SetCameraLookAt | |||||||
| SetCameraControllable | NA | NA | NA | ||||
| SetCameraFov | |||||||
| SetCameraSensitivity | NA | NA | NA | ||||
| SetCameraNearFarClippingPlane | |||||||
| SetCameraRestore |


