Generate a story with Theo
YAHAHA empowers creators with our interactive AI assistant, Theo, who facilitates both game scene generation and game story completion. While still in the beta version, we are dedicated to enhancing and refining this feature. Theo generates game stories based on user prompts. Currently, Theo breaks them down into essential story elements such as non-player characters (NPCs), monsters, items, and quest lines before incorporating them into the gameplay. For more insights into Theo's capabilities, please refer to our guides about AI.
Start a story
- Download and install YAHAHA installer.
- Log in to YAHAHA Desktop (Desktop) with your YAHAHA account. If you haven't signed up for a YAHAHA account yet, create one first.
Then you can choose to start the story creation either from Desktop or YAHAHA Studio (Studio).
From Desktop
-
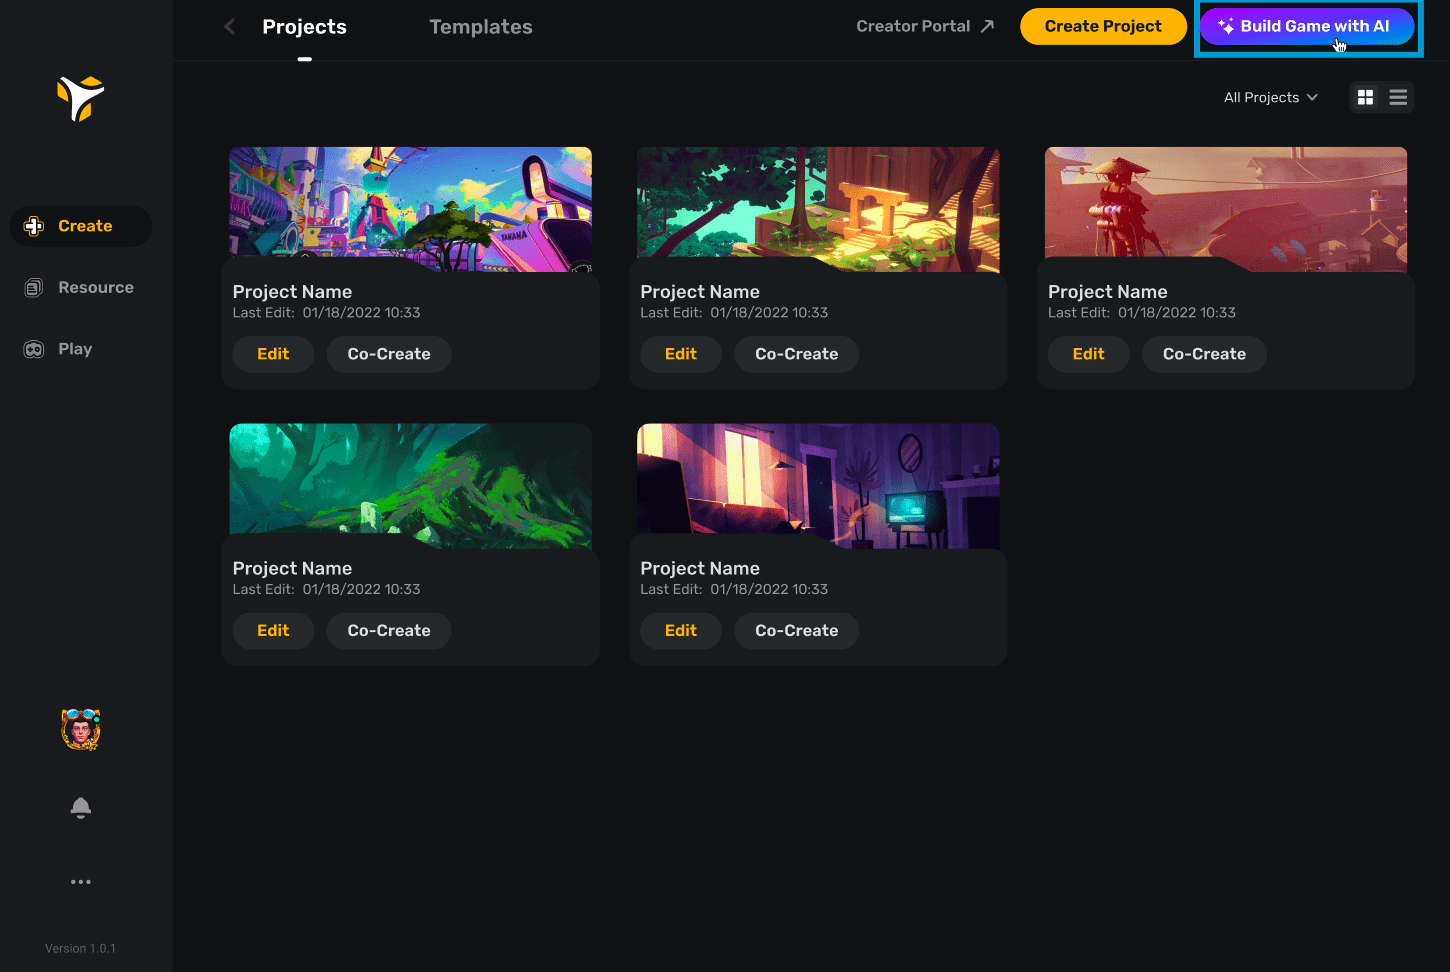
In Desktop click the Build Game with AI button under the Create tab to get started.
No projects: Center Existing projects: Top-Right 
-
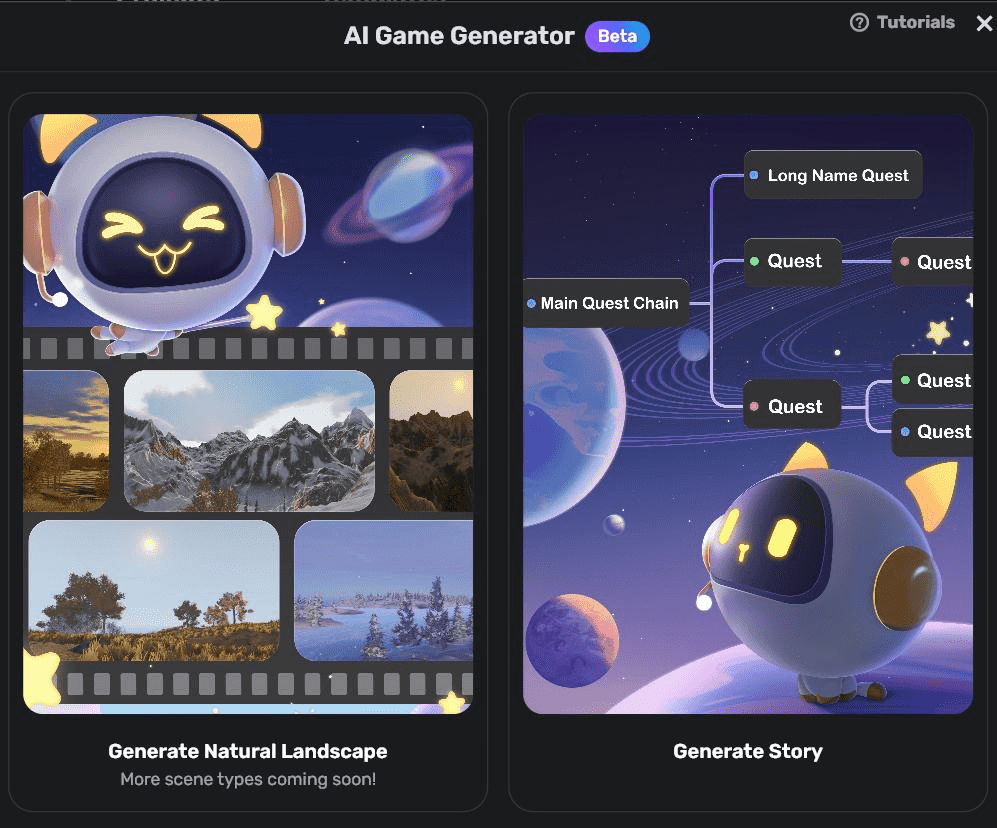
In the pop-up window, choose Generate Story for story generation.
-
After clicking Generate Story, you'll see a story generator window. In the window, set the scene, theme, and prompt for your story.

-
Choose a Scene: Select a scene from scene templates. To replace a chosen template, click Replace.
-
Theme: Enter the game theme. For example, adventure and friendship.
-
Prompt: Describe the game story you want to generate. You can include NPCs, items, monsters, specific tasks, and even storylines here. For example, For more information on prompt tips, see Prompt tips.
Alternatively, you can click Try Prompt on a story example on the left side to enter its prompt and modify it further. To have an overview of the story description and prompt, click More Details.

When you fill in everything, click Generate to start generating a story.
-
-
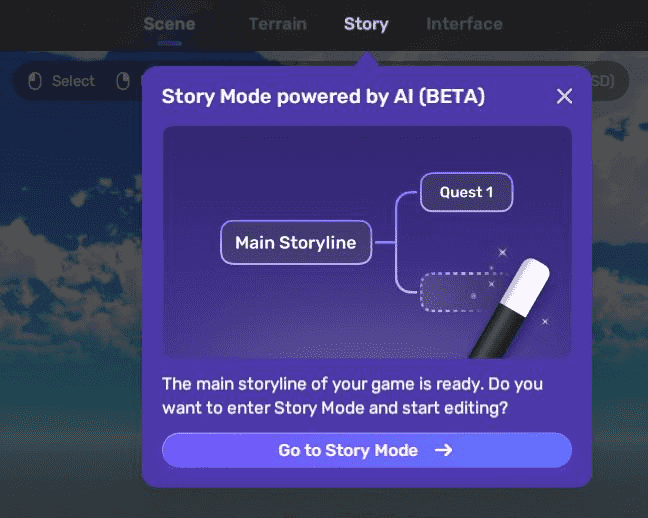
You will be directed to Studio and prompted to go to Story Mode, an editor in which Theo helps you create quests that comprise storylines.


From Studio
If you want to try the story generation feature on an existing project, open your project on Desktop and switch to the Story tab in Studio. For more information on project creation, see create a project.

Then you are ready to enter Story Mode, an editor in which Theo helps you create quests that comprise storylines. To get started, click OK, let's get started.

A chatbot with Theo pops up. If you have a basic story idea, fill in your story summary. If you need inspiration, ask Theo for some new ideas. Meanwhile, you can preview your story on the left pane.

When Theo has all the game basics, such as the game name, theme, and storyline, the Generate Now button will light up and you can click it to edit the story.

Edit a story
In the story editor, quests are displayed as main or side types for you to edit further. Players can conveniently track their quest progress through the Quest List pane in game.

To view the story prompt, click the 
To view the quest structure, expand the Hierarchy window by clicking the 

Note: AI-assisted story generation produces unique storylines, much like snowflakes. Even when using the same prompt, each story showcases its individuality, featuring shared elements and styles with distinct touches that set them apart.
Modify a quest
To start modifying a quest, select the quest and click Quest Properties in the top right corner to expand the Properties window.


Here are all the quest properties in the window:
-
Basic info:
-
Name: Name of the task
-
Type: Type of the task, including:
-
Narrative: To complete the task, players need to engage in a conversation with an NPC.
-
Monster Kill: To complete the task, players need to collect a specific number of monsters.
-
Item Collection: To complete the task, players need to collect a specific number of items.
-
-
NPC: The initial contact to interact with the player and deliver the quest. Click the

-
Sketch: Describes the quest briefly
-
-
Target: Corresponding target of the task
-
For a Monster Kill quest, the target is a monster to kill. Because there is no preset monster, you need to click + Create new one to create a monster.
-
For an Item Collection quest, the target is an item to collect. You can choose an item or click + Create new one to create a new item.
-
For a Narrative quest, the target is at least one pre-set NPC to interact with through dialogue. You can either select an existing NPC or click + Create new one to create a new NPC. You also need to add dialogue in English in the Target pane for the conversation with the designated NPC.
-
-
Reward: (Optional) The item given to players when they finish tasks.
-
Dialogue: The conversation players have with the NPC that serves as the players's initial contact. We only accept input in English.

Note: For a smooth gameplay experience, each quest, NPC, item, and monster must have a unique name.
You can edit the properties by adjusting the values. Or click Modify with AI and describe desired changes to enable Theo to update properties directly. However, remember that new items, NPCs, and monsters cannot be generated this way.
Add a quest or quest branch
You can easily create quests or quest branches using existing quest assets. If you want to add a new quest to kill monsters, make sure to create the monsters first since there is no preset monster model. There are multiple methods to create new quests and initiate quest branches. Among them:
-
To create an independent quest, click + New Quest, then decide how to create it. If you need a specific type of quest, you can request it from Theo, and it will generate it automatically. However, remember that new items, NPCs, and monsters cannot be generated this way. Or you can choose to create a quest manually.

-
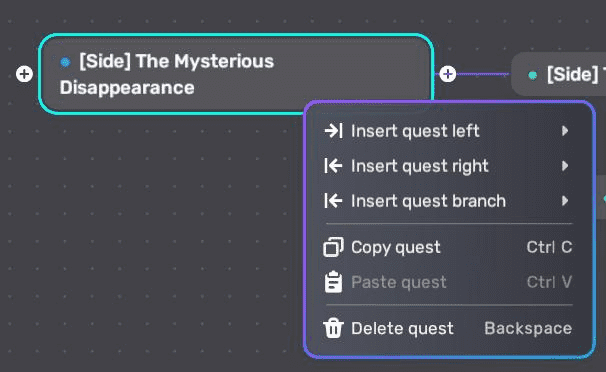
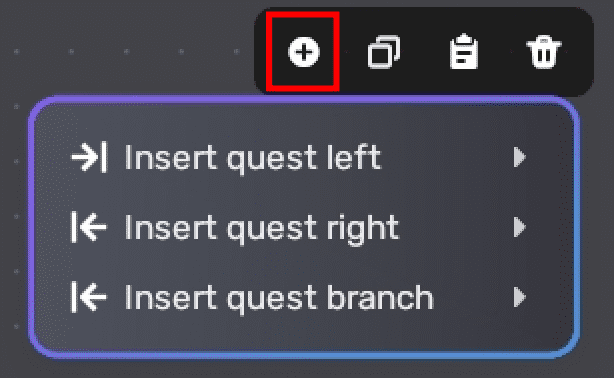
To create a quest or quest branch next to an existing one:
- Right-click the existing quest, then select where and how to insert it.
- Hold your pointer over the quest, click


- Select the quest, click


Copy a quest
Copying a quest copies the quest and all the subsequent quests in the sequence, if any. To copy a quest, do any of the following:
-
Right-click the quest and select Copy quest.
-
Select the quest and click the

-
Hold your pointer over the quest and press Cmd+C (on Mac) or CTRL+C (on Windows).

Paste a quest
To paste the copied quest(s) to the right of a quest (target quest), do one of the following:
-
Right-click the target quest and select Paste quest.
-
Select the target quest and click the

-
Hold your pointer over the target quest and press Cmd+V (on Mac) or CTRL+V (on Windows).

To paste the copied quest(s) as the independent quest(s): Find an empty spot in the interface, then right-click and select Paste quest, or use the same hotkeys as before (Cmd+V or CTRL+V).
Delete a quest
Deleting a quest removes the quest and all the subsequent quests in the sequence, if any. To delete a quest, do one of the following:
-
Right-click the quest and select Delete quest.
-
Select the quest and click the

-
Select the quest and press Backspace.

To delete multiple quests at once, drag a rectangle around them and delete all the quests that fall inside the bounding box.
Manage quest resources
To manage quest resources, including NPCs, monsters, and items for quests, click Quest Ref.
You can also click Create to create more resources. These created quest assets can also be published to Asset Library. For more information on asset publishing, see Publishing an asset to Asst Library.
If you want to delete an asset, click the 
More functions
Consult gameplay questions
Whenever you need any assistance from Theo on story generation, such as prompting ideas and quest breakdown, click AI Assistant at the bottom and chat with Theo in the chatbot.

Scale canvas display
To adjust the display size of quest lines, use the zoom button, zoom in button, or adjust the percentage slider.

Apply a story
To apply quests to the game, click Apply to Gameplay in the top right corner. Once applied, you enter the scene editor and view everything generated there.
NPCs and monsters are usually generated within a 10 to 30-meter radius from the spawn point. You can freely reposition them and continue to edit the scene and gameplay. To learn more about scene editing and gameplay, see Scene Editor and Gameplay. When making changes to the scene, ensure they align with the existing gameplay. Likewise, when you modify quests in the story editor, they should remain coherent and consistent with the gameplay. Before re-applying quests, remove any resources previously generated from the scene to avoid potential naming conflicts that could affect game functionality.
To see how the game goes, playtest it in Play Mode.
Save a scene
When you apply all quests, the scene with generated quests is automatically saved. If you make any edits or modifications within the scene, save it before exiting Studio.
For a saved scene, you can access, modify, and publish it anytime.
Manage the scene
Access the scene
You can access the scene under the Projects tab in Desktop. It is labeled as AI-Generated.

Publish the scene
You can publish the AI-generated scene to Desktop, with mobile support coming soon. For more information about scene publishing, see Publishing your project.
Theo assistance
To rate Theo's service and leave a comment, see Feedback.
For additional assistance, contact us at the YAHAHA Discord server.
Prompt tips
-
A prompt is a short text description that YAHAHA interprets to produce game scenes and stories. Whether it's a single word, phrase, sentence, or even a more elaborate description in complete sentences, the prompt should not exceed 500 characters.
-
Be clear and specific about the desired game story. You can use punctuation, but don't worry too much about grammar and capitalization. The main focus should be to effectively convey your ideas.
Related documents
- Introducing Theo, an overview of AI services
- Theo chatbot, a guide to the AI chatbot


