Manipulating a YahahaObject
Scene editor allows you to create your space by adding and manipulating YahahaObjects. All editable objects in YAHAHA Studio can be called YahahaObjects and they can be found in Object Explorer. You can manipulate YahahaObjects with the following tools.
Editing tools
| Icons | Tools | Description | Default shortcuts |
|---|---|---|---|
| AI assistant | An interactive AI assistant designed to assist creators in designing and building games within YAHAHA Studio | 0 |
|
| Grab | Grabs YahahaObjects and puts them wherever you want. This is an auto-snapping tool that allows YahahaObjects to snap to the bounding boxes of other YahahaObjects. If you press Ctrl in Windows or Command in Mac when grabbing a YahahaObject, the YahahaObject will be snapped to the nearest vertex. | 1 | |
| Move | Changes the precise position of a YahahaObject. With this tool, you can place a YahahaObject in the exact place. This tool is often used together with the Grab tool. | 2 | |
| Rotate | Changes the rotation of YahahaObjects | 3 | |
| Scale | Rescales YahahaObjects. You can use Box Scale to scale an object relative to a single point. Alternatively, you can expand to use Point Scale to scale an object proportionally along all three axes while maintaining its proportions. | 4 | |
| Transform | A tool for general purposes. You can use it to change the position and rotation of YahahaObjects and rescale them as well. | 5 | |
| Align | Aligns objects along one or more axes. For more information, see Align. | 6 | |
| Handle | Controls the rotation and position of selected YahahaObjects.
|
- | |
| Grid | A visual grid for precise alignment of YahahaObjects.
|
|
|
| Camera | Stores up to 5 camera views. You can switch between the saved views. | - | |
| Gizmo icons | Gizmo icons for audio, effects, decals, and light in the scene. Use this tool to show or hide these gizmo icons. | - | |
| NavMesh area | The walkable surfaces in the scene that enable AI players to move intelligently and navigate around obstacles. It's generated by a navigation mesh. To bake the mesh, click NavMesh>Start baking in the main menu. Once the mesh is baked, use this tool to view the areas highlighted in blue where AI players can move and you can adjust their path. | - | |
| Lighting | Controls the lighting source in the scene. When enabled, the scene's lighting is active. When disabled, a light source attached to the scene view camera provides lighting. | - |
Adjusting the view
- Hold the right mouse button to change the direction the view is facing. Then press W, A, S, and D, Q, E on the keyboard to move view position forward, left, back, right, down, and up. Pressing Shift accelerates the speed of the camera view.
- Hold the Alt button in Windows or option in Mac. Then press right mouse button to orbit around a selected YahahaObject.
- Use the scroll wheel to move the view closer or further away.
- Press F with an object selected to move the view to focus on that YahahaObject.
Align tool
The Align tool helps you align objects along one or more axes. It can be a huge time-saver when it comes to positioning objects precisely in your scene.
To open the Align tool, click Align ![]() in the toolbar, or use the hotkey 6. To start aligning, select the objects that you want to align. You can do this by clicking and dragging to create a selection box around the objects or by holding down the Shift key and clicking on each object individually.
in the toolbar, or use the hotkey 6. To start aligning, select the objects that you want to align. You can do this by clicking and dragging to create a selection box around the objects or by holding down the Shift key and clicking on each object individually.

| Property | Description |
|---|---|
| Relative to | The object that the alignment is related to.
|
| Space | Select the coordinate space in which you want the alignment to occur:
|
| Align to | Enabled when you select multiple objects. You can choose to align objects along the x-, y-, or z- axis, and specify whether you want them aligned to the minimum, center, or maximum point along that axis. For example, if you choose Z Center, all selected objects will be aligned to the center point of the z-axis. |
Note: When you hover over the Align to options, in the scene you can see the selection box outlined in orange and a plane highlighted in orange, to which all objects will be aligned.

Scene gizmo
In YAHAHA Studio (Studio), the navigation gizmo located in the bottom right corner helps you quickly change your viewpoint and viewing direction.
![]()
The navigation gizmo displays your current view orientation. It features conical arms extending from each side of the central cube. Clicking on any arm aligns the view with the X-, Y-, or Z-axis, as indicated by the labels. Clicking the same axis again will switch to the opposite view along that axis.
The same scene viewed in top view by clicking the conical Y-axis arm:

The same scene viewed in left view by clicking the conical Z-axis arm:

The same scene viewed in front view by clicking the conical X-axis arm:

The button below the navigation gizmo enables the view mode switch. Clicking the button to switch scene views between orthographic and default perspective mode.

The orthographic view lacks perspective, allowing for an undistorted representation of objects. You can click the conical axis arm to elevate front, top, and side views for a more detailed examination.
| Scene in perspective mode | Scene in orthographic mode |
|---|---|
 |
 |
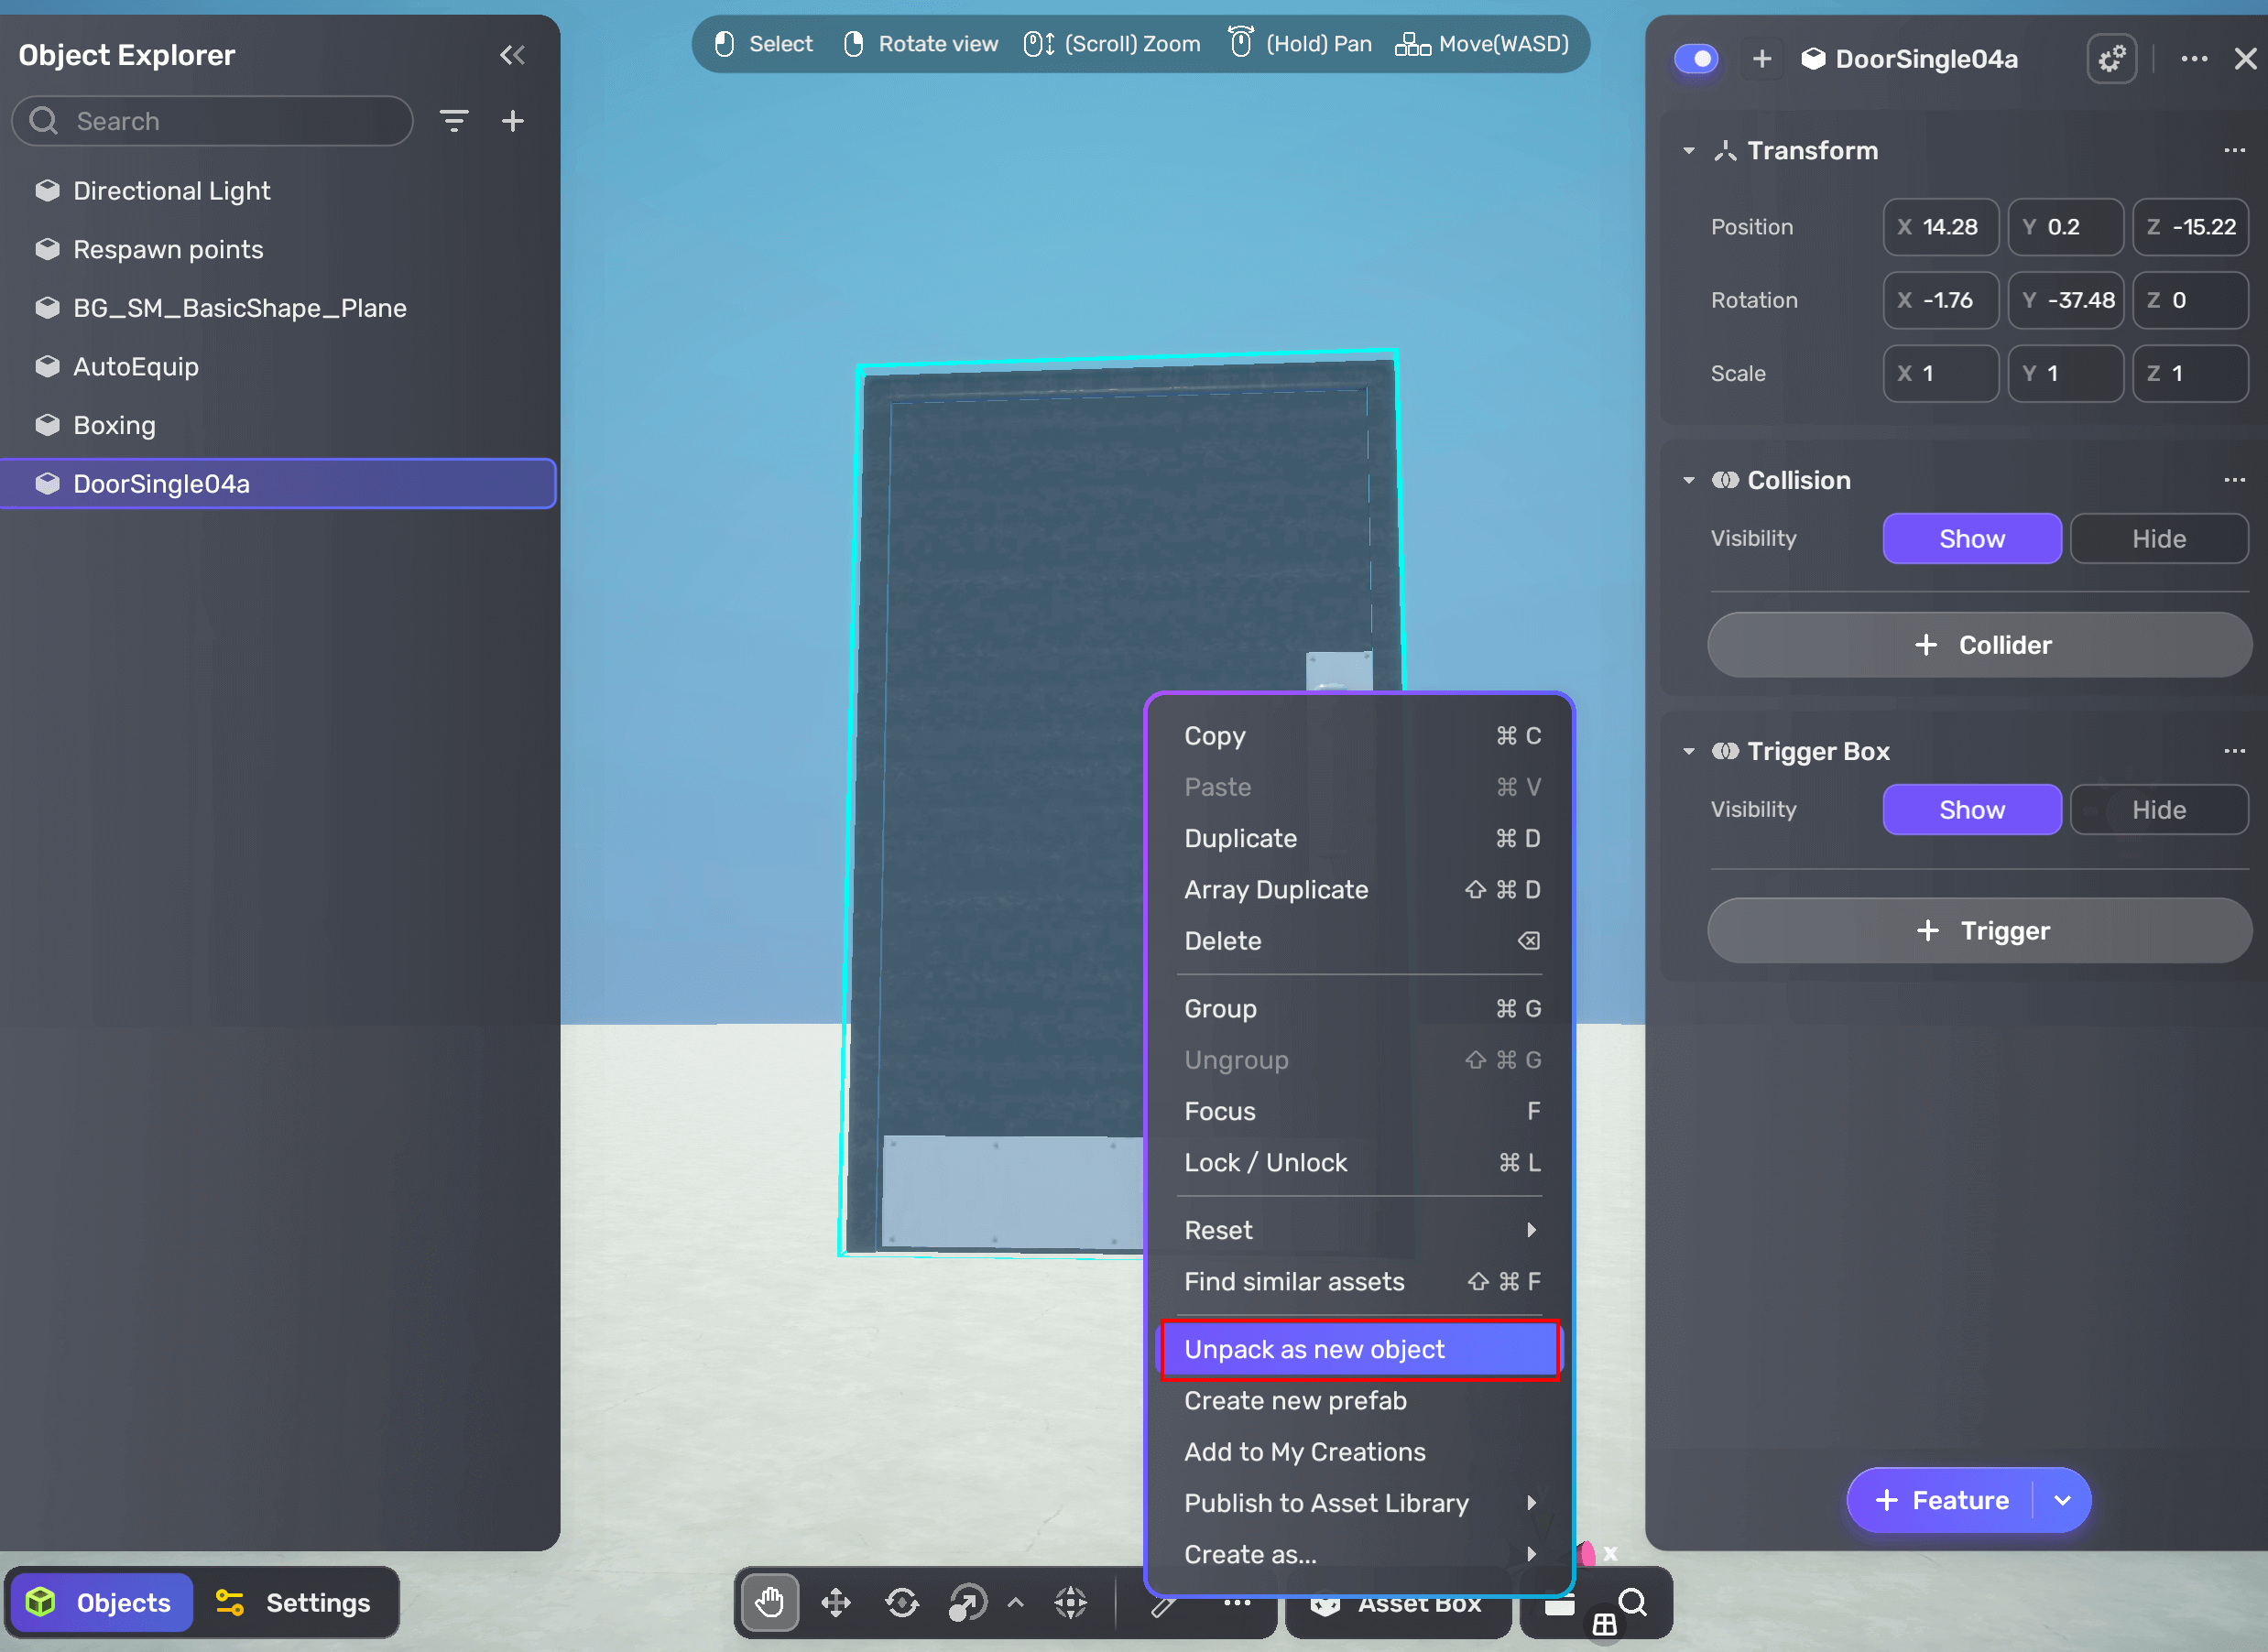
Unpacking
Unpacking in YAHAHA Studio (Studio) allows you to manipulate the individual components of an object independently. For example, you can unpack a door model into separate parts, such as a door body and a door frame. Unpacking creates a duplicate of the object, displaying all manageable parts while removing any gameplay logic. It is important to note that unpacking is a non-destructive operation, meaning it does not modify the original selected object.
Unpacking an object
To unpack an object in Studio:
-
Make sure the object is present in the scene. If not, add it to the scene.
-
Right-click the object to open the context menu and select Unpack as new object.
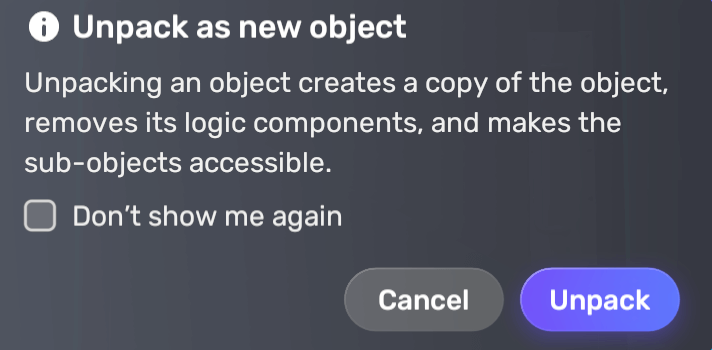
-
In the Unpack as new object dialog, click Unpack.
-
A duplicate of the previously selected object is created with the same name and an expandable hierarchy in Object Explorer. In the scene, the duplicate overlaps with the original object.
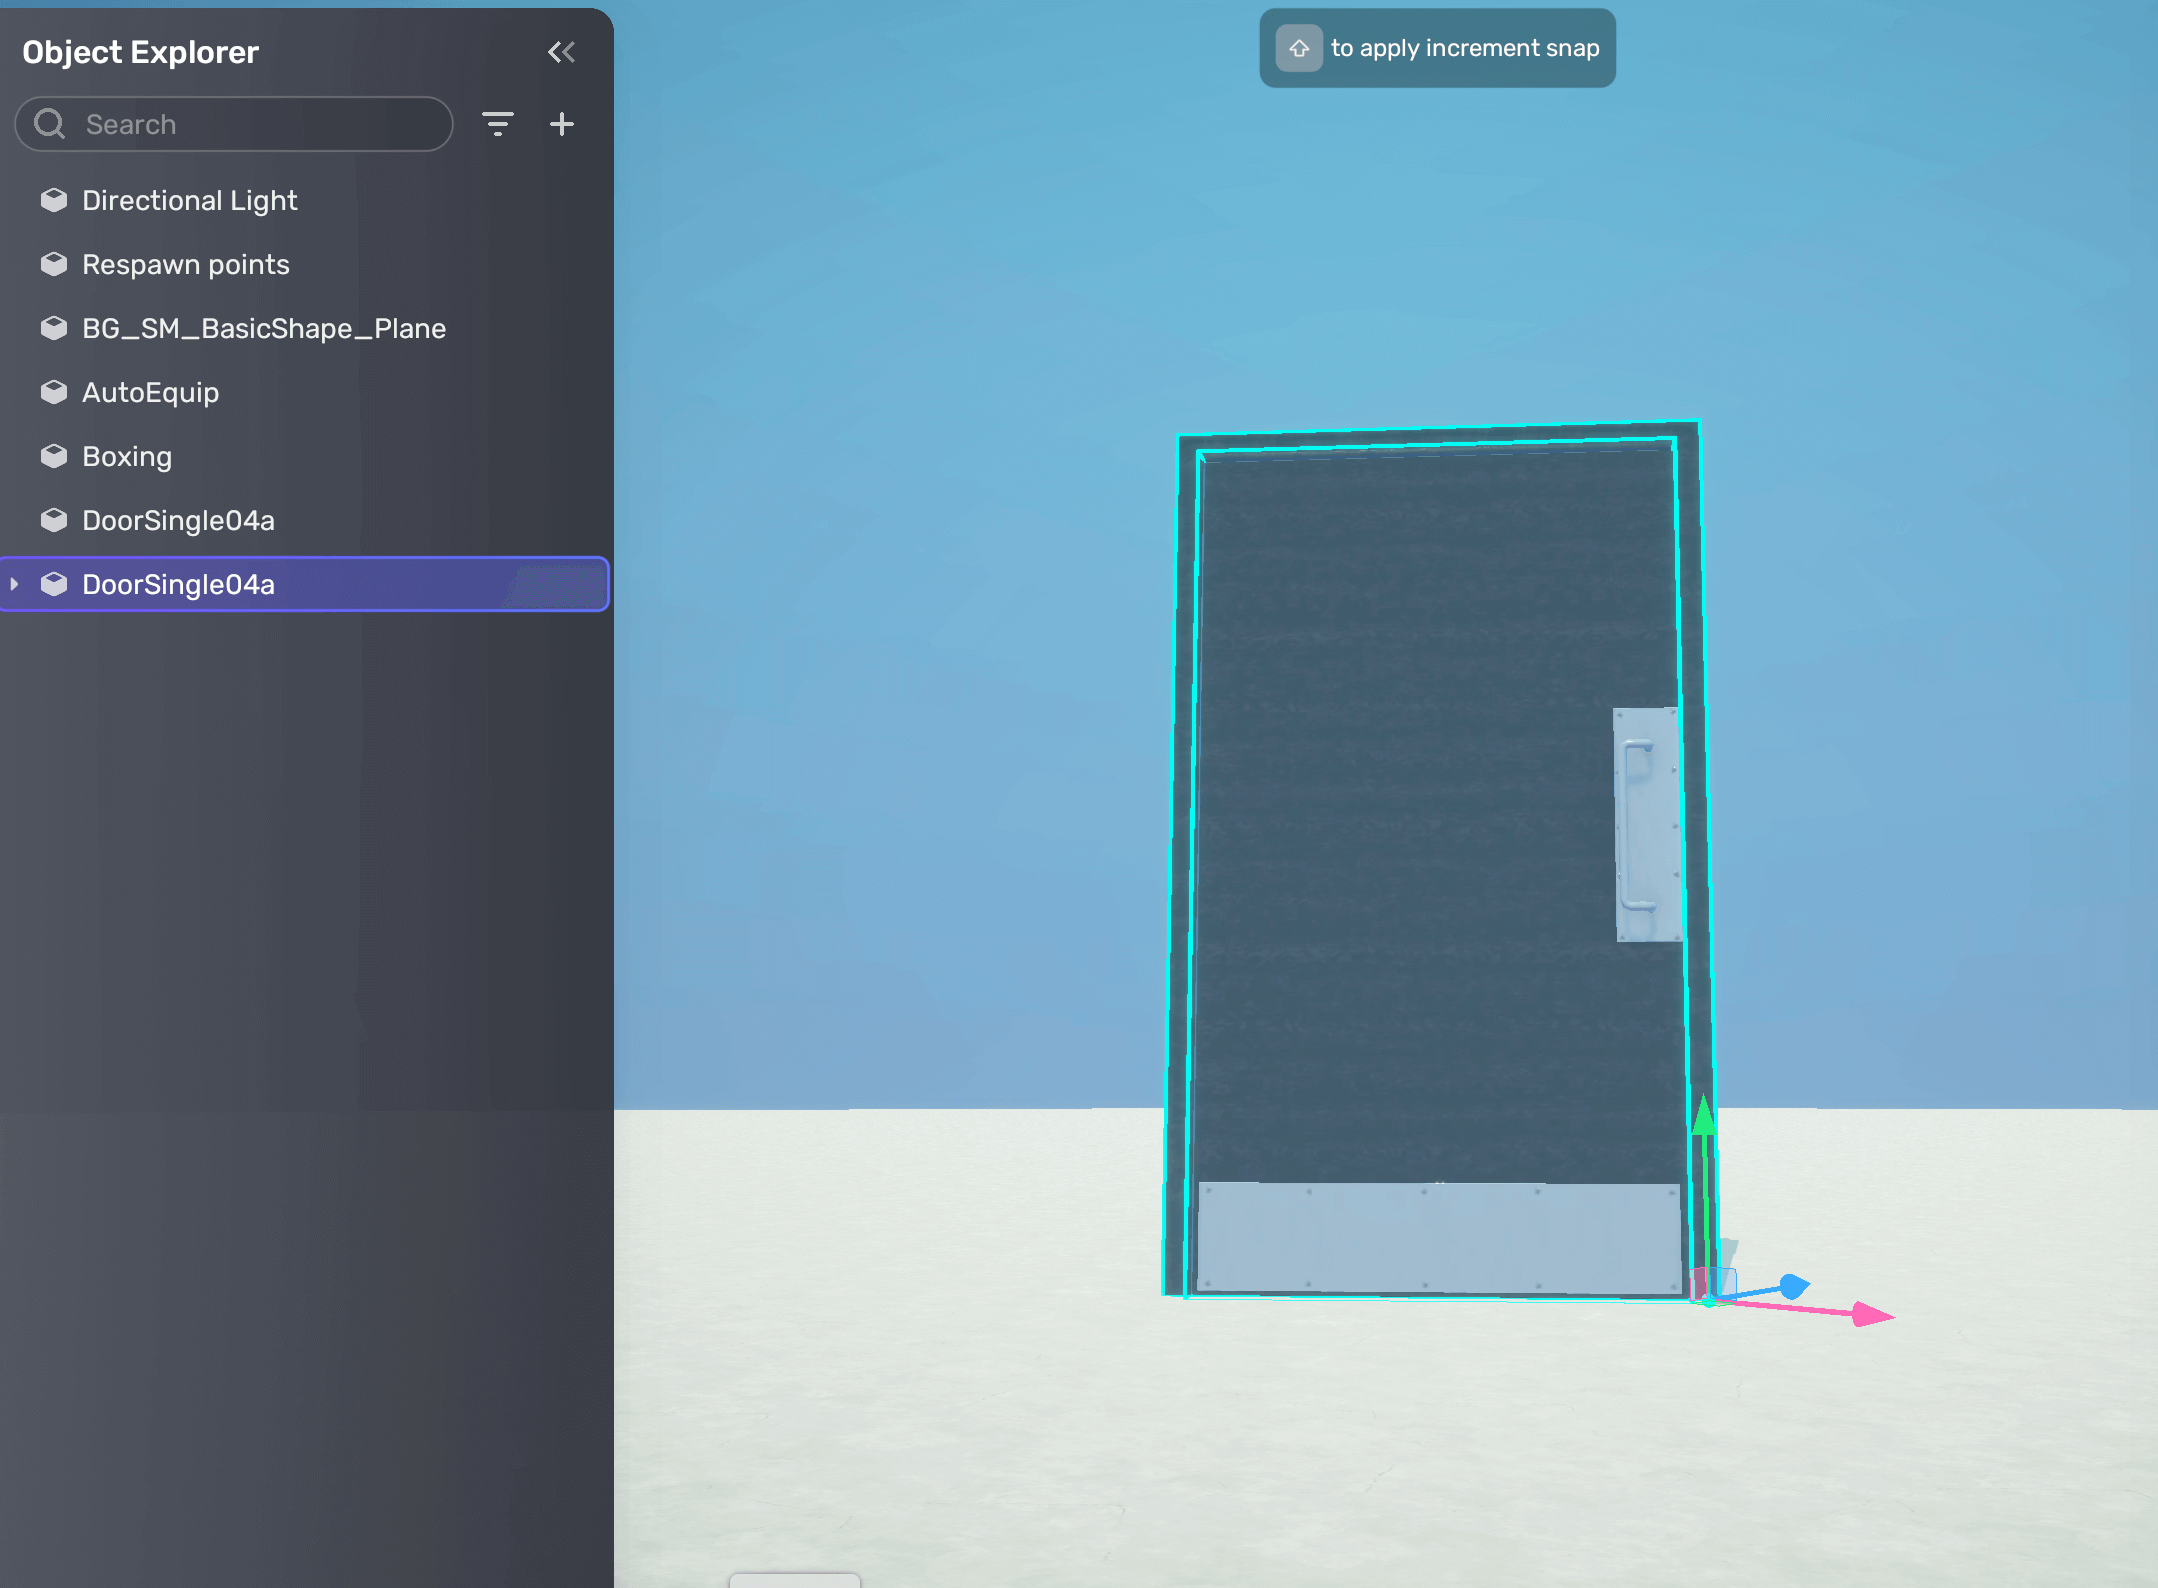
For better organization and control, consider moving the duplicate slightly away from the original in the scene and expanding its hierarchy in Object Explorer to view all controllable parts without gameplay logic.
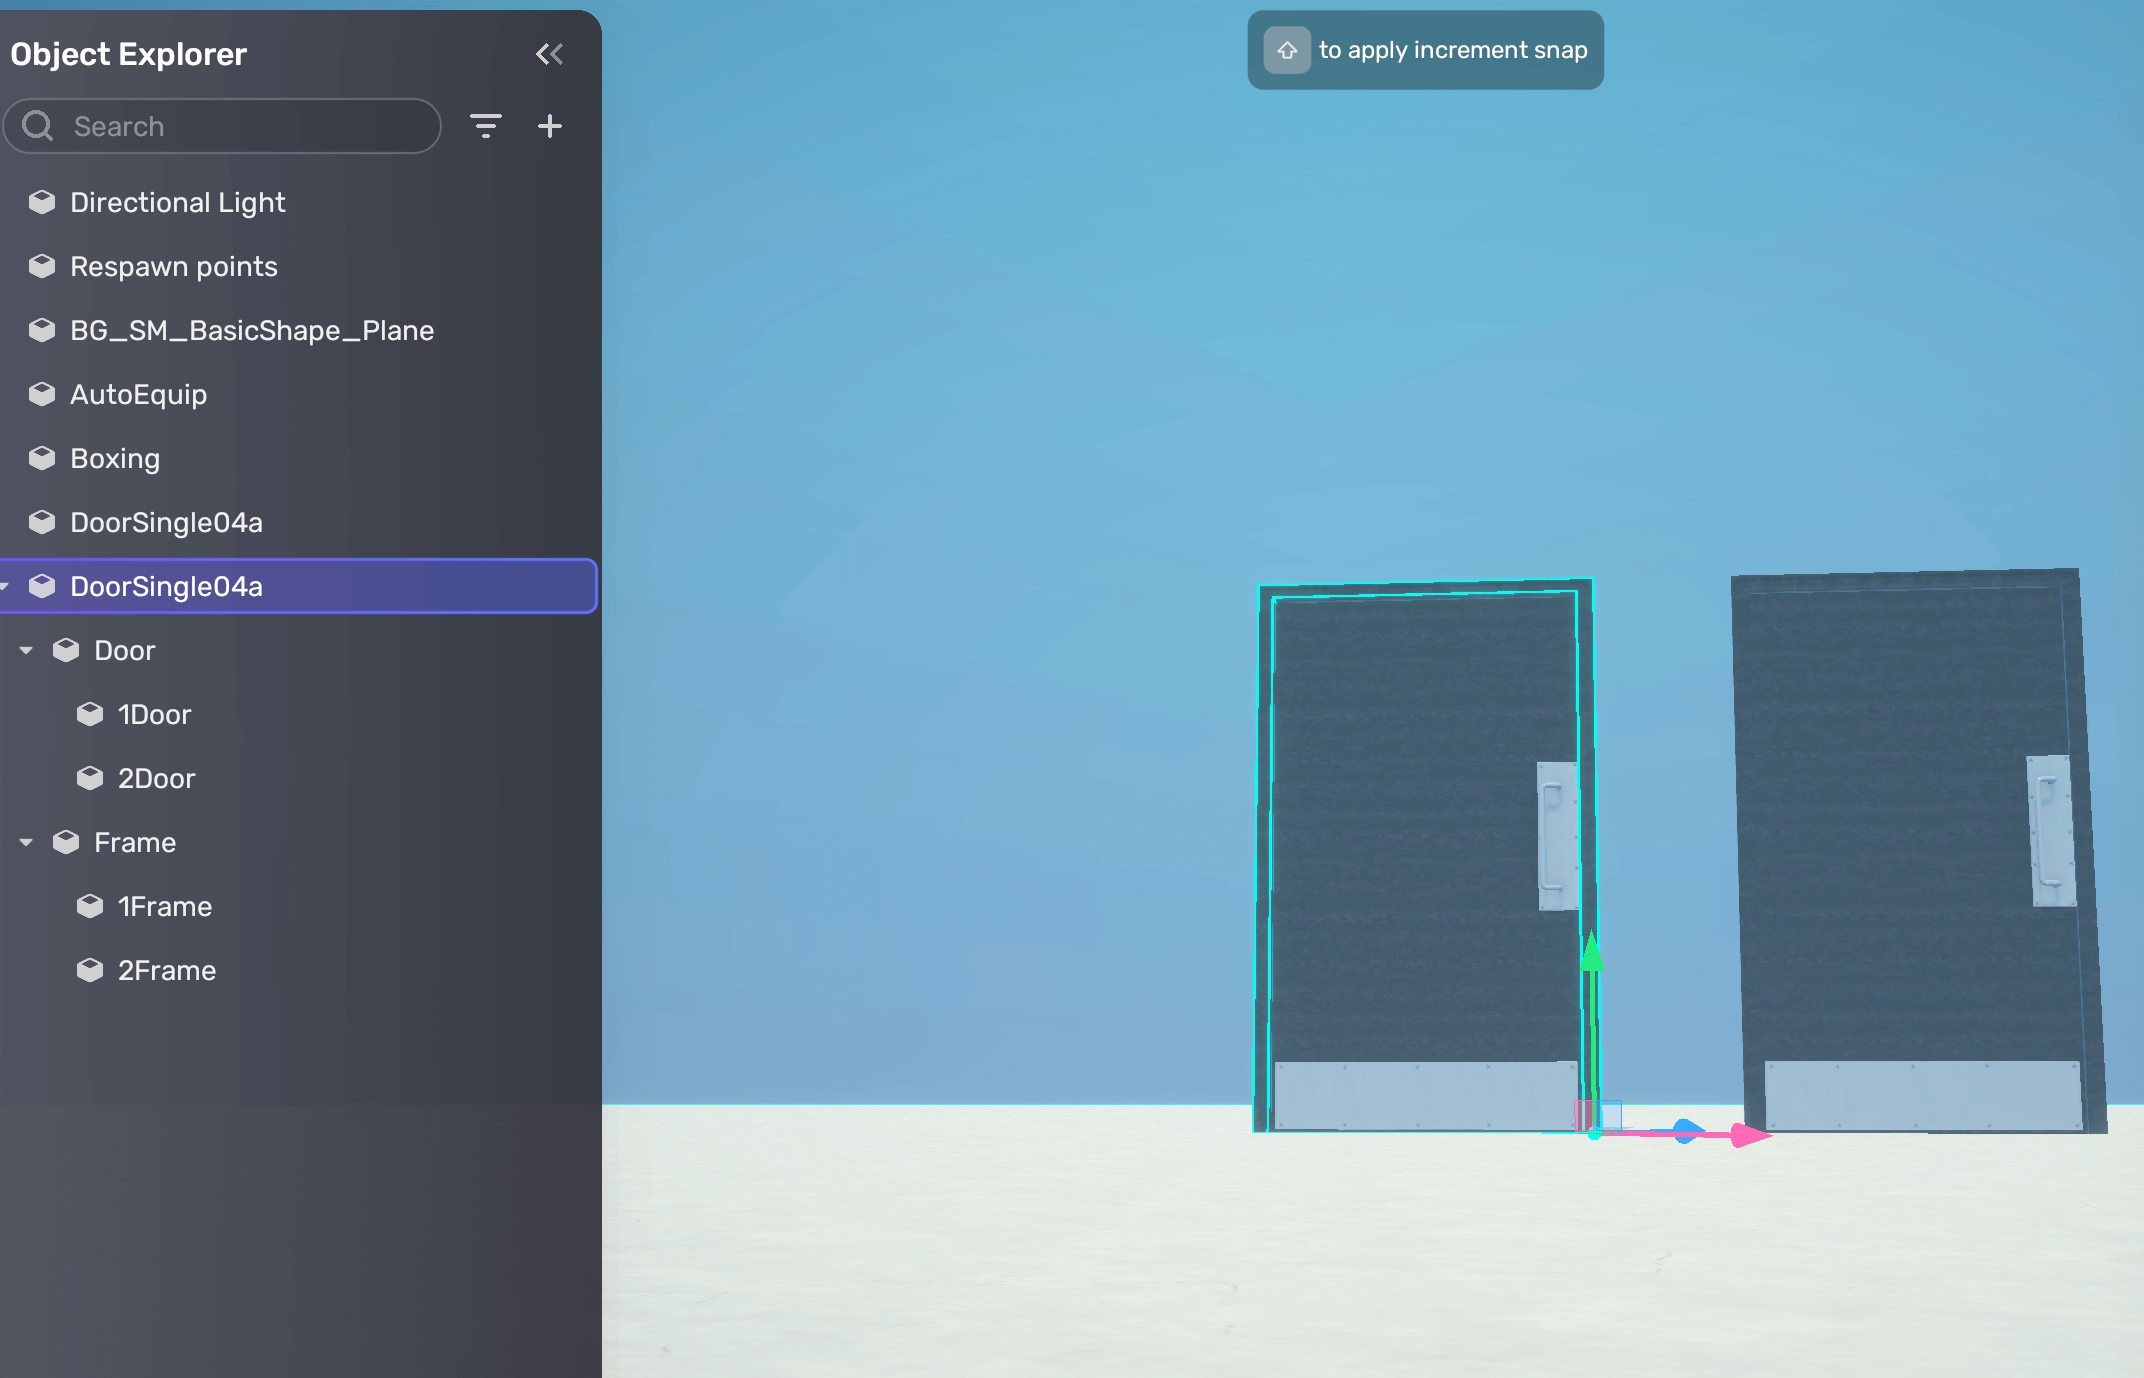


Limitations
It's important to note that the results of unpacking can vary depending on how the object was created and packaged in other 3D platforms before being imported into Studio. In some cases, unpacking may reveal the most intricate or detailed components of an object, such as individual knobs or handles on a door. However, in other instances, unpacking may not separate the object into its most visibly basic parts, and some unpacked objects might remain intact or unaltered in Scene Explorer. Keep this in mind when unpacking objects in Studio, as the level of detail in the unpacked objects may not always meet your expectations.


