Making a drivable vehicle in a codeless way
In this tutorial, you will learn how to make a drivable vehicle using a few models and community components (Components), without a single line of code.
Prerequisites
- Find models of car bodies and wheels from the Asset Library and put them in the scene.
-
Check if there is any mesh collider in models and turn the mesh collider off if there is any.

-
Find the Behavior_ArcadeVehicle, Behavior_ArcadeVehicleWheel, Behavior_VehicleDriverSeat, and UI_VehicleControl Components in Asset Library and add them to My Assets. Then you can attach them to an object via + Feature>Assets in Properties.
Setting up the car body
-
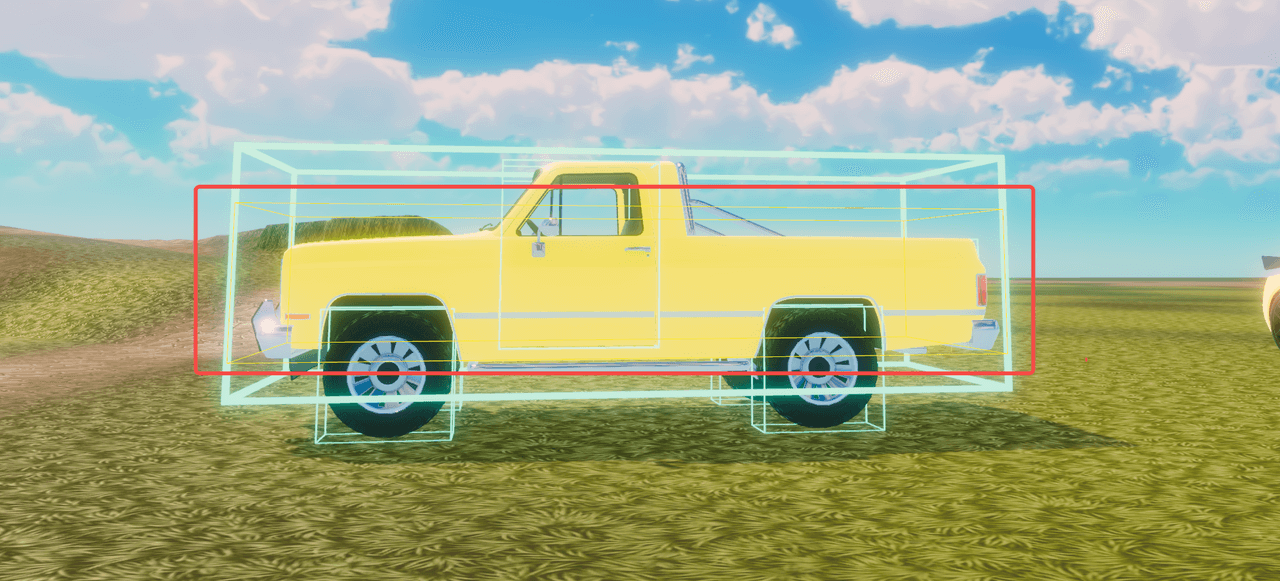
Setting up a collision for the car by adding a box collider to the car model. Adjusting the shape of the collider to make sure:
- The bottom of the box is aligned with the chassis of the car
- The center of gravity of the box coincides with that of the car
-
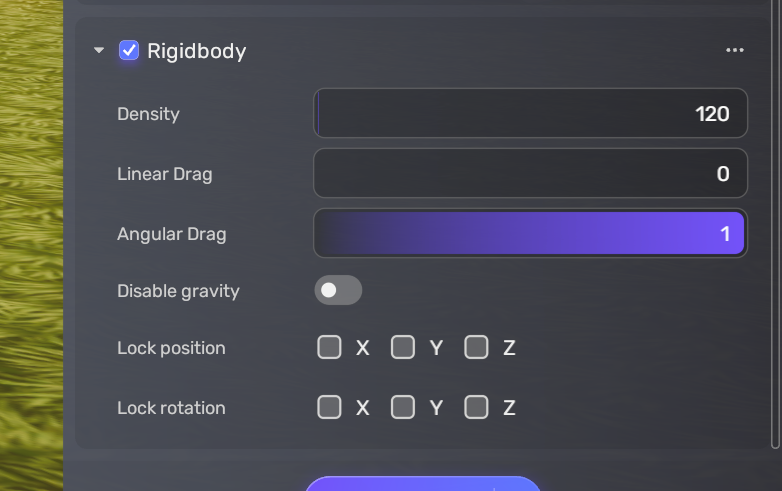
Add a Rigidbody component and configure it as follows:
- Set the Density to around 100, which makes the mass of the vehicle about 1 ton. If the density is adjusted to be too large, the size of the suspension force of the wheels needs to be adjusted to ensure that the support force of the wheels is greater than the gravity of the vehicle.
- Set AngularDrag to 1 as a small AngularDrag can easily cause the car to overturn during turning.
-
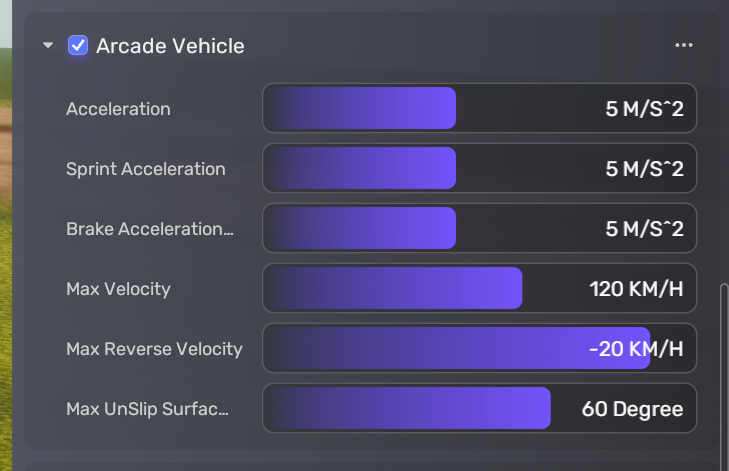
Attach the Arcade Vehicle Component to the car body and set up the speed and acceleration for the car.
-
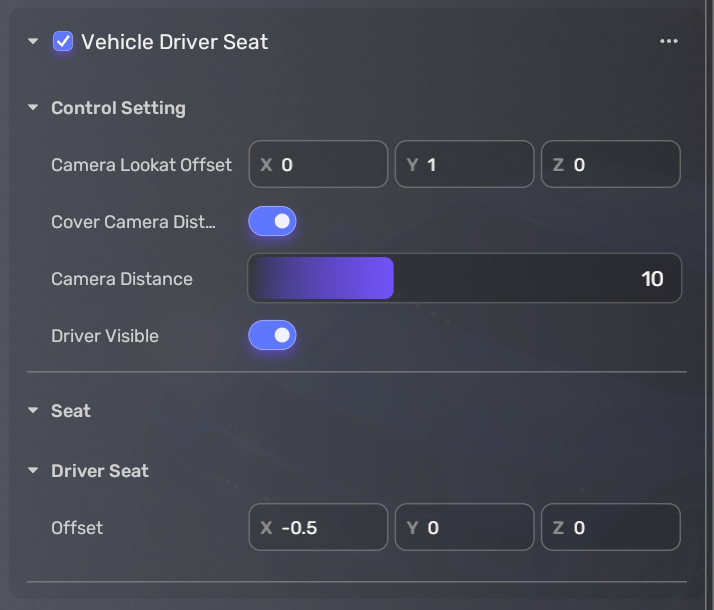
Attach the Vehicle Driver Seat Component to the car body and adjust the driver's seat.
The position offset of the seat determines where a person sits. A quick method to adjust the seat position offset is to create an empty object, place it under the car in Explorer, and then move it to the seat position. Then enter the position into the Offset parameter of the Driver Seat.
-
In the end, a player needs a button for getting on and off the car. Attach the UI_VehicleControl Component to the car body.

Setting up the wheel
In this tutorial, we assume that the wheels and the car body are separate models.
- Find the Arcade Vehicle Wheel Component in Asset Library and attach it to all wheels.
-
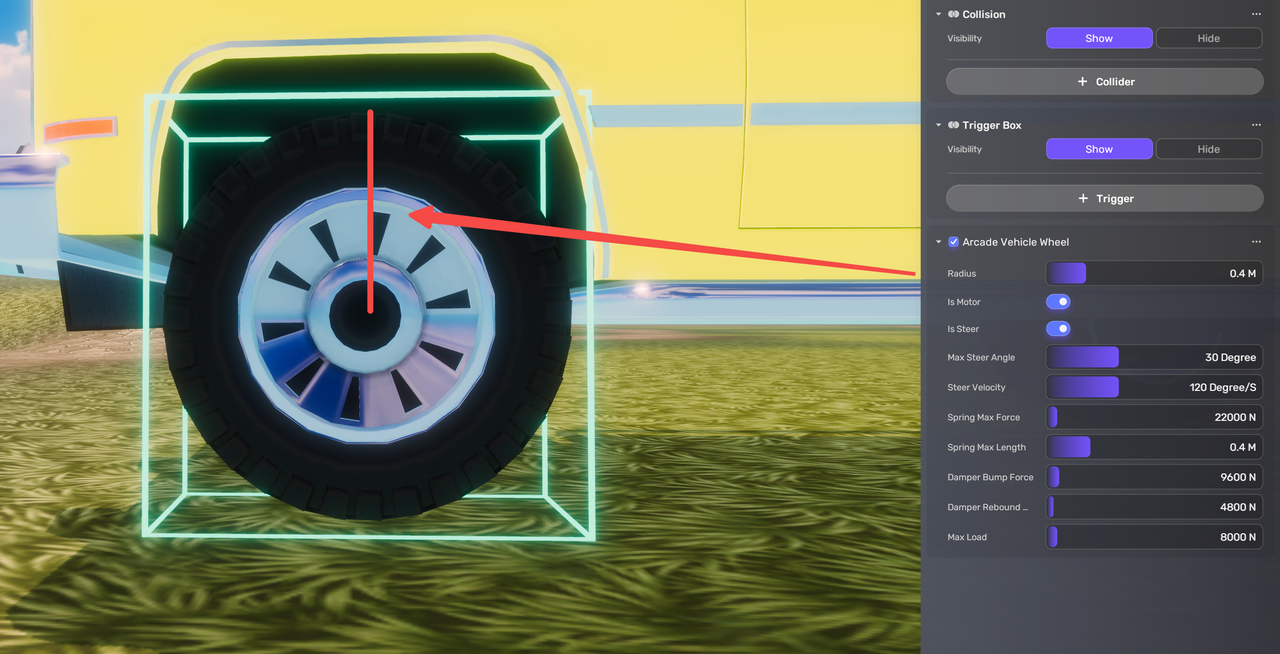
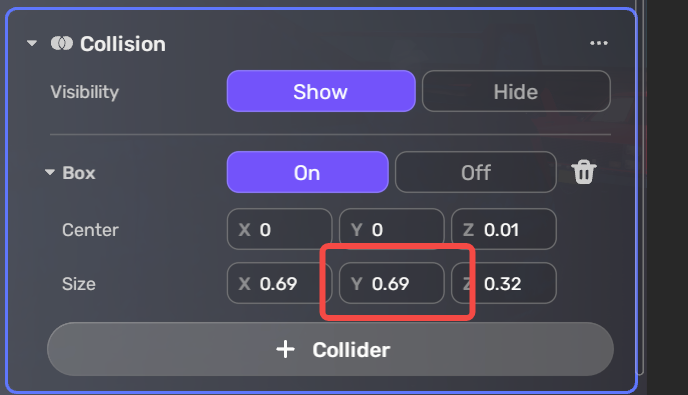
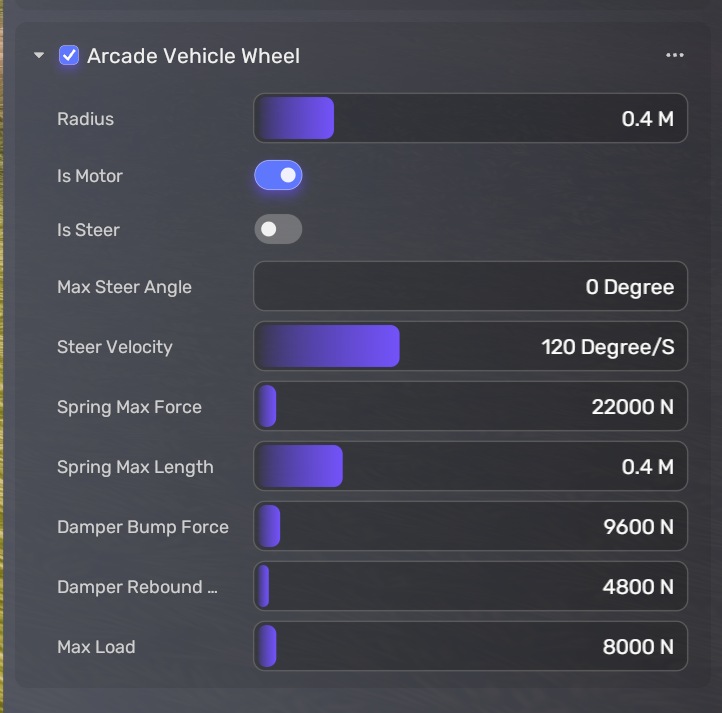
Set up the radius of the wheels, which is the radius of the wheel model. To get the radius value conveniently, add a box collider to the wheel and the size on the Y axis is the diameter of the wheel. You can get the radius by dividing it by 2. Make sure you delete the box collider right after you get the radius value.
-
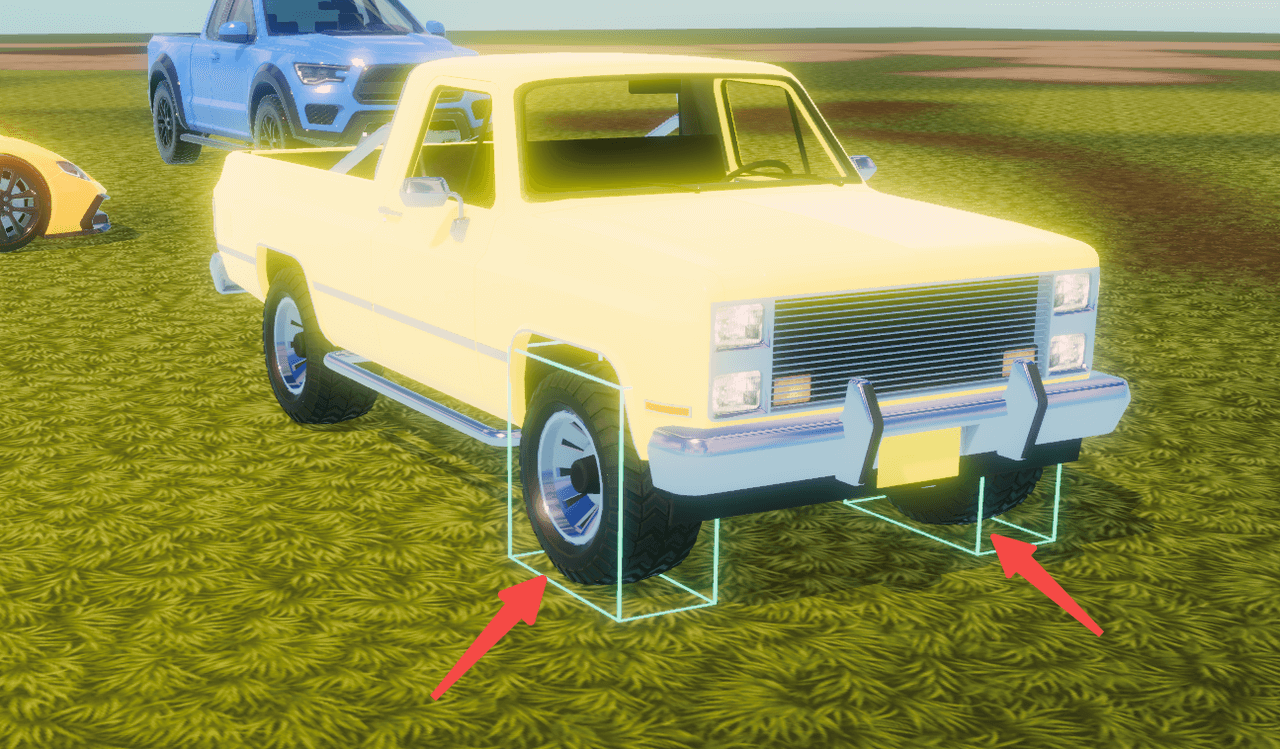
Set the front wheels as steering wheels and specify the maximum steering angle for them.

-
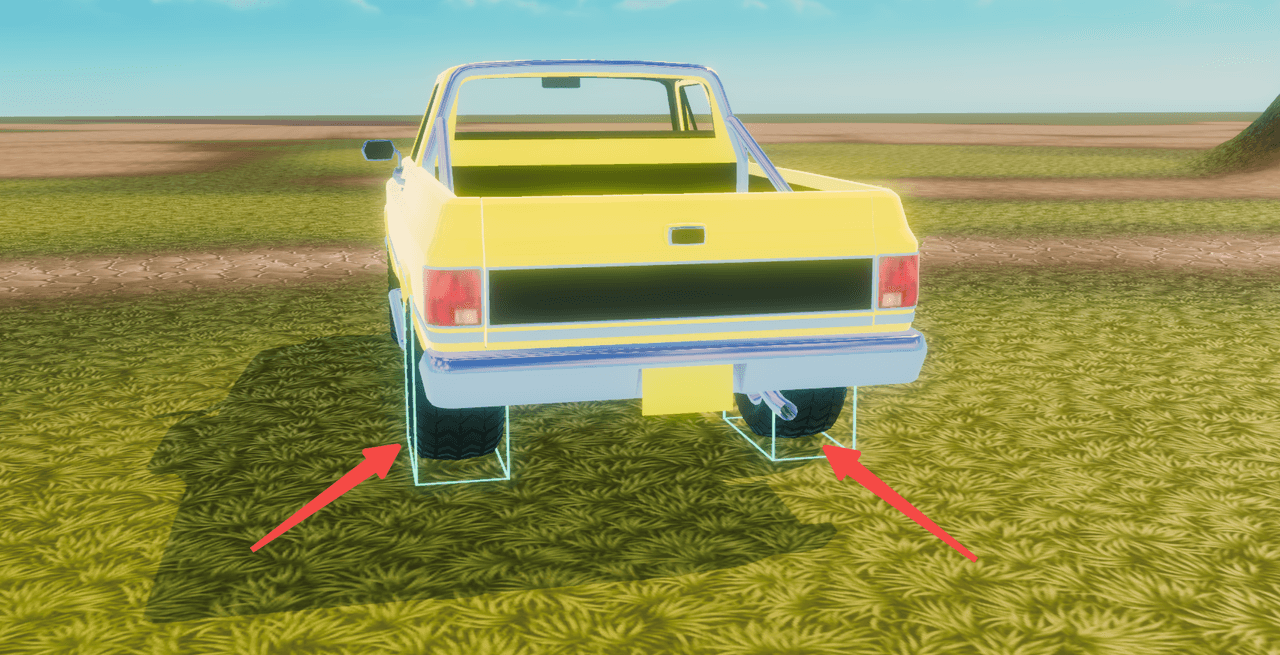
Set the rear wheels.
-
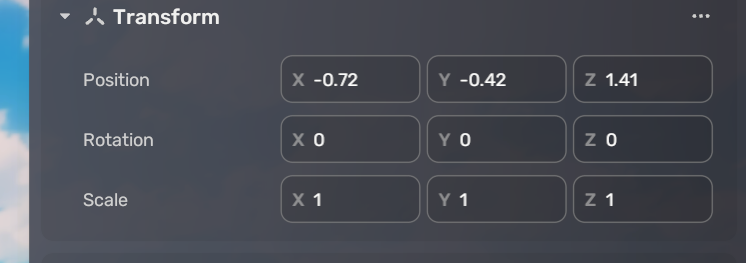
Set positions of wheels. Four wheels are like the four legs of a table and need to be positioned correctly to ensure that the car does not tip over and provides a comfortable driving experience. When you set the positions of the wheels, make sure:
- The y-axis values of the wheel positions must be the same to ensure stability. For instance, if the y value of a wheel position is -0.42, the y values of all four wheel positions should be -0.42. Inconsistent values of the y-axis cause the vehicle to be unlevel.
- The positions of the wheels on the x-axis must also be symmetrical. For instance, if the left wheel has an x value of -0.72, the right wheel should have an x value of 0.72. Unequal values on the x-axis of the wheels cause the turning radius to be different when turning left and right.
- The absolute value of the x-axis values must be greater than 0.5. If the values are smaller than that, the car may roll over.
- The z-axis values of the front wheels must be the same, and the same applies to the rear wheels.
