Environment
The Environment system in YAHAHA Studio (Studio) gives creators the power to control the sky (skybox), sunlight, and post-processing of a scene.
Managing environment
To access the environment system:
-
Go to Settings Explorer and click Environment.
-
Find the Environment Properties panel that appears on the right hand.

To enable or disable the environment system, toggle Environment. To make your edits to the environment system take effect, toggle it on.
To restore the environment settings, including presets, to their default values, click the 
Customizing environment
Environment preset
Environment presets are pre-built environment templates that include specific configurations for all environment components. Some presets also feature fog, which can add a layer of mystery and atmosphere to your scene.

| Forest with no preset | Forest with the preset Aurora |
|---|---|
 |
 |
Sky
The Sky pane lets you set the skybox, which determines the visual backdrop for your scene. If you disable it, the sky appears blue. Resetting the pane reverts to the default settings and presets.
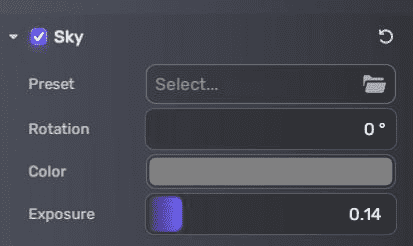
Here are the properties you can edit about the sky:
| Property | Description |
|---|---|
| Preset | A skybox preset. Clear the preset to remove it, leaving other settings intact. For more presets, search the Sky category in Asset Library. |
| Rotation | The rotation of the skybox around its y-axis, from from 0 to 360 degrees. |
| Color | The color of the skybox. Set the color using a color picker, or entering color values. |
| Exposure | Adjust the brightness of the skybox, from 0 to 1. Higher values produce brighter, more exposed skyboxes. |
For example, by switching to the preset horror-4 and adjusting other sky settings, you can create a breathtaking night sky, complete with a tantalizing greenish moon:

Sunlight
Sunlight is the main light of the scene, setting the tone for shadows and mood. Even if you have another directional light in Objects Explorer with a higher intensity, sunlight is the boss and will cast shadows. If you disable the sunlight, the directional light with the highest intensity will take over as the main light, keeping the shadows in check. Resetting the Sunlight pane reverts to the default settings and presets.
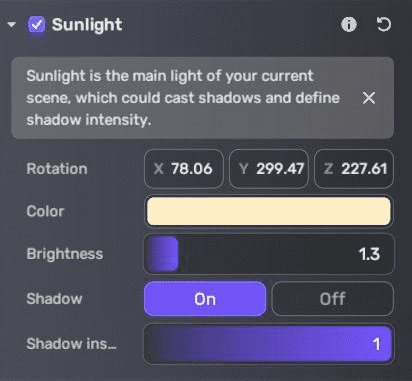
Here are the properties you can edit about the sunlight:
| Property | Description |
|---|---|
| Rotation | The rotation of the main light source around its x-, y-, and z-axes. |
| Color | The color of the main light. Set the color using a color picker, or entering color values. |
| Brightness | The brightness of the main light from 0 to 10. Higher values provide brighter lights. |
| Shadow | Toggle whether to allow the main light to cast shadows. |
| Shadow intensity | Set the intensity value for the shadows cast by the main light, ranging from 0 to 1. Higher values produce darker shadows. |
Example sunlight result:
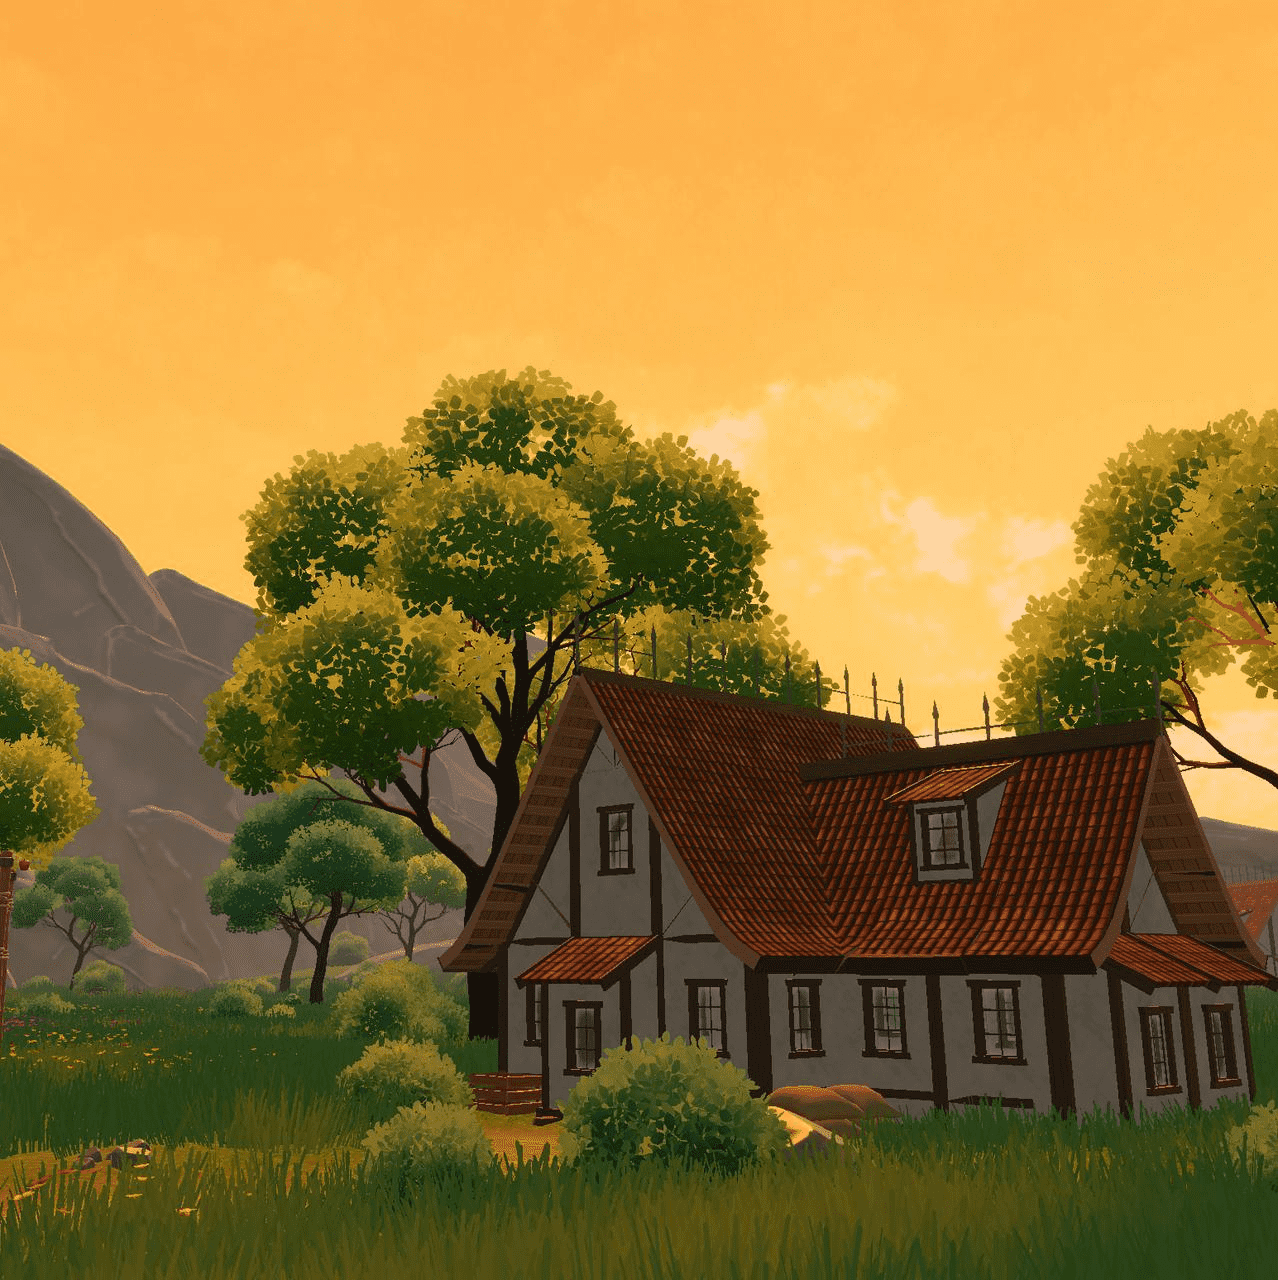
Post-processing
Post-processing enriches and refines the visual experience through techniques like bloom, white balance, color adjustments and atmosphere creation, such as fog and vignette. Resetting the pane reverts to the default settings and presets.

Note:
To ensure the visibility of post-processing results, it is recommended to set the Studio quality to Medium or High (Preferences>General>Quality in the 
The post-processing preset is aligned with the environment preset, creating a consistent visual tone throughout the scene. For instance, choosing Aurora for the environment and Dusk for the post-processing results in a visual experience like this:

Bloom
Bloom creates a dreamy, glowing effect on bright areas in a scene. Colors seem to spill out beyond their borders, creating a soft haze that adds a vibrant, magical touch to your game environment.
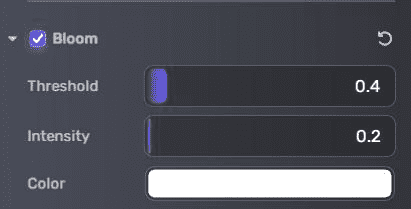
To edit the bloom properties:
| Property | Description |
|---|---|
| Threshold | Controls how bright a color must be before it blooms. It ranges from 0 to 5. |
| Intensity | Controls the intensity when it blooms. It ranges from 0 to 15. |
| Color | The base color applied to the post-effect. Set the color using a color picker, or entering color values. |
For example, by decreasing the threshold, heightening the intensity, and enhancing the color, we get a glowing Dusk with bloom adjustment:

White balance
White balance adjusts the color temperature of an image to neutralize unrealistic colors and make things that would be white in real life appear white in the final render.
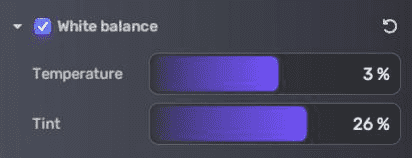
To edit white balance properties:
| Property | Description |
|---|---|
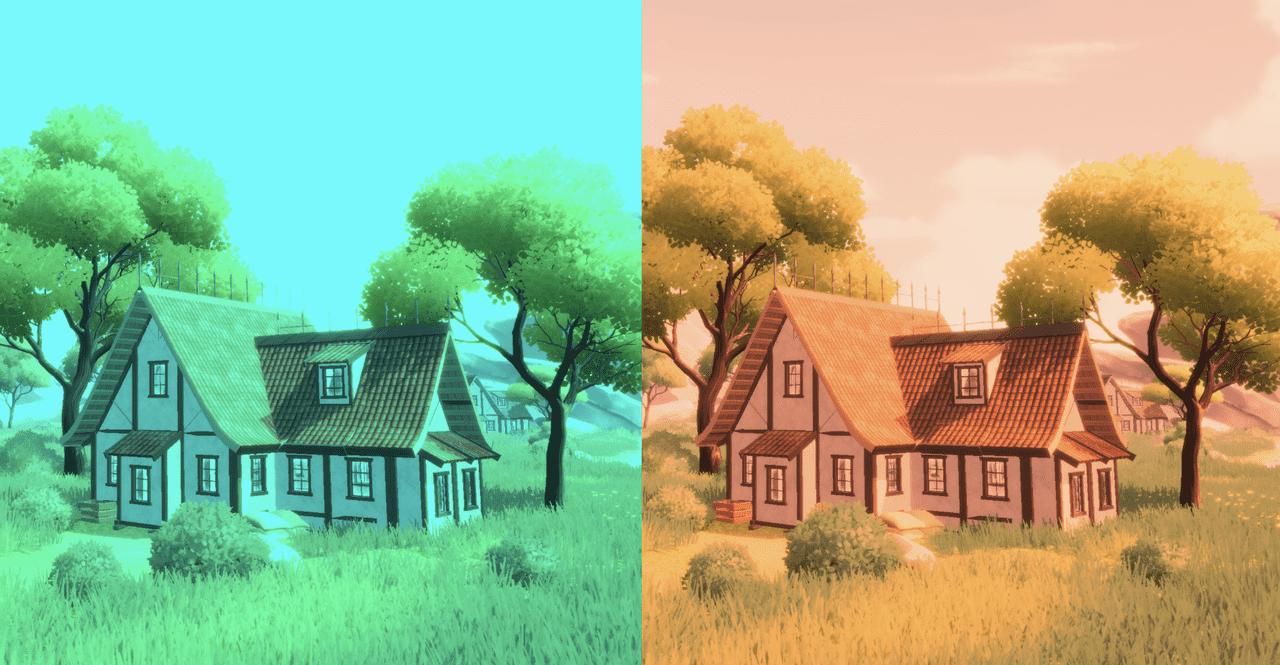
| Temperature | Higher values create warmer color temperatures. Ranges from -100% to 100%. |
| Tint | A negative tint makes the scene greenish and a positive tint makes it magenta-looking, ranging from -100% to 100%. |
Temperature and tint both at -100% and at 100%:
Color adjustments
In this pane, you adjust the overall mood, luminosity, and definition of the final image with just a few tweaks. The image can look brighter, darker, warmer, cooler, or more dramatic.

To edit the properties of color adjustments:
| Property | Description |
|---|---|
| Post exposure | Exposure to apply after all other post-effects. It ranges from 0 to 5. |
| Contrast | The change in separation between dark and light colors. It ranges from -100% to 100%. |
| Color Filter | The color to tint the scene. Set the color using a color picker, or entering color values. |
| Hue Shift | Shift the hue of all colors. It ranges from -180 to 180. |
| Saturation | Push the intensity of all colors. It ranges from -100 to 100. |
By adjusting the contrast value to a negative, the hue value to 180, and the saturation value to 100, we change the atmosphere of the scene drastically:

Vignette
Vignette darkens the edges of the scene, which creates a subtle framing effect and draws the viewer's eye towards the center of the image.

To adjust the vignette properties:
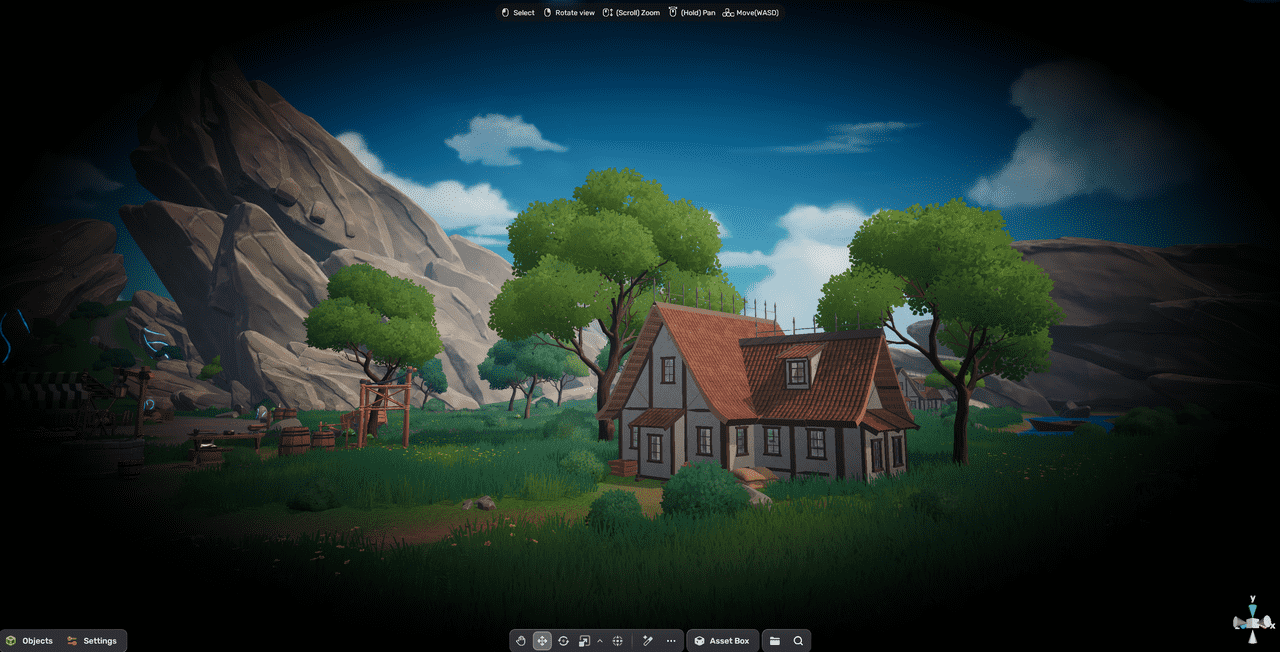
| Property | Description |
|---|---|
| Intensity | Higher values create darker edges on the screen. It ranges from 0 to 1. |
| Color | Vignette color. Set the color using a color picker, or entering color values. |
| Smoothness | Smoothness of the vignette borders. It ranges from 0 to 1. |
Lift/Gamma/Gain
In this pane, you can do some color grading.
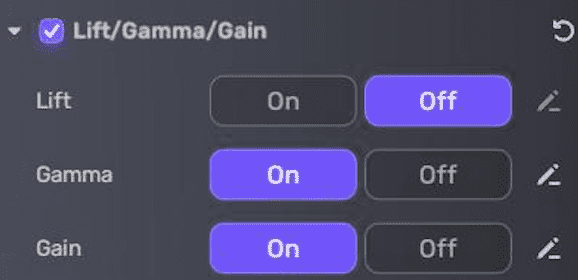
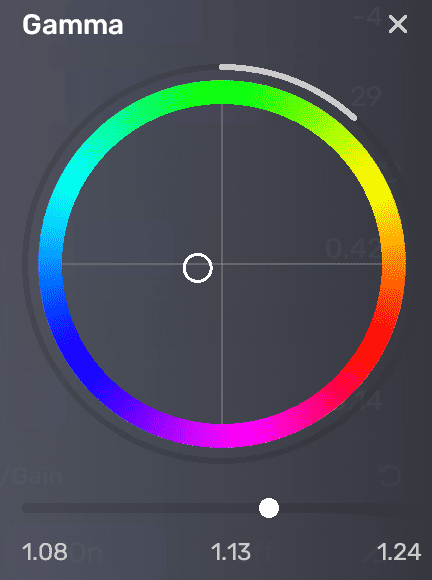
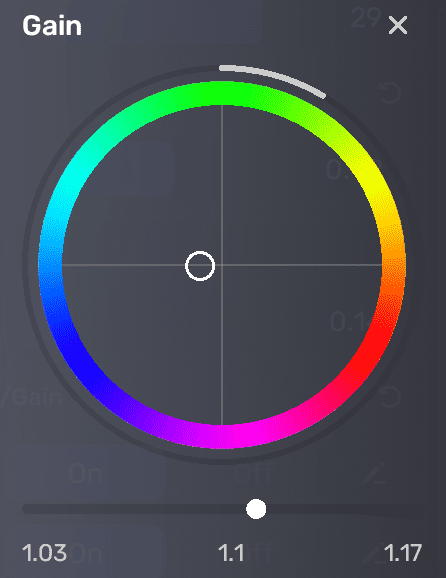
| Lift trackball | Gamma trackball | Gain trackball |
|---|---|---|
 |
 |
 |
To edit the properties:
| Property | Description |
|---|---|
| Lift | Control the dark tones. Disabled by default. To edit, switch to On first. Click the pencil icon and use the trackball to adjust the hue of the dark tones; also, use the slider to adjust the offset of the color lightness. |
| Gamma | Control the mid-range tones. Click the pencil icon and use the trackball to adjust the hue of the mid-range tones; also, use the slider to adjust the offset of the color lightness. |
| Gain | Control the highlights. Click the pencil icon and use the trackball to adjust the hue of the hightlights; also, use the slider to adjust the offset of the color lightness. |
Fog
The fog can be in a certain color, and vary in density with distance and height from the camera in a specified speed.

To edit the fog properties:
| Property | Description |
|---|---|
| Color | The color of fog. Set the color using a color picker, or entering color values. |
| Fade height | Defines the height (in meters) in the y-axis at which the fog's density gradually decreases, from -20 (heaviest fog near the ground) to 20 (thinnest fog far above). Default: 10. |
| Start distance | Specify the distance in the z-axis at which the fog first appears from the camera's perspective, ranging from 0 (immediate fog) to 500 (fog visible from a distance). Default: 5. |
| Global density | The overall intensity and thickness of the fog from 0 (fogless) to 10 (foggy). Default: 5. |
| Fade speed | Determine how quickly the fog fades away, ranging from 0.01 (slow) to 0.5 (fast). Default: 0.01. |
For example, by changing the fog to a blueish color with fade height at 20, start distance at 0, and global density at 1.92, you will get a scene similar to this:


