Decals
Decals are flexible images that can be applied to the surfaces of objects. They provide the ability to project materials onto objects, allowing for size adjustments, color variations, and different angles and forms. In YAHAHA Studio (Studio), after you add decals, you can customize them by modifying their related components, such as Transform, Decal, Collision, and Trigger Box, and then publish them to Asset Library.
Note: In the YAHAHA App, when Picture quality is set to Adaptive, decals may not be visible in the scene.
Adding a decal to your scene
To add a decal to your scene:
-
Go to Asset Library and select the Decal category at the top.
-
Choose a decal for your game and add it to your assets or display it in the scene.
-
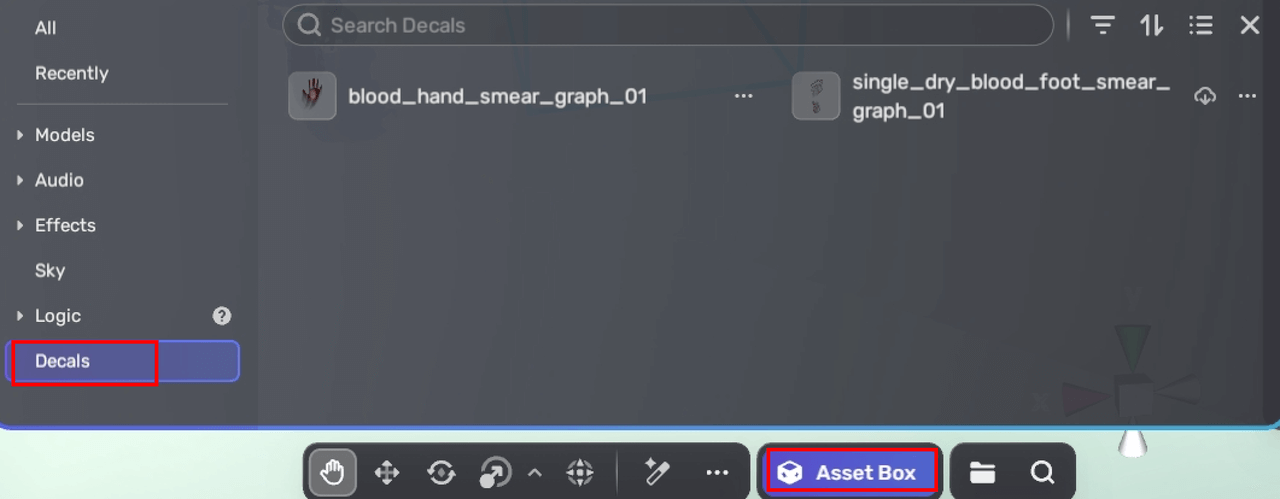
In Studio, click Asset Box and navigate to Decals to view the added decal.

-
Click the decal that you wish to apply in the scene, such as blood_hand_smear_graph_01 in our example.
-
The decal's bounding box will appear, along with its gizmo in the center if Gizmo icons are enabled.

-
To display the decal, place an object within the bounding box so that the decal's material can be projected onto the object's surface. To make this process easier, you can use the Move tool for precise control.

Configuring the decal
When you select a decal, several related components in the Properties window are available for further configuration. Follow these steps to configure the decal:
-
Open the Properties window by clicking the More button.
-
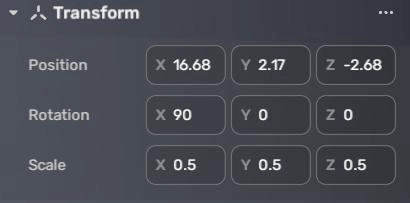
In the Transform component, you can set the position, rotation, and scale of the decal. Alternatively, simply drag and drop the decal to adjust the transform properties.

-
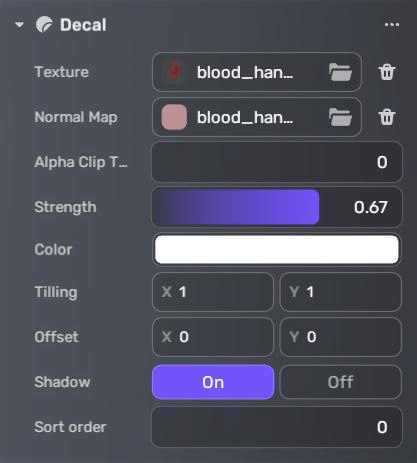
In the Decal component, adjust the following properties:

Property Description Texture The texture of the material used for the decal. To remove a selected texture, click the trash icon next to it. Normal Map The normal texture of the material the decal projects. To remove a selected normal map, click the trash icon next to it. Alpha Clip Threshold Determines pixel rendering based on alpha values. Pixels with values below this threshold will not be rendered. Ranges from 0 to 1. Default: 0.5. Strength The intensity of blending the decal into the background. A higher strength value makes the decal more noticeable on the background. Ranges from 0 to 1. Default: 1. Color The base color of the decal and its opacity. Ranges from 0 to 100%. Tiling Controls the number of times the decal repeats on the surface along the x- and y-axes, respectively. The default value is 1 for both axes, with higher values increasing repetition. Offset Controls the placement offset of the decal on the surface along the x- and y-axes, respectively. The default value is 0 for both axes, with negative values shifting the decal left or top, and positive values shifting it right or bottom. Shadow Enables or disables the casting of shadows over the decal surface. Enabled by default. Sort Order Controls the prominence of the decal. A higher sort order value makes the decal more prominent. Ranges from 0 to 99. Default: 0. -
(Optional) To add and edit the decal's collider, see Collision for more details.
-
(Optional) To add and edit the decal's trigger, see Trigger for more details.
Publishing a decal to Asset Library
After customizing a decal, you can publish it to Asset Library. For more information, see Publishing an asset to Asset Library.
Limitations
-
The process of decal projection is not effective when applied to transparent surfaces.
-
Decals are affected by scene lighting.


