Create a zombie shooting game with Party Game Kit
This tutorial is intended for Party Game Kit users.
In this tutorial, you'll learn how to create a zombie shooting game without writing code. Players will receive a main objective and instructions at the start, find a weapon nearby by following the instructions, complete assigned tasks by defeating zombies, and escape the ruined house by driving a vehicle.
To follow this tutorial in video form, check out our step-by-step guide on YouTube.
Time to complete
20-30 minutes
What you'll learn
Before getting started
- Basic knowledge of the Studio interface and how to add assets in scenes.
- For beginners, check out Create a multiplayer game for a quick intro.
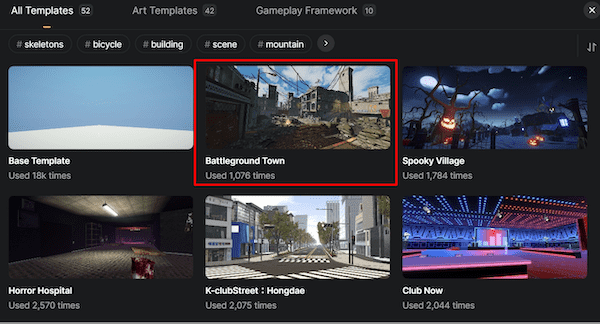
Choose a suitable template for your game
On Desktop, choose Create Game > Party Game, then select a suitable template. For example, the Battleground Town template has a ruined city map, ideal for FPS games.
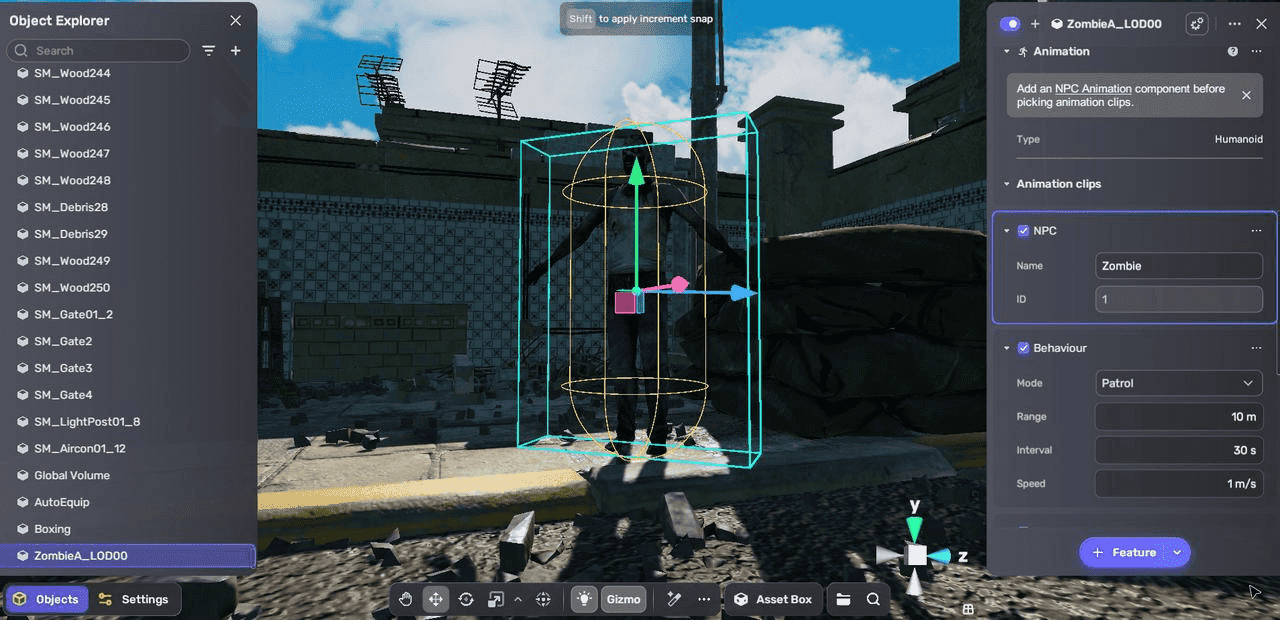
Add zombie NPCs with attributes and behavior:
-
Add a zombie model from Asset Library.
-
Add an NPC component to the model by choosing + Feature > NPC. Enter an NPC name.
-
Add a Behavior component to the NPC by choosing + Feature > Behavior for in-game movement.
-
Set the action mode to Patrol for wandering.
-
Set patrol range, interval, and movement speed if needed.
-
-
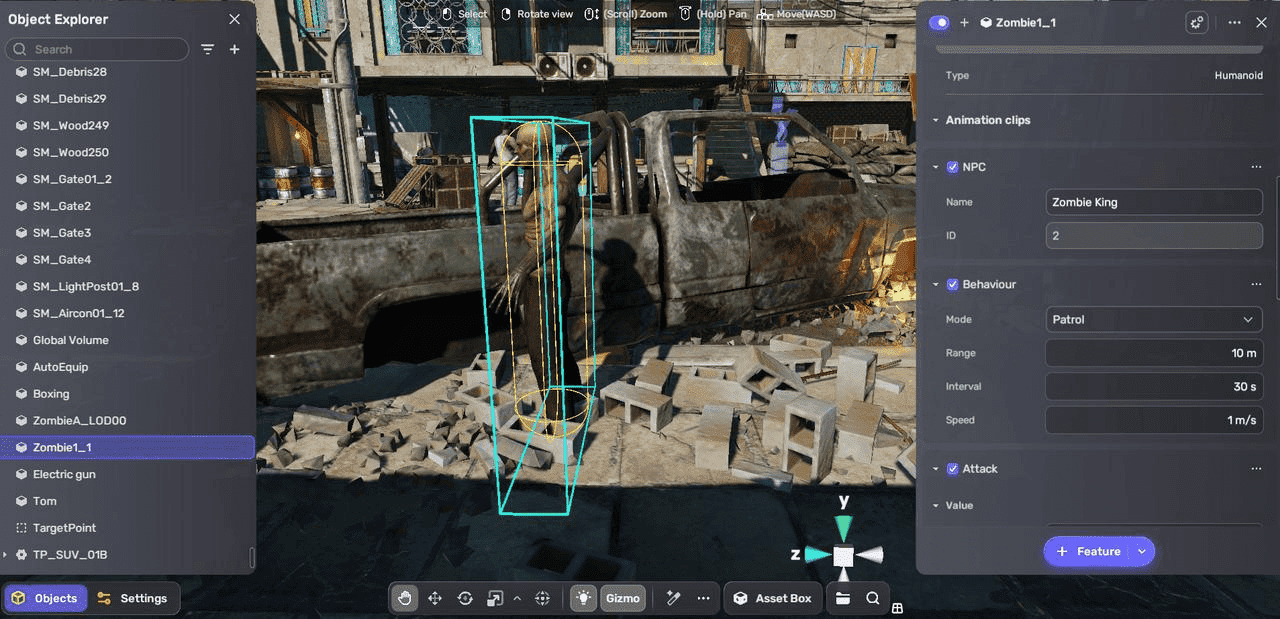
Add an Attack component to the NPC by choosing + Feature > Attack to allow NPC attacks.
-
Set the life, attack, and defence attributes.
-
Set the attack mode to Active attack, and configure alert range, attack range, interval, and enable respawn settings if needed.

-
-
Repeat for more zombies to make the game more exciting.
- Save time by copying and pasting attached components from one zombie model to others.
- Adjust player attack settings in Settings Explorer > Avatar ability > Attack Settings.
Create a main quest
-
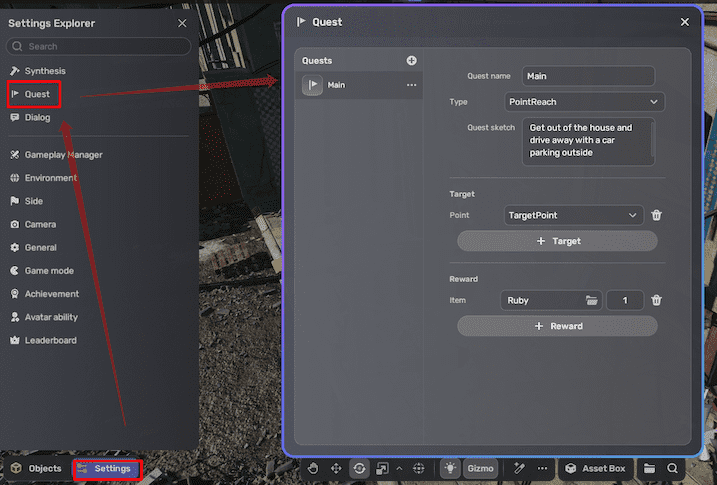
In Settings Explorer, select Quest and create a new main task quest.
-
Configure the quest:
-
Add a quest name and description.
-
Set the type to PointReach, requiring players to reach a specific point.
-
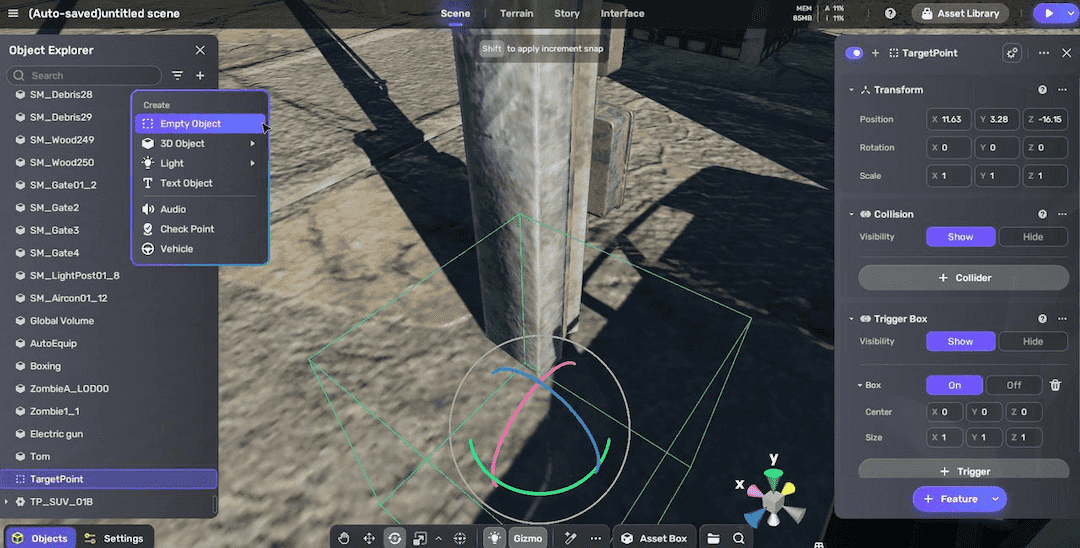
Create a new point for the target point using + Create > Empty object and place it outside the main shooting field.
-
For the reward, create an item or equipment by clicking the folder icon or in My Resources > Gameplay library > + Create. Refer to Creating an item.

-
-
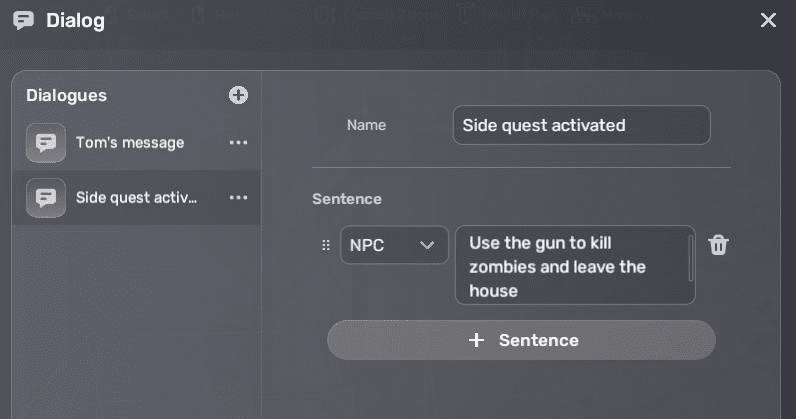
Create an accompanying dialog:
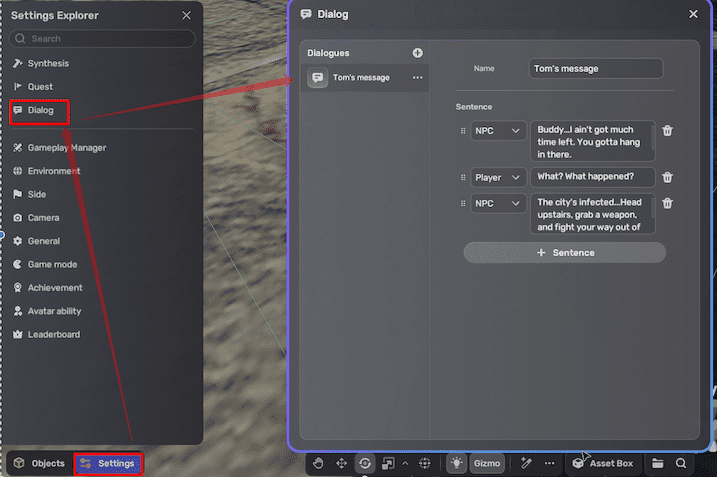
- In Settings Explorer, select Dialog and create a new dialog.
- Fill in the dialog name and sentences, like a conversation between a dying character named Tom and the player.
-
Attach the quest to a model using the Quest component:
-
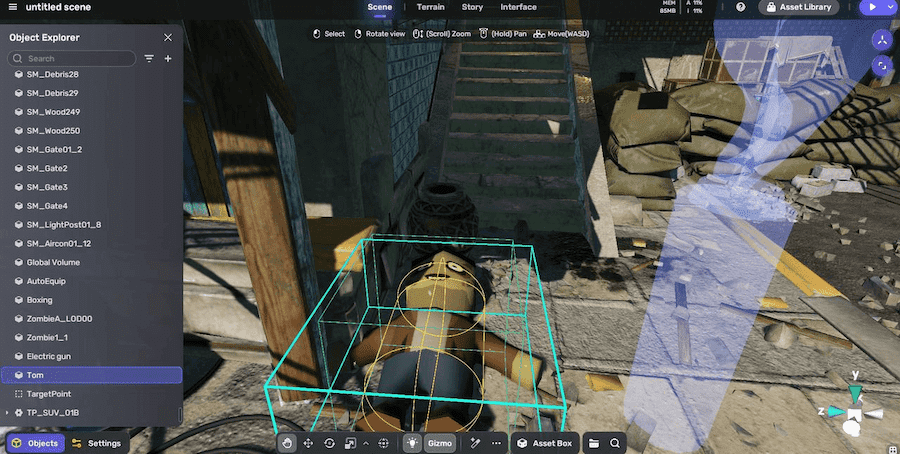
Add a model from Asset Library near the spawn point as Tom, guiding the player.
-
Select the model and attach a Quest component by choosing + Feature > Quest.
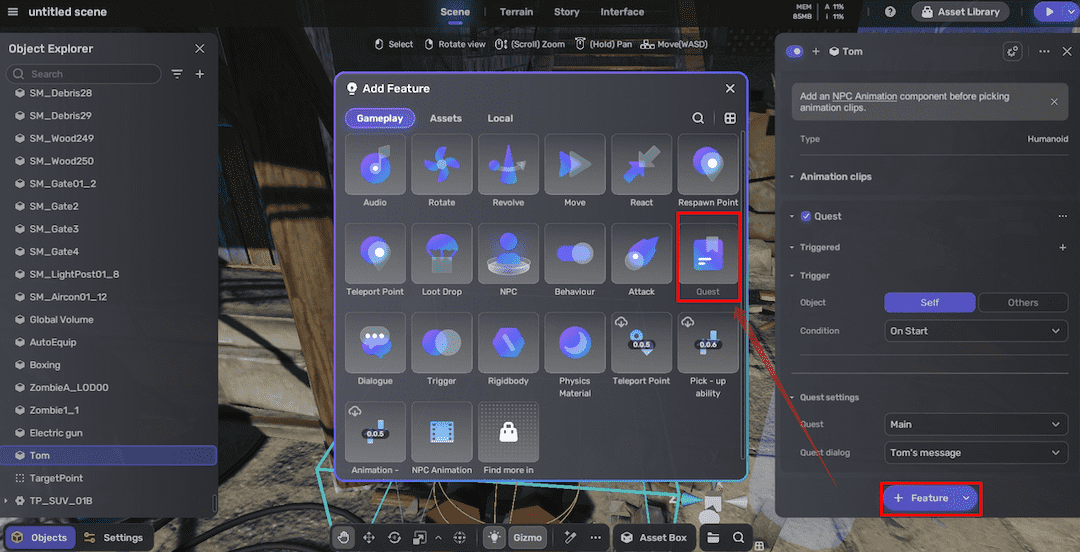
-
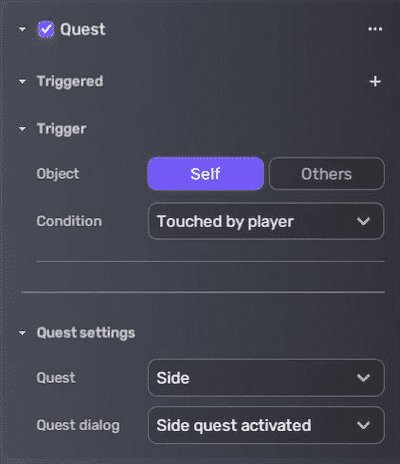
Configure the Quest component:
- Set the trigger to Self On Start. Refer to Trigger.
- Select the quest and the dialog accompanied. The set quest and dialog will start when the game starts.
-
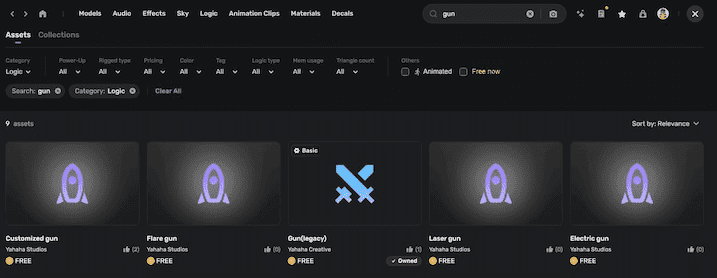
Add a weapon
-
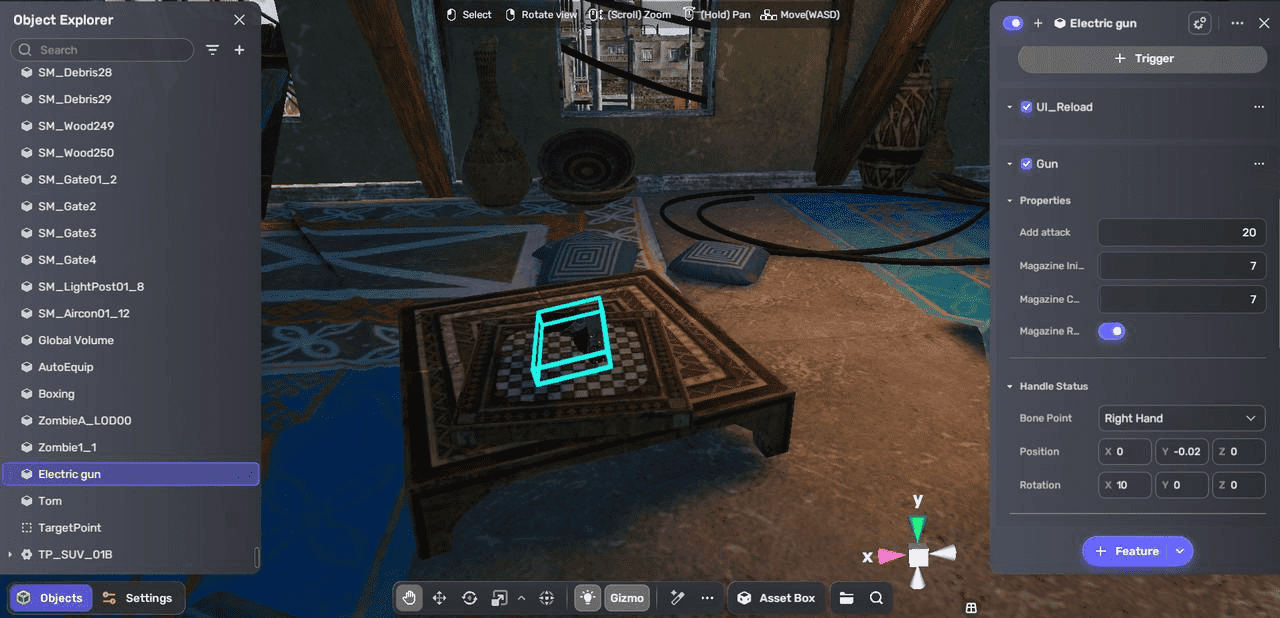
In Asset Library select the Logic category and search for gun. Such assets contain prebuilt Gun and UI_Reload components that enable the weapon to be used right away once added to the scene. For example, select the Electric gun assembler and add it to the scene.
For more information about weapon setup, see Creating a weapon.
-
Place the gun on the ruined house's third floor.
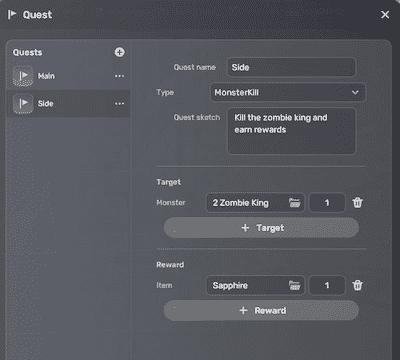
Create a side quest
When the player picks up the gun, it triggers a side quest to kill zombies.
-
Create a side quest as in the main quest. However, this time set the quest type as MonsterKill and specify a particular NPC in the scene as the target to eliminate, requiring players to hunt a specific zombie for rewards.
-
Create a new dialogue as you did for Tom's dialogue.
-
Add a Quest component to the gun from + Features > Quest, then configure the component:
- Set the trigger to Self Touched by player. When the object is touched, it will trigger the side quest.
- Select the created side quest and dialog.
Add a vehicle
Let's add a red car outside the ruined house, allowing the player to escape the zombie-infested city by driving away.
-
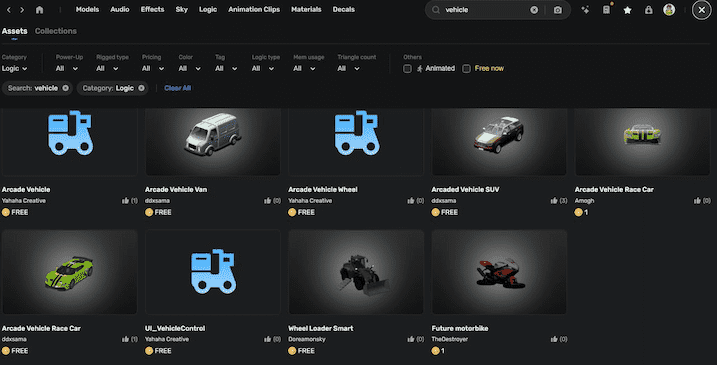
In Asset Library, go to the Logic category and select a vehicle asset. For example, add Arcade Vehicle SUV to the scene.
These assets contain built-in components for vehicle behavior and are drivable upon addition to the scene, without requiring extra settings. For more information, see Making a drivable vehicle.
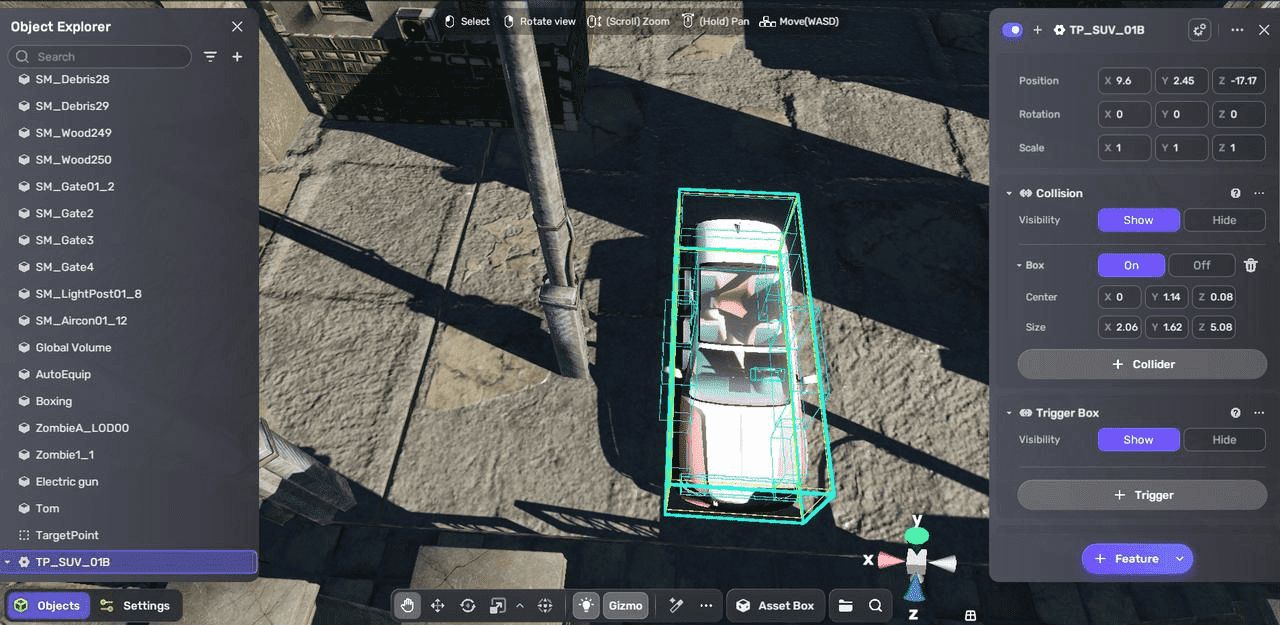
-
Place the vehicle near the main request's target spot, enabling players to reach the spot and drive away.
Test your game
Click  to enter Play Mode to verify that shooting and quests function correctly.
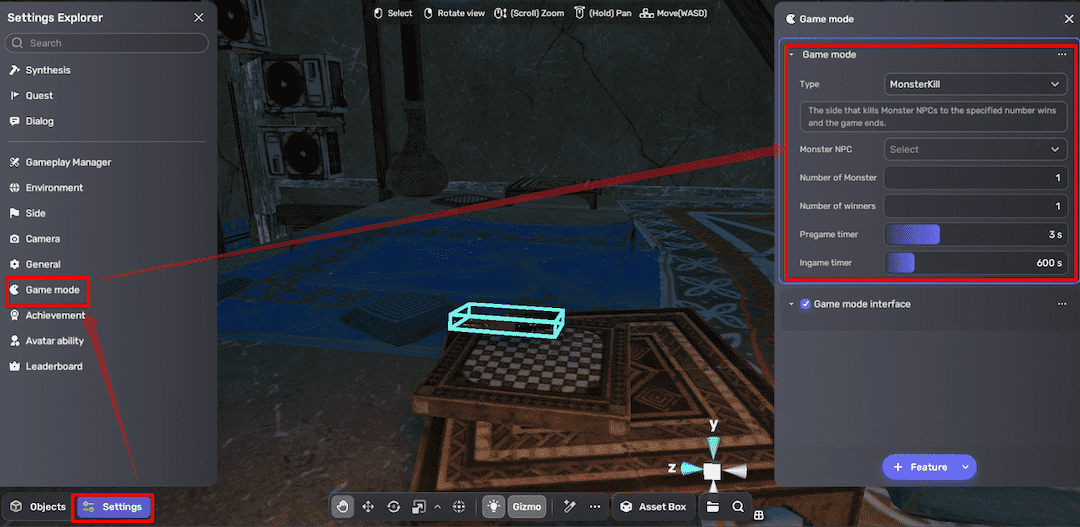
(Optional) Set game mode
If you want to make defeating a specific zombie NPC the winning condition of the whole game, follow these steps:
-
Go to Settings Explorer > Game Mode, set the type to MonsterKill.
-
Select the target NPC, and complete the remaining game settings.