Create a 2D platformer level with Party Game Kit
This tutorial is intended for Party Game Kit users.
This tutorial guides creators step-by-step to build a mini 2D platformer level, where the player controls a character that runs, jumps, and navigates across various platforms and obstacles in a side-scrolling view. Along the way, the player will collect floating coins, interact with switchable platforms, face enemies, and reach an endpoint to complete the level. Classic platformers like Super Mario Bros. inspire the core gameplay elements in this hands-on creation experience.
For a video walkthrough, watch our step-by-step guide on Youtube.
Time to complete
20-30 minutes
What you'll learn
Before getting started
- Basic knowledge of the Studio interface and how to add assets to scenes.
- Beginners can check out Create a multiplayer game for a quick intro.
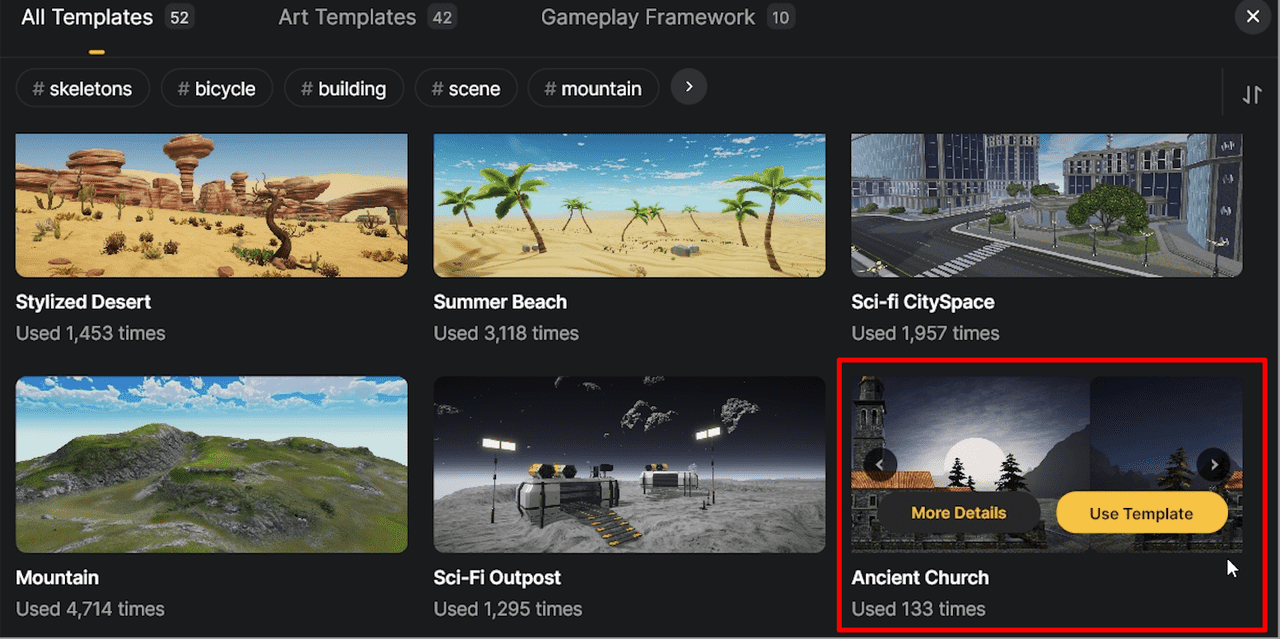
Choose a suitable template for your game
On Desktop, choose Create Game > Party game, then pick a suitable template. For example, the Ancient Church template features medieval-themed scenery.
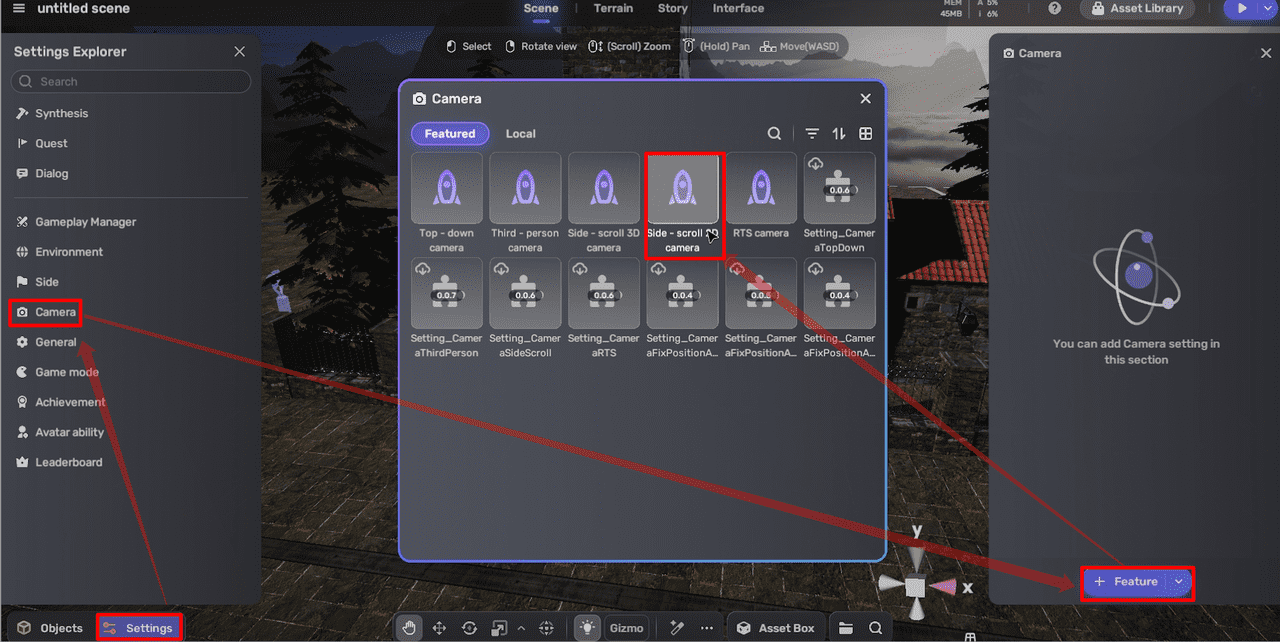
Add a side-scroll 2D camera
The default view is third-person. To adjust for side-scrolling:
-
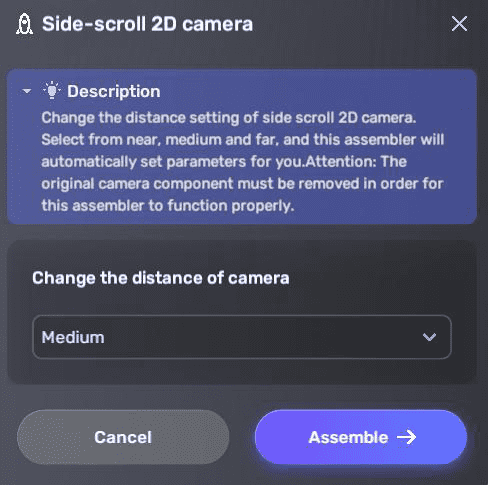
Go to Settings > Camera, click + Feature > Side-scroll 2D camera to select the side-scrolling 2D camera assembler. A setup window will be prompted.
-
In the window, set the camera distance and continue to assemble.
-
In the camera settings, adjust the At depth value, which represents the camera's position on the Z-axis. Increasing this value (making it less negative or closer to zero) moves the camera forward, closer to the objects in the 2D scene. This changes how much of the scene is visible by altering the camera's distance from the game world.
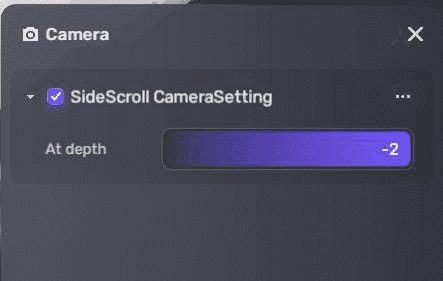
Camera Z position: -5 Camera Z position: -2 

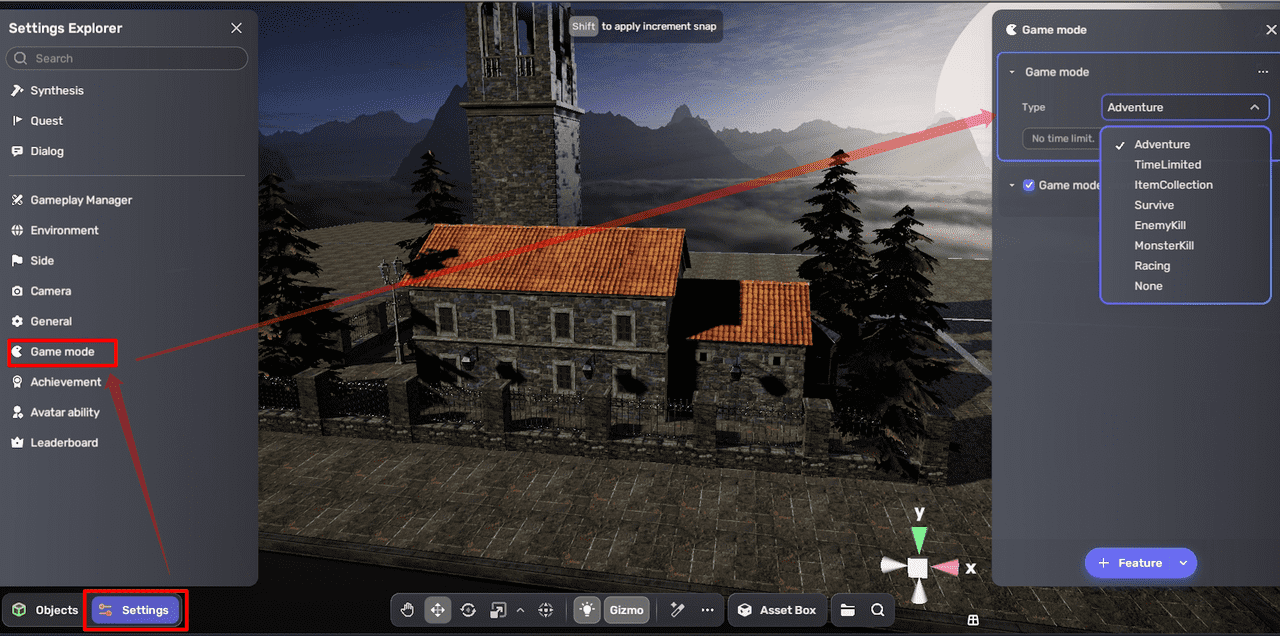
Set the game mode
Customize the game mode in Settings > Game Mode, for example, select Adventure.
Setting game mode to None disables key gameplay components like Rotate and Move, which are essential for this tutorial.
Adjust player settings and spawn point
Go to Settings > Avatar ability to customize player attributes like turn speed, walk speed, jump height, health, attack, and defense. For example, set max jumps to 2, jump height to 4, and run speed to 3 to make the player character move faster and jump higher. You can also set life to 200, and both attack and defense to 60 to enhance the character's durability and combat effectiveness. For more information, see Avatar.
Adjust spawn settings under Settings > General > Respawn, defining spawn mode and respawn time.
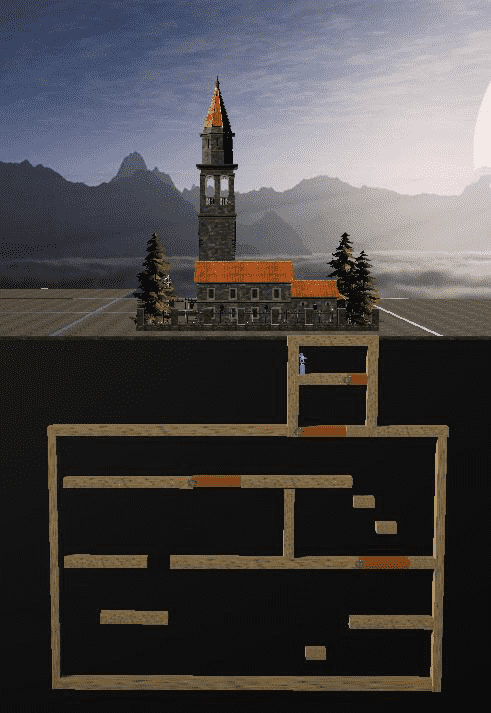
Build a playable area
You can start building your playable area from scratch or by using existing assets.
-
Create a basic platform
Start with a simple cube for your platform:
-
Add a cube to the scene by selecting + Create > 3D Object > Cube in the Object Explorer.

-
Place and resize the cube as needed.
-
Apply a brick texture to the cube.
Alternatively, use template assets, assets from Asset Library, or import your own.
-
-
Add gameplay elements Enhance your level by adding more elements:
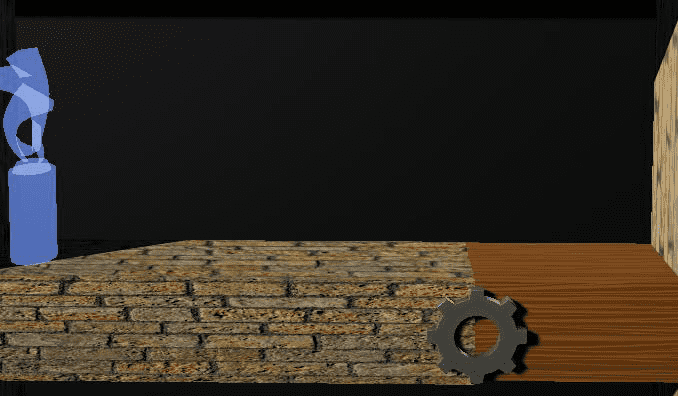
- Add a gear model from Asset Library to act as a switch.
- Apply different materials to create special platforms.
These elements help design engaging challenges and encourage player interaction.
-
Expand your level
Repeat these steps to layer platforms and interactive objects, gradually building out a complete, playable area like the example below.
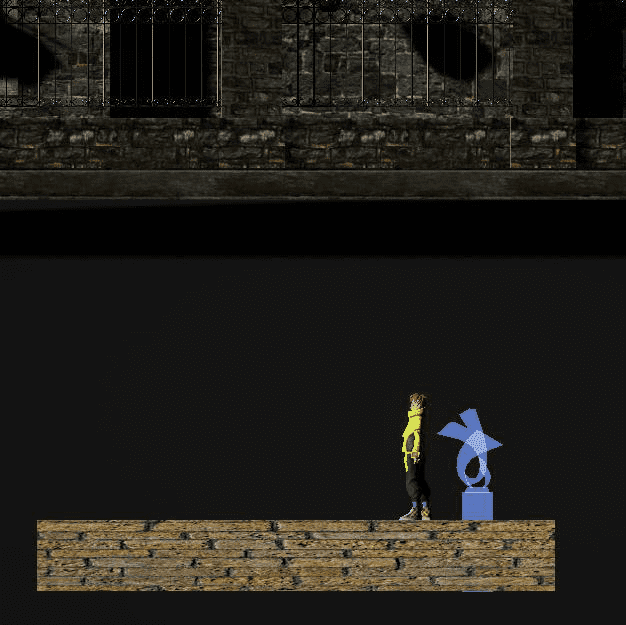
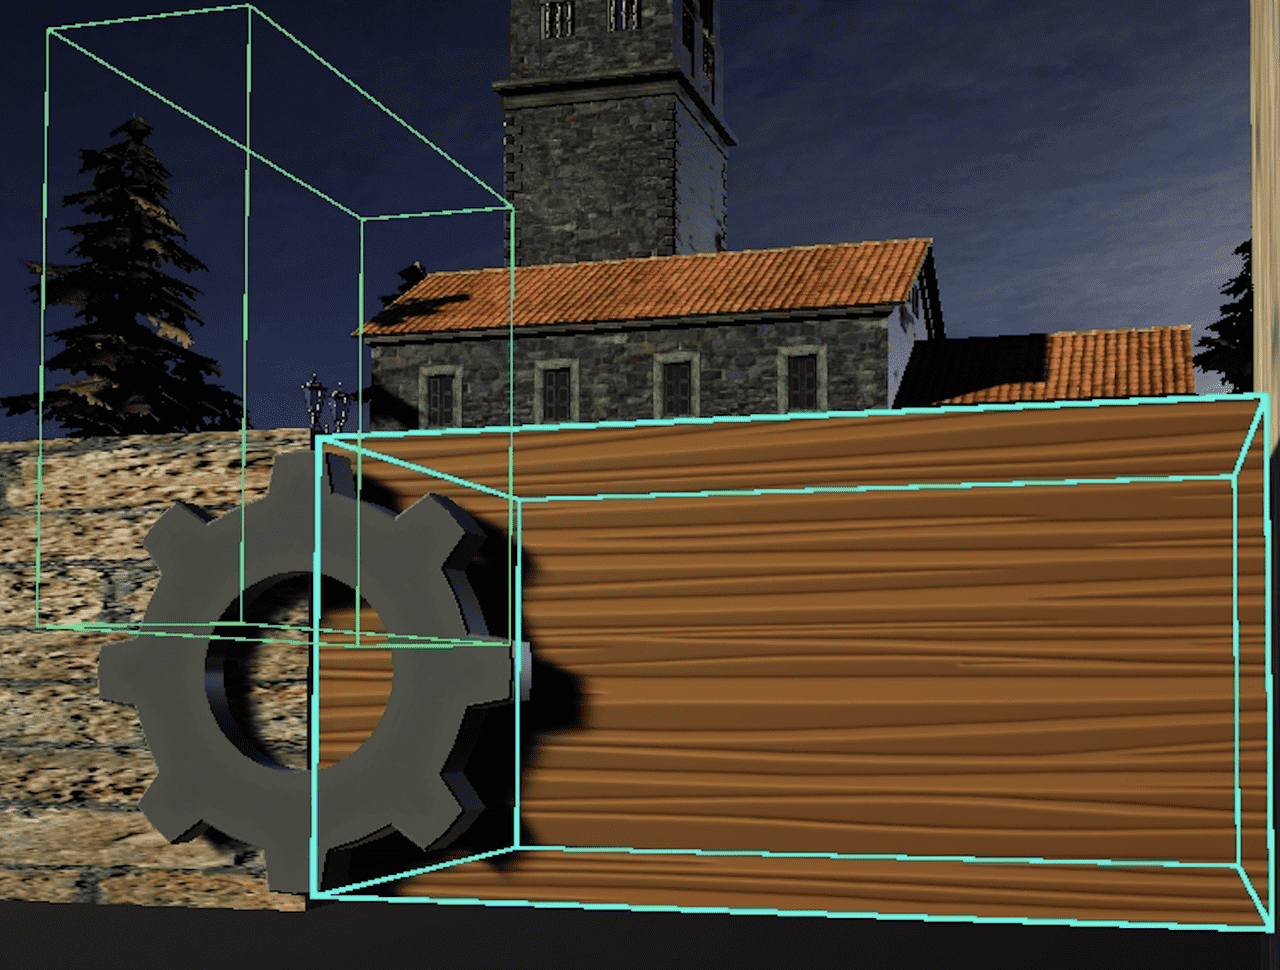
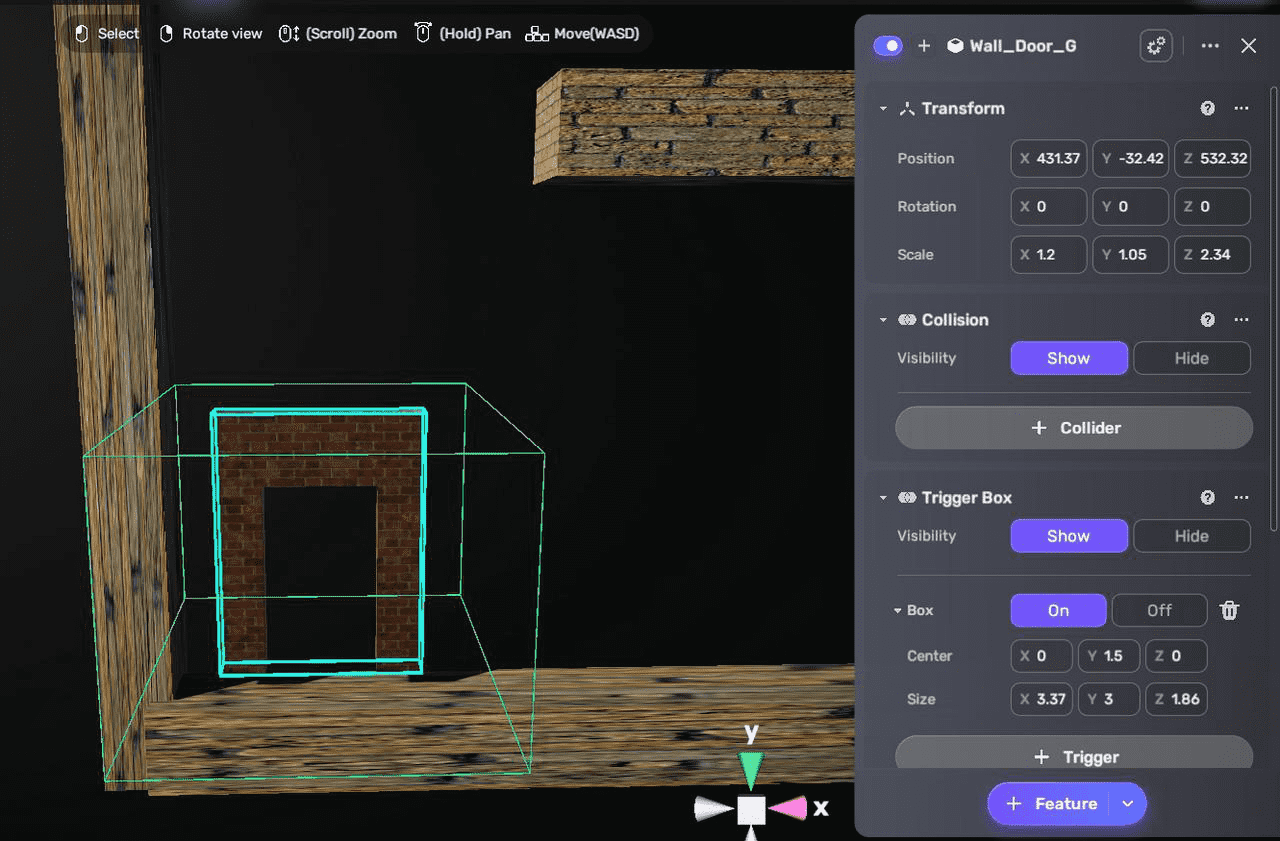
Create switchable platforms
To make the platform switchable when the player approaches, the cube should rotate when the player enters its trigger box.
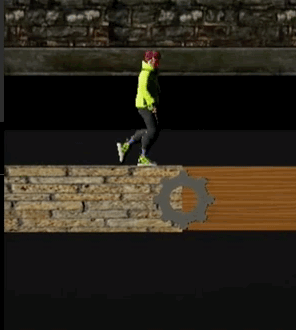
However, simply adding a Rotate feature to the cube causes it to rotate around its default pivot point at the center—not the desired edge. To rotate the cube around an edge instead, follow these steps:
-
Create an empty object to act as the cube's parent by selecting + Create > Empty Object in the Settings Explorer, then drag the cube under it in the Object Explorer.

-
Move the empty object's pivot point to align with the edge around which you want the cube to rotate (for example, the left edge).
-
Add a trigger box to the empty object and ensure the player can enter it to activate the rotation.
-
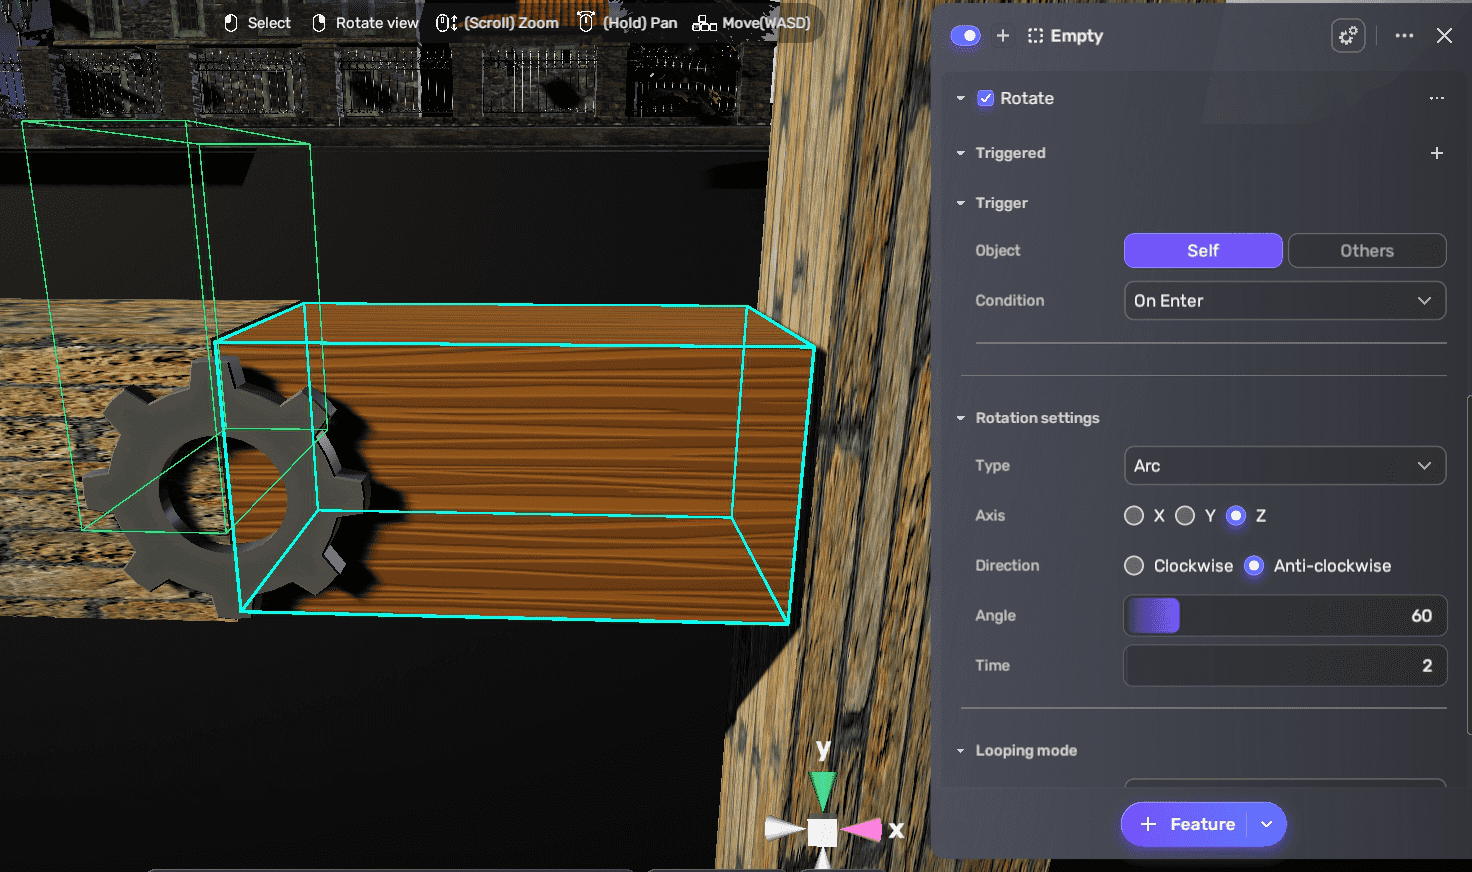
Attach the Rotate component to the empty object by choosing + Feature > Gameplay > Rotate.
-
Configure the Rotate component:
- Set the trigger to Self On Enter.
- Set the rotation type to Arc, rotate on the Z axis, and specify the direction, angle, and time to complete the rotation.
- Choose looping mode as one-time or infinite times, and set the direction as one-way or two-way according to your game design. For more information, see Rotate.
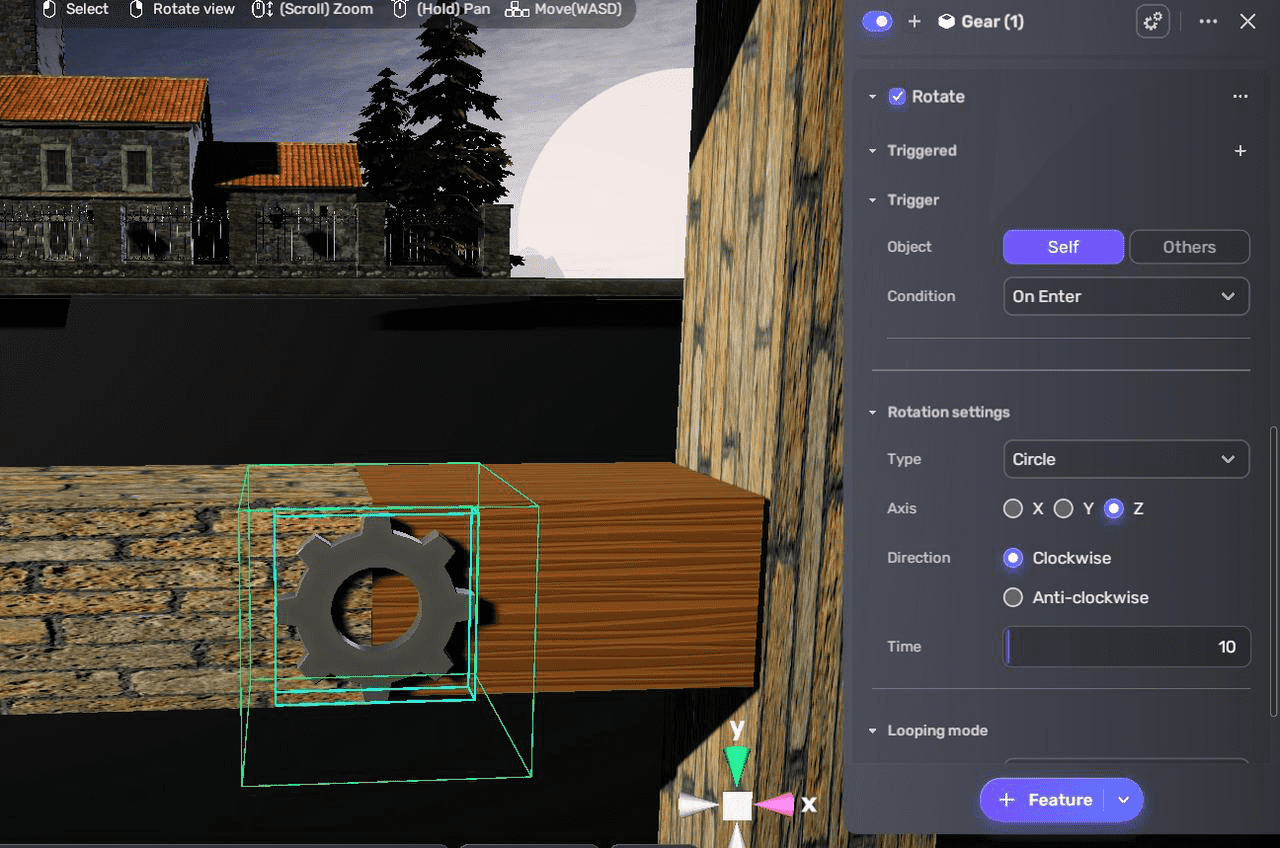
After making the cube rotate, attach the Rotate component to the gear and configure its trigger and rotation to simulate a switch being turned on.
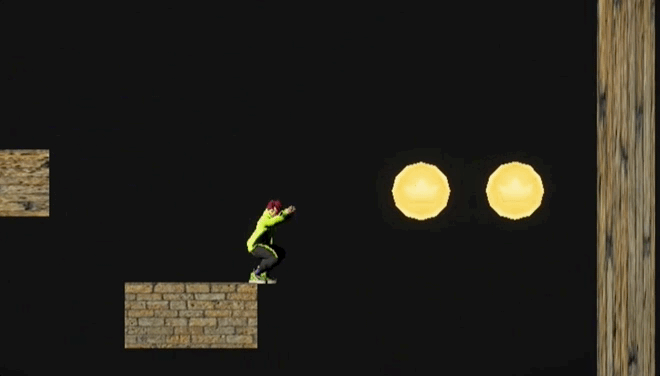
Create floating coins
Inspired by classic platformers, floating coins encourage jumping and collection. You can create them by making a coin a collectible item and attaching a Move component to it.
To do this:
- Add a coin model from Asset Library to your assets.
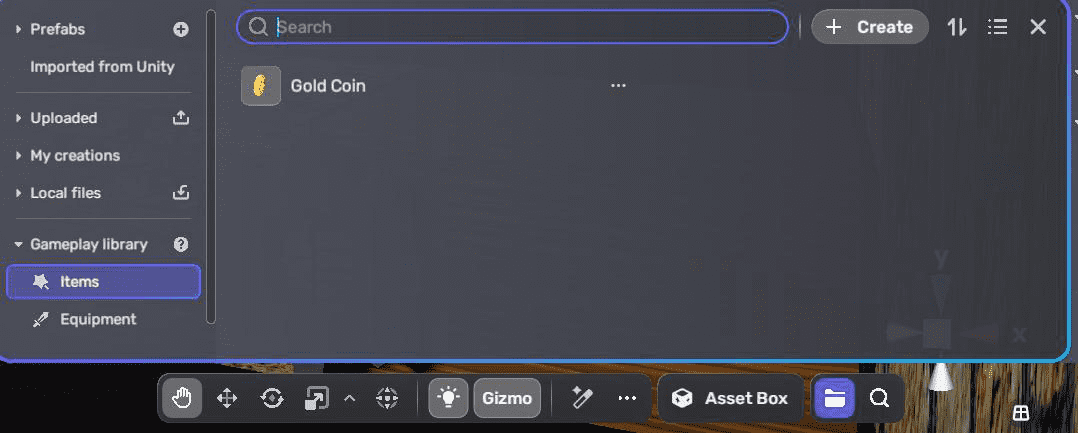
- Create a collectible item by going to My Resources > Gameplay library > Items, and click + Create. Set pickup mode to Auto for automatic collection. For details, see Make collectible items.
- Add the coin item to the scene where desired.
- Attach the Move component to the coin item to make it float by selecting + Feature > Gameplay > Move.
- Configure the Move component:
- Set the trigger to Self On Start so the coin starts floating as soon as the game begins.
- Add a few waypoint positions, and adjust the stay time and move speed. For example, a stay time of 0.1 seconds and move speed of 6 creates a smooth floating effect. For more information, see Move.
- (Optional) In the Settings Explorer, go to General to adjust the pick-up distance and audio settings if needed.
Use Move to create various floating or moving interactive elements. Components like Revolve and React further expand dynamic gameplay options.
Create enemies
Add enemies with attack behaviors to increase challenge. You can check out how to set up enemy NPCs with attack attributes as in the monster hunt game or follow the steps below:
- Go to Asset Library and select characters. You can find a variety to choose from, ranging from zombies to regular humans.
- Add a character model to the scene and adjust its size, position and rotation.
- Add an NPC component to the model by selecting + Feature > NPC. Enter an NPC name.
- Add a Behaviour component to the NPC by selecting + Feature > Behavior so that she can sense the player within a perception range.
- Set the action mode to Patrol for wandering.
- Set patrol range, interval, and movement speed if needed.
- Add an Attack component to the NPC to have the players attacked by the NPC by selecting + Feature > Attack.
- Set the life, attack, and defense attributes.
- Set the attack mode to Active attack, and configure alert range, attack range, interval, and enable respawn settings if needed.
- (Optional) Attach Loot Drop component for automatic item drops on enemy death. For more information, see Set loot dropping at a drop point.
Create an endpoint
The endpoint signals level completion. When players reaches it, they are teleported to the next level or scene, often with sounds or animations to mark progress.
An example of creating an endpoint at your level:
-
Place a model at the destination and add a trigger box to it.
-
Add a Teleport Point component to the destination by choosing + Feature > Teleport Point.
-
Configure the target position or object, character orientation, delay, and audio to play upon teleportation. This setup decides where and how the player will be teleported when they reach this point. For more information, see Teleport point.

Test your game
Click  to enter Play Mode to verify if:
- Side-scroll 2D camera works
- Switchable platforms rotate properly
- Floating coins collect correctly
- Enemies attack as expected
- The player character teleports at the endpoint