Create a racing game with Party Game Kit
This tutorial is intended for Party Game Kit users.
In this tutorial, you will learn how to create a racing game using assets and built-in components—without writing any code.
To follow this tutorial in video form, check out our step-by-step guide on YouTube.
Time to complete
20-30 minutes
What you'll learn
Before getting started
- Basic knowledge of the Studio interface and how to add assets in scenes.
- For beginners, check out Create a multiplayer game for a quick intro.
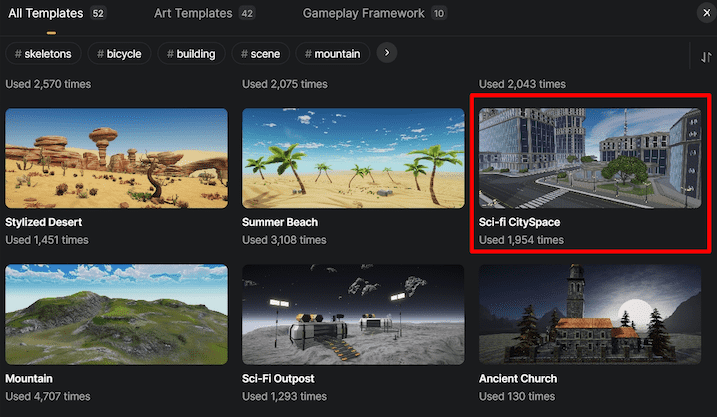
Choose a template with a race track
On Desktop choose Create Game > Party Game, then select the Sci-fi CitySpace template. This city template includes a ready-made race track.
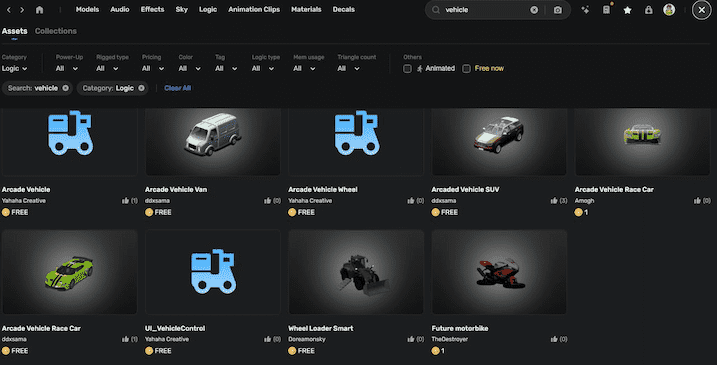
Add a drivable vehicle
-
In Asset Library, go to the Logic category and select a vehicle asset. Such assets contain built-in components for vehicle behavior.
-
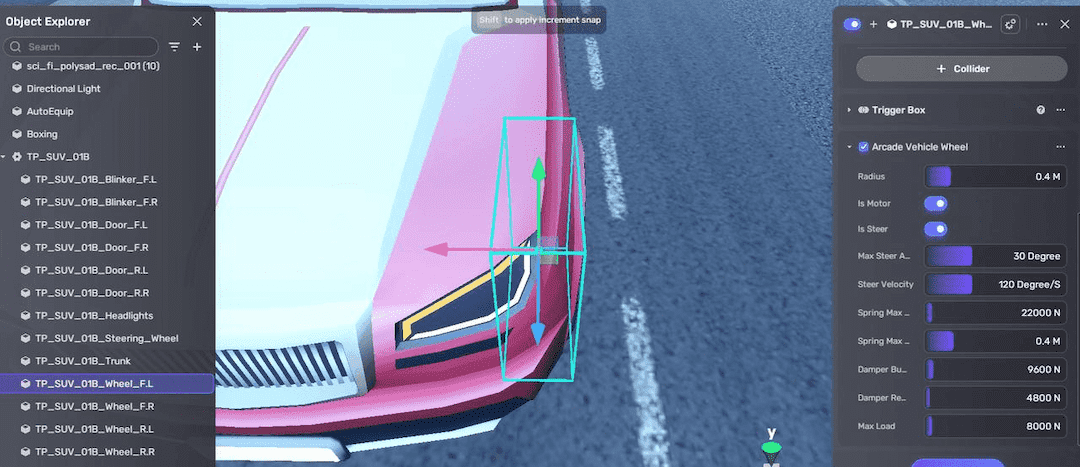
Drag the vehicle actor into your scene and position it at the designated start line. For example, add Arcade Vehicle SUV.
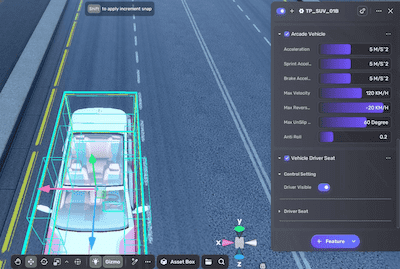
The car asset includes essential components such as Collision (for collision detection), Rigidbody (for physics simulation), UI_VehicleControl (for input controls), Arcade Vehicle (for driving behavior), and Vehicle Driver Seat (for player interaction) on the car body.
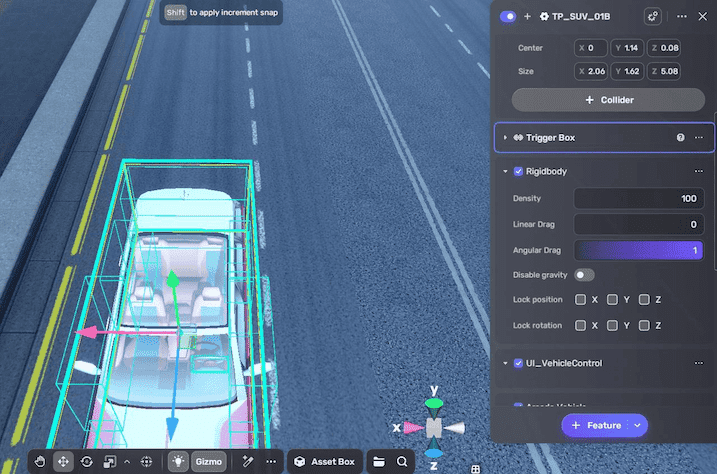
And the car wheels are prebuilt with the Arcade Vehicle Wheel component, which controls the wheel's rotation, steering, and suspension behavior to enable realistic movement and handling of the vehicle.
If you want to create your own drivable vehicle, see Making a drivable vehicle in a codeless way.
- Adjust the spawn point positions to ensure players can locate and enter their vehicles at game start.
Add a finish line
-
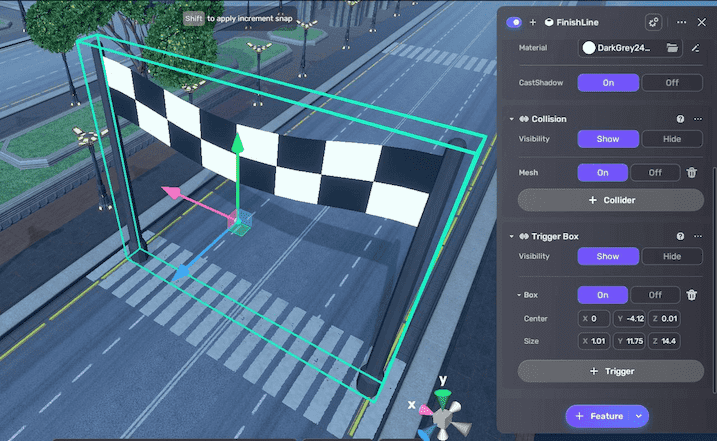
Find and add a finish line model from Asset Library.
-
Place the model at the end of the track.
-
Add a trigger box to the model.
(Optional) Add passing vehicles
To make some vehicles move as if they're passing:
-
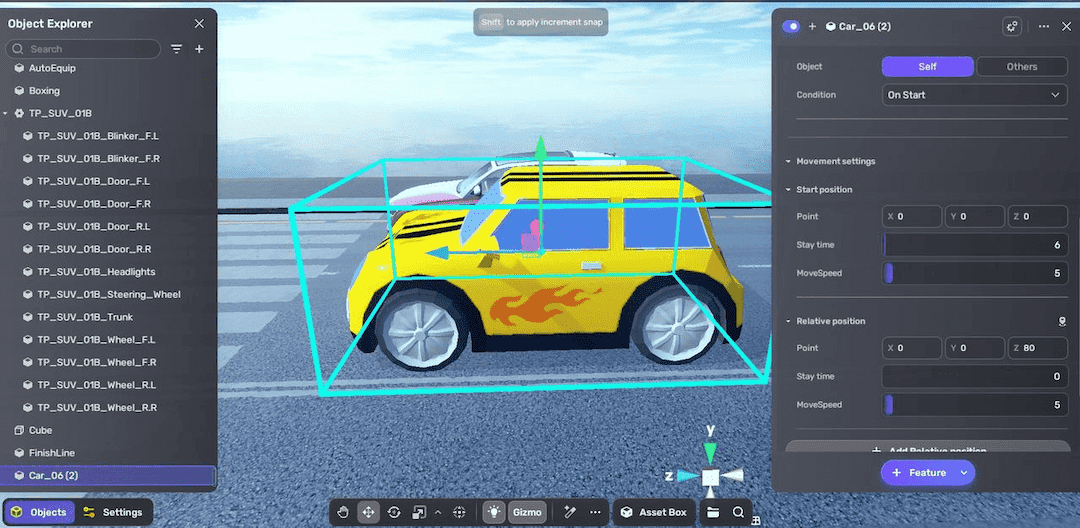
Find and add car models without built-in logic from Asset Library.
-
Place these vehicles along the track in your scene.
-
Add a Move component to the passing vehicle from + Feature > Gameplay > Move.
-
Configure the Move component by specifying its initial position and target offset to define the movement path and direction of the vehicle.
For example, set a delay of 6 seconds at the starting point, and set the target position 80 units forward along the z-axis, so the vehicle will begin moving 80 units ahead after a 6-second delay once the game starts.
-
Repeat this process for other passing vehicles if needed.
(Optional) Add obstacles
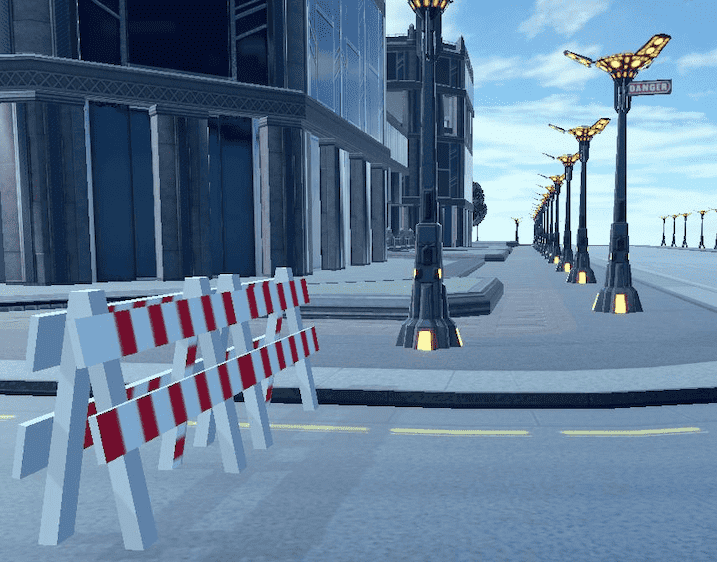
Add road obstacles to increase game difficulty and engagement. Examples include roadblocks, warning signs, or barricades placed strategically to challenge players during the race.
Set racing game mode
In Settings Explorer, go to Game Mode, set the game type to Racing, and select the finish line object as the race's destination to define the endpoint for player victory.

Test your game
Click  to enter Play Mode and verify that passing vehicles are functioning as expected and the race can be won within the time limit.
To drive a vehicle:
-
go near the car with prebuilt logic, press Alt (Windows) or Option (macOS) and click
 to enter the vehicle.
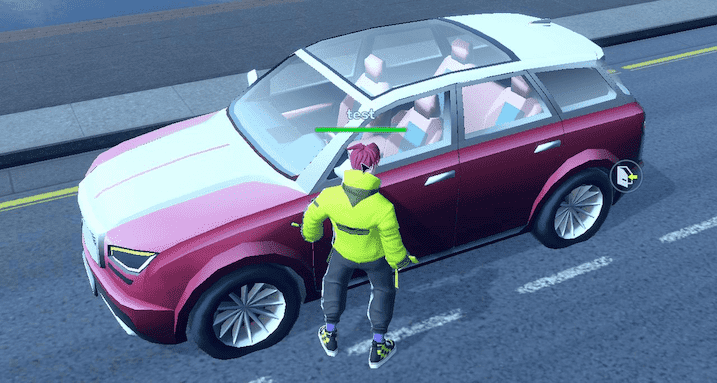
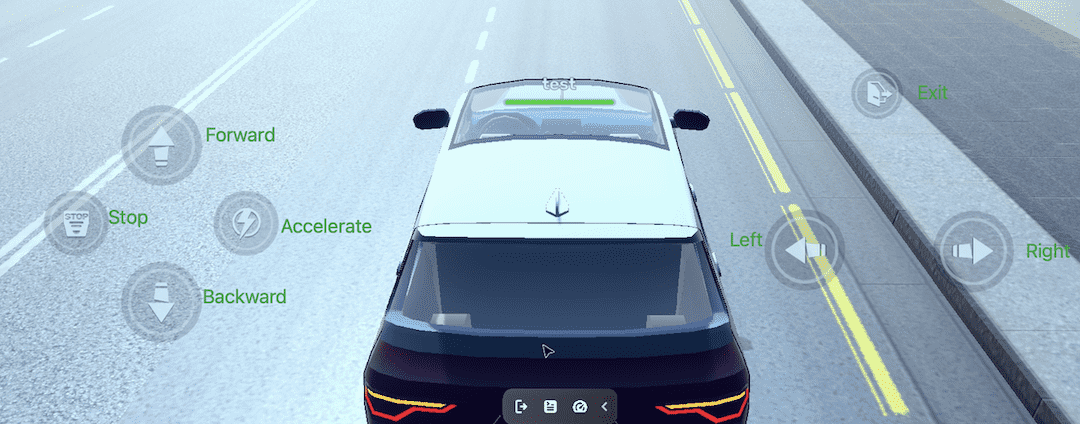
-
Use on-screen UI controls to drive, or keyboard keys:
- WASD to move left/right/forward/backward
- Shift to move faster
- Right mouse button to rotate the view
Additional: Build multiplayer gameplay
To expand your game into a multiplayer racing experience:
-
Place multiple drivable car assets with built-in components at the starting line.
-
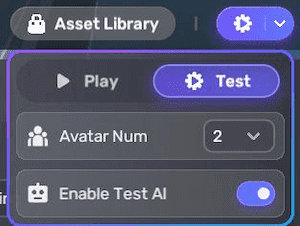
In testing, set the player count (avatar number) and enter Test Mode to observe gameplay from multiple player perspectives in separate launcher windows.
-
When publishing, set an appropriate maximum player limit to accommodate the desired number of simultaneous players.