Create a monster hunt game with Party Game Kit
This tutorial is intended for Party Game Kit users.
This tutorial guides creators through creating a monster hunt game without writing code. Players will have a conversation with a guide NPC at game start, receive a quest with clear objectives when the conversation ends, discover different types of weapons nearby, and use them to defeat monsters and complete the quest.
To follow this tutorial in video form, check out our step-by-step guide on YouTube.
Time to complete
20-30 minutes
What you'll learn
Before getting started
- Basic knowledge of the Studio interface and how to add assets to scenes.
- For beginners, check out Create a multiplayer game for a quick intro.
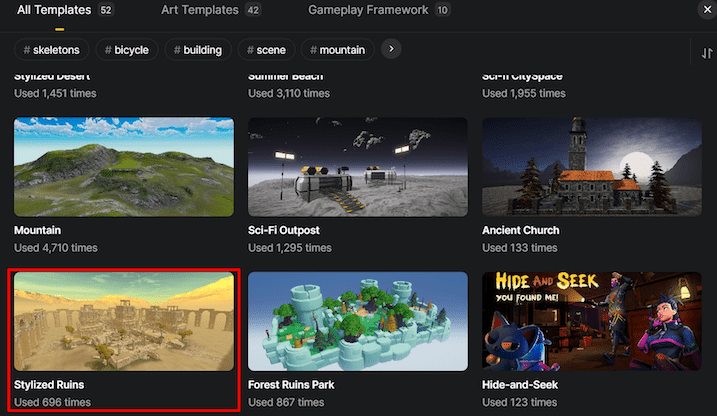
Choose a suitable template for your game
On Desktop, choose Create Game > Party game, then pick a suitable template. For example, the Stylized Ruins template provides a medieval ruin environment ideal for monster hunting with a fantasy theme.
Set up NPCs
Set up the guide NPC
-
Add a model to the scene that will act as the guide NPC to provide instructions to players.
-
Add the NPC component to the model by choosing + Feature > NPC, then enter a name for this NPC.
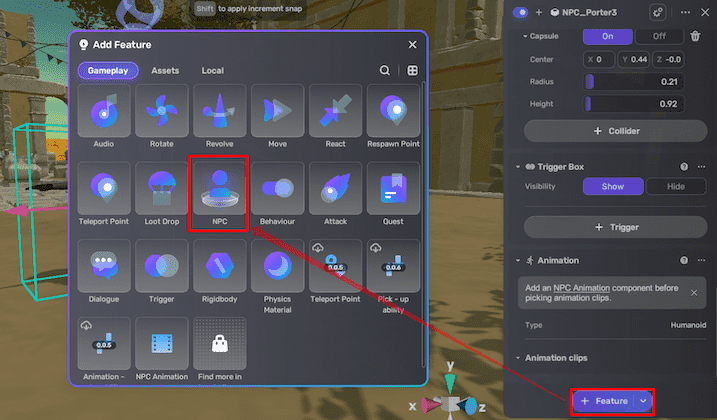
-
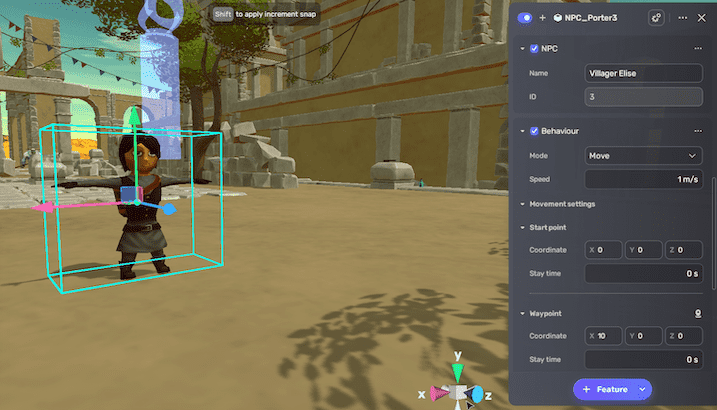
Add a Behavior component to the NPC by choosing + Feature > Behaviour for in-game movement.
-
Set the action mode to Patrol for wandering.
-
Set patrol range, interval, and movement speed if needed.
-
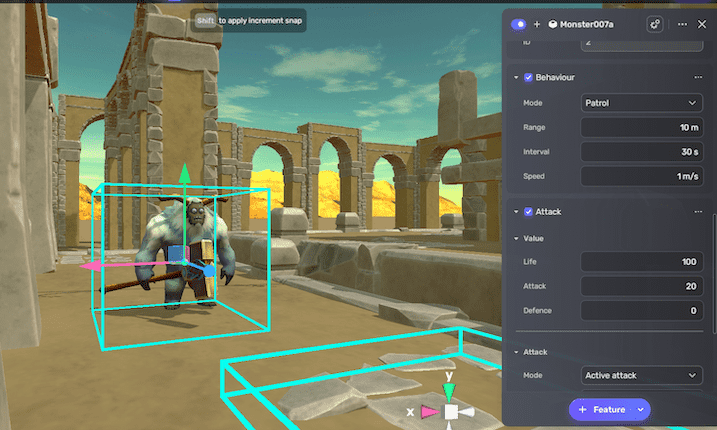
Set up enemy NPCs with attack abilities
- Add a model for enemy into the scene.
- Attach NPC and Behavior components to the model; set Behavior Mode to Patrol so the enemy can detect and chase players.
- Add the Attack component to the NPC and configure:
- Set the life, attack, and defence attributes.
- Set the attack mode to Active attack.
- Configure alert range, attack range, interval.
- Enable respawn settings if needed.
- Repeat for more enemy NPCs to make the game more exciting.
Some monster assemblers available in Asset Library's Logic category, such as Dragon Boss or Demon Wolf are ready-to-use prefabs. These assemblers come preconfigured with NPC, Behavior, Attack, and NPC animation components, enabling quick integration into your scenes without additional setup.
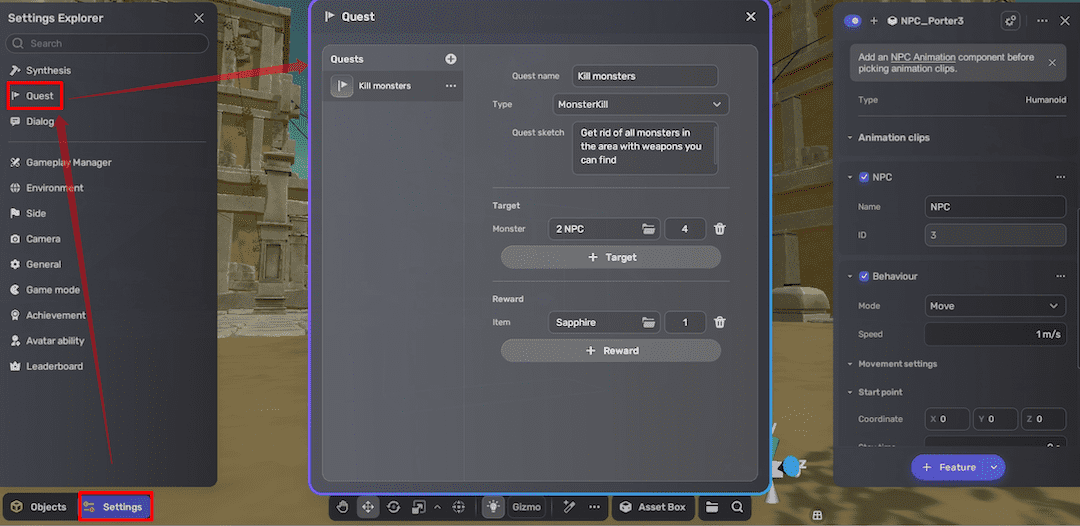
Create a quest
- In Settings Explorer, select Quest and create a new quest.
- Configure the quest:
- Add a quest name and description.
- Set the type to MonsterKill, specifying which monsters to hunt and their quantities.
- Create quest rewards such as items or equipment either by clicking the folder icon or in My Resources > Gameplay library > + Create. Refer to Creating an item for details.
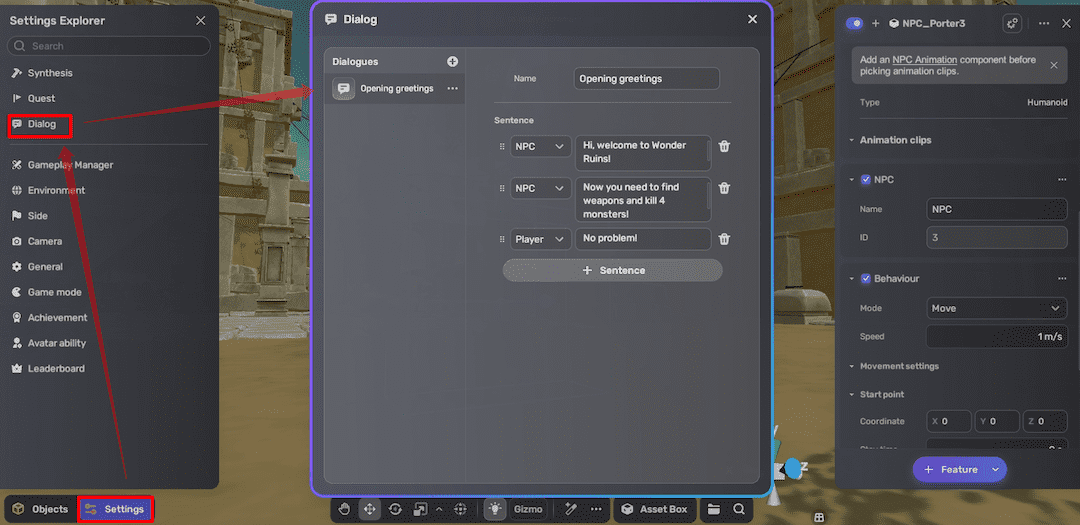
Create a dialogue
- In Settings Explorer, select Dialog and create a new dialog entry.
- Provide the dialog name and sentences to simulate a conversation between a guide NPC and the player.
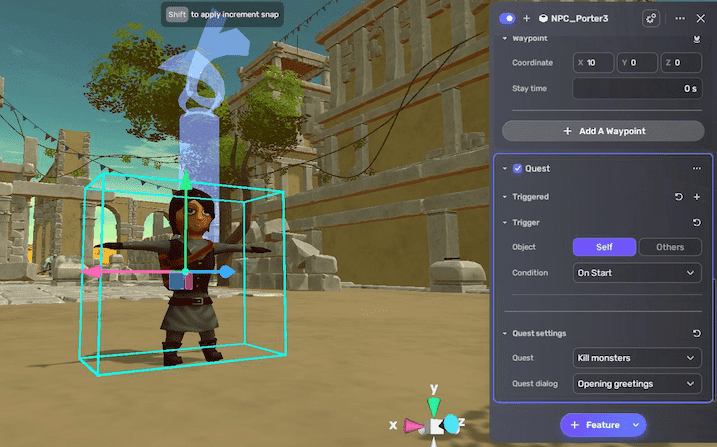
Link quest and dialogue to the guide NPC
-
Select the guide NPC in the scene and add the Quest component to it by clicking + Feature > Quest.
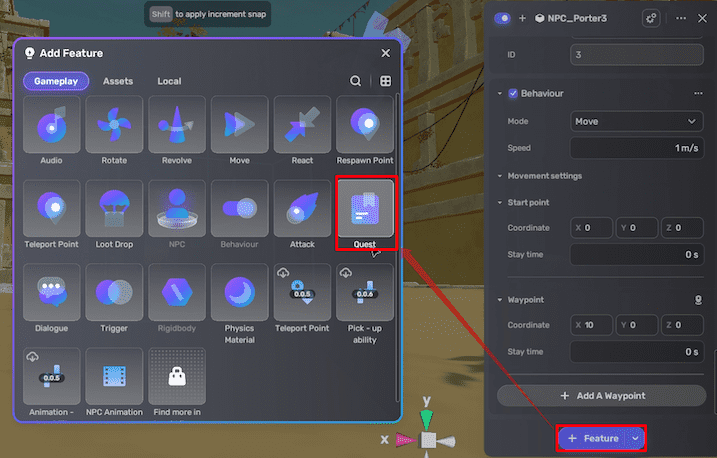
-
Configure the Quest component:
- Set the trigger to Self On Start, so the quest activates when the game and dialog begin.
- Select the relevant quest and dialog to associate with the NPC. When the dialog is complete, the quest will start.
Add weapons for players to pick up
You can add some weapons to the game for players to choose from and speed up their monster hunting.
Add a gun
- Select a gun model from Asset Library and place it in the scene.
- In Asset Library's Logic category, add the Gun(legacy) component to your assets.
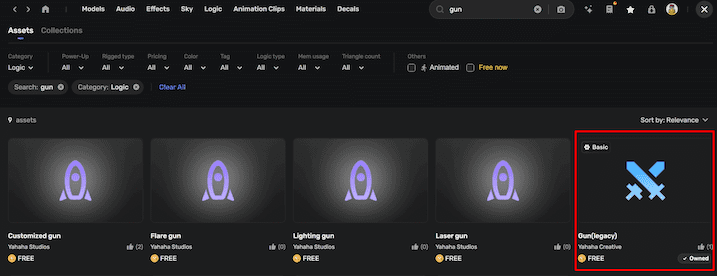
Alternatively, use gun assemblers like Electric gun for prebuilt components including UI and reload mechanics. For more information about weapon setup, see Creating a weapon.
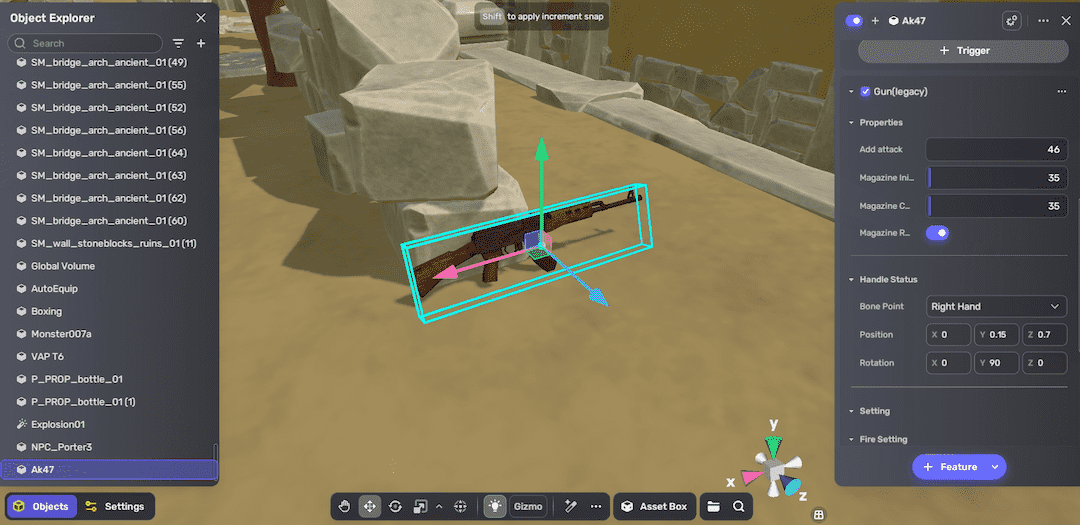
- Attach the Gun(legacy) component to the gun model and configure:
- Adjust gun position and rotation relative to the bone point for correct hand placement.
- Enable magazine reload UI by adding the UI_Reload component if applicable.
- Configure audio for firing and reload sounds. For more information, see Gun.
Add a melee weapon
- Choose a melee weapon model, like an axe, from Asset Library.
- In Asset Library's Logic category, add the Melee Weapon(legacy) component to your assets.
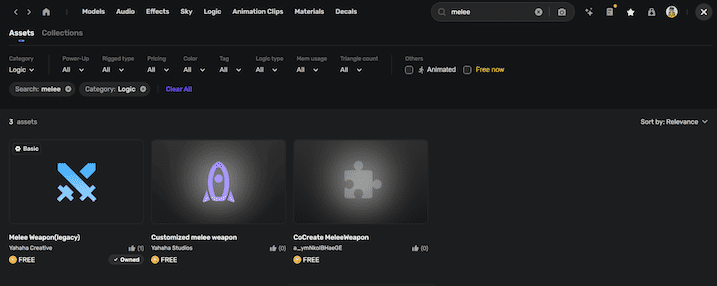
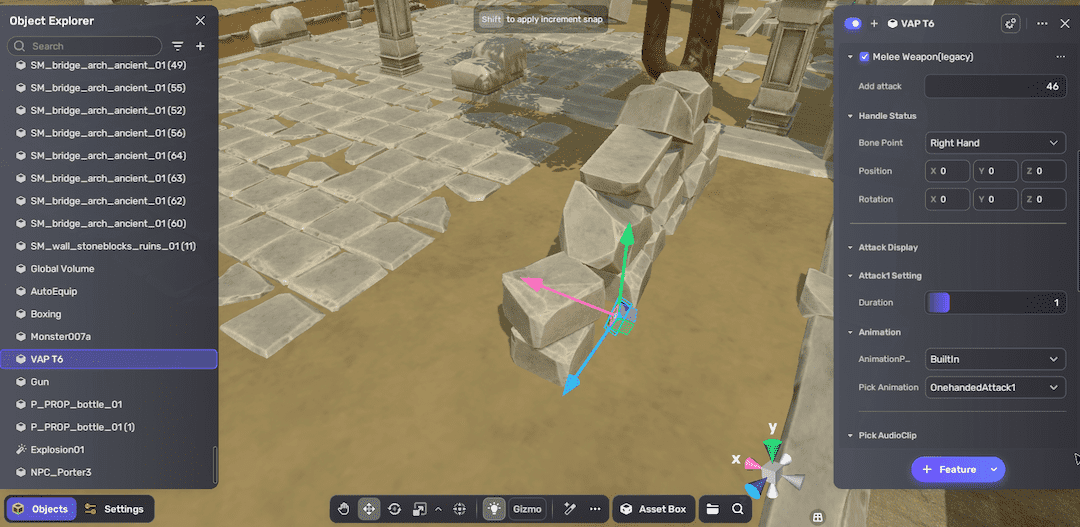
- Attach the Melee Weapon(legacy) component to the model and configure. For more information, see Melee Weapon.
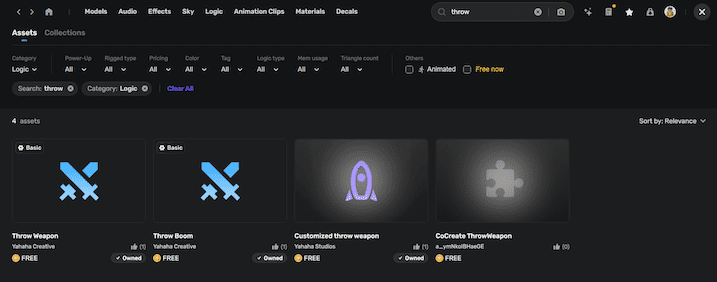
Add a throwing weapon
- In Asset Library's Logic category, add the Throw Weapon and Throw Boom components.
- Create the explosive by attaching a Rigidbody component and a Throw Boom component to a model like a bottle; name it appropriately. For more information, see Throw Boom.

Disable mesh colliders on the explosive model (if any) and replace with simple colliders (box, sphere, capsule) for better physics.
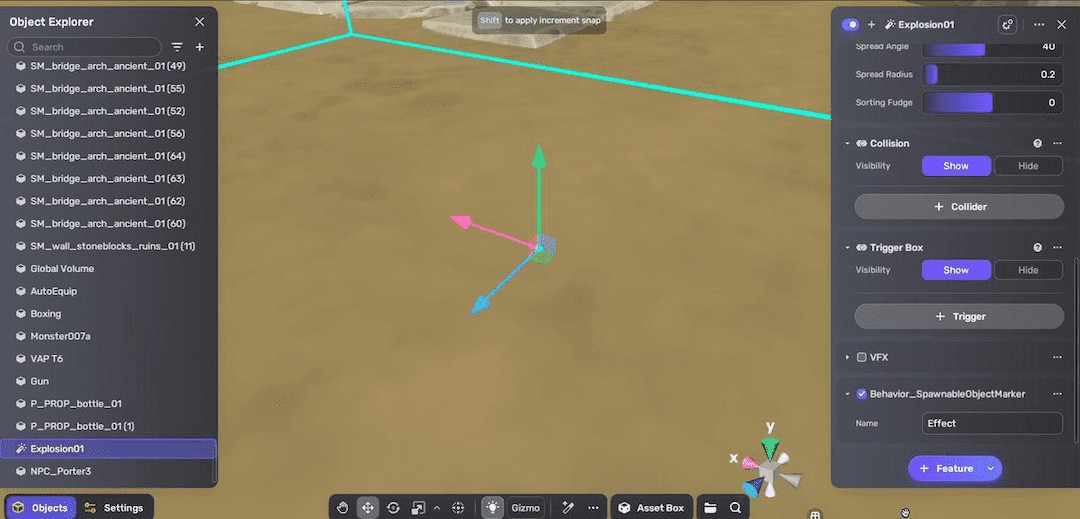
- Create the explosion effect:
- Find an effect in Asset Library and add it to the scene.
- Disable the effect's VFX pane by clearing the checkbox in the Properties window.
- Add the Behavior_SpawnableObjectMarker component to the effect to make it a spawnable object; name it properly.
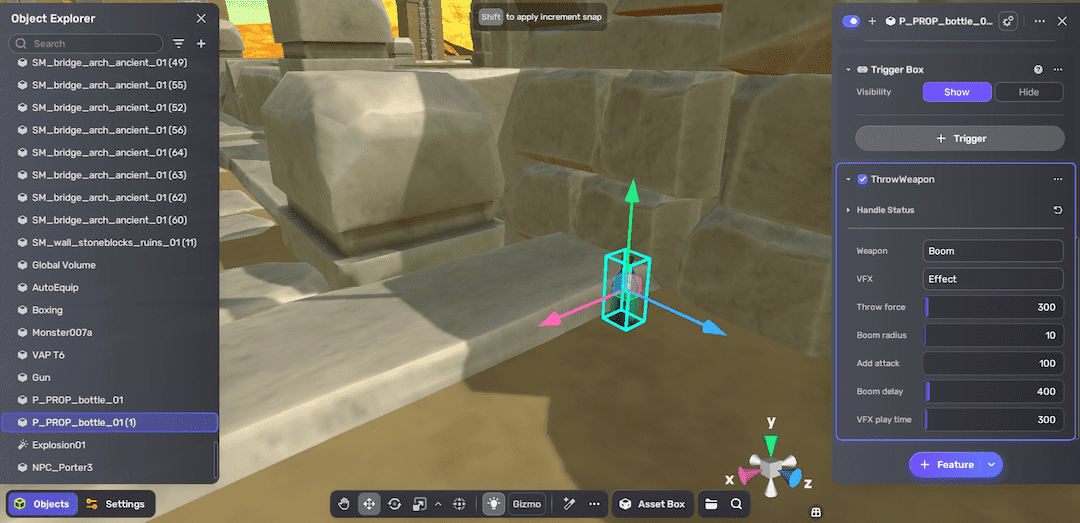
- Create the launcher:
- Simply duplicate the explosive and use the duplicate as the launcher.
- Add the Throw Weapon component to the launcher, and link the weapon and effect names. For more information, see Throw Weapon.
Test your game
Click  to enter Play Mode to verify if:
- NPCs behave as expected
- Quest and dialogue trigger correctly
- Weapons are available and function properly
(Optional) Set game mode
If you want to make defeating a specific monster NPC the winning condition of the whole game, follow these steps:
-
Go to Settings Explorer > Game Mode, set the type to MonsterKill.
-
Select the target NPC, and complete the remaining game settings.