Quick start guide
This quick start guide is designed to help you familiarize yourself with coding using Horror Game Kit 1.5.
In this guide, you will learn how to build a Move Speed logic, add a script component, and compile it in Visual Studio Code IDE to control the acceleration and deceleration of your game objects. While Move Speed is just one aspect of game logic, this guide will give you the foundation to script more components and create incredible effects in your game world.
Note:
- Coding features differ between game kits. To learn more about scripting in Party Game Kit, please refer to our Party Coding here.
- Lua scripting functionality is available in Horror Game Kit starting from version 1.5.0. If your project is based on Horror Game Kit 1.0, we recommend upgrading to a later version to access this feature.
Prerequisites
- Download and install Visual Studio Code and set it as an external editor in YAHAHA Studio.
- Configure the debugger in Visual Studio Code and attach it to YAHAHA Studio.
- Create a horror Project. For more information, see Creating your first project.
Create a new script
In YAHAHA Studio, you create a script for a specific object and then redirect it to an external editor to create gameplay logic.
- Create an object in the scene:
- Open YAHAHA Studio.
- Navigate to Scene Explorer, click + > 3D Object > Capsule to add a capsule to your scene.
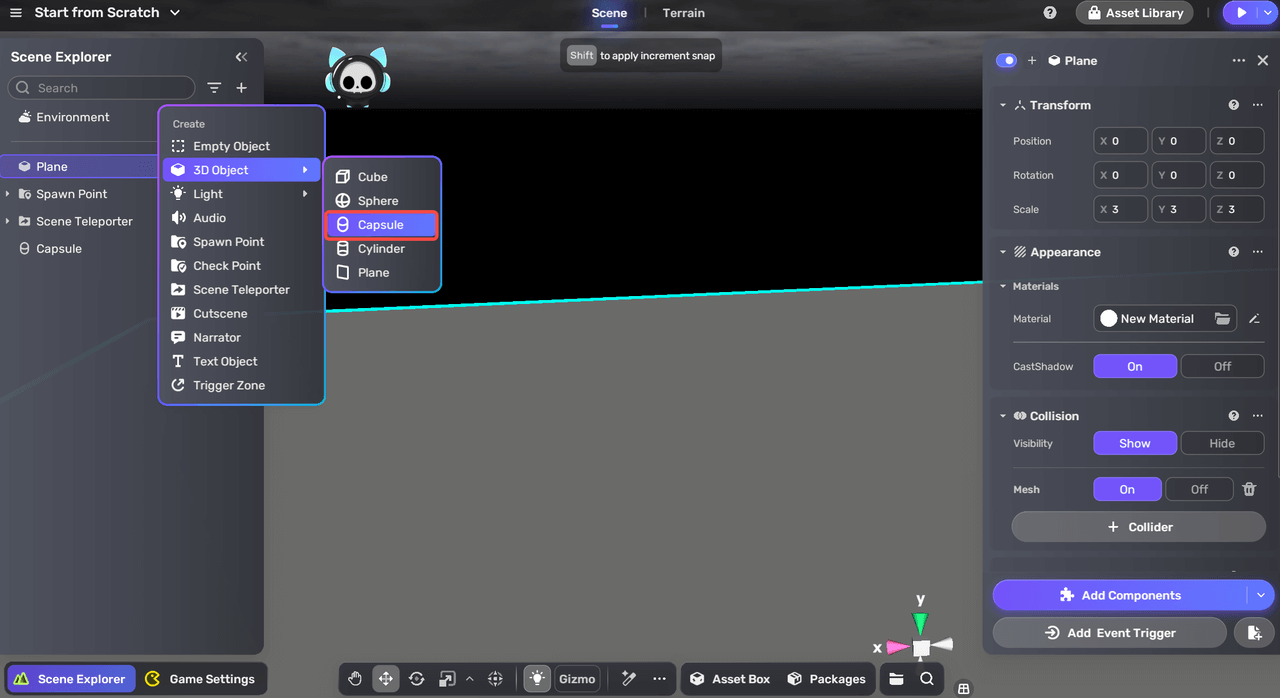
- Add a Lua script:
- Select the capsule object.
- Click the Add Lua Script button in the Properties window.
- Click + New Lua script and enter a name for the script, such as "movespeed".
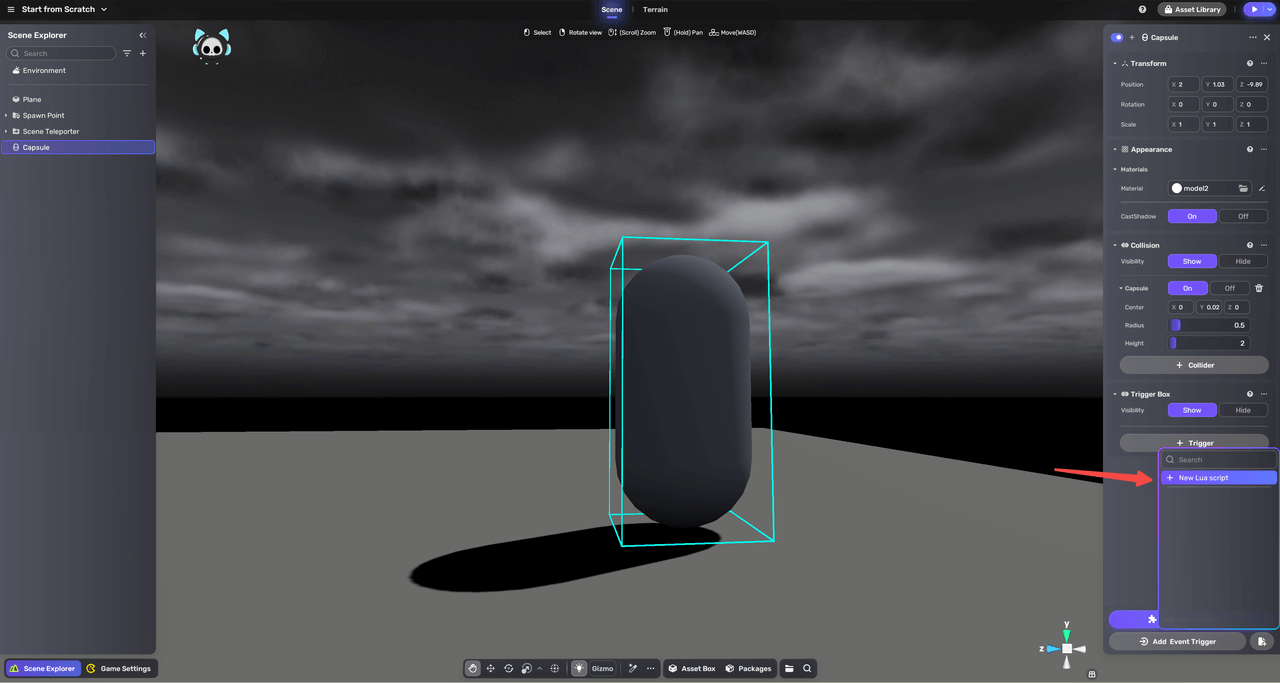
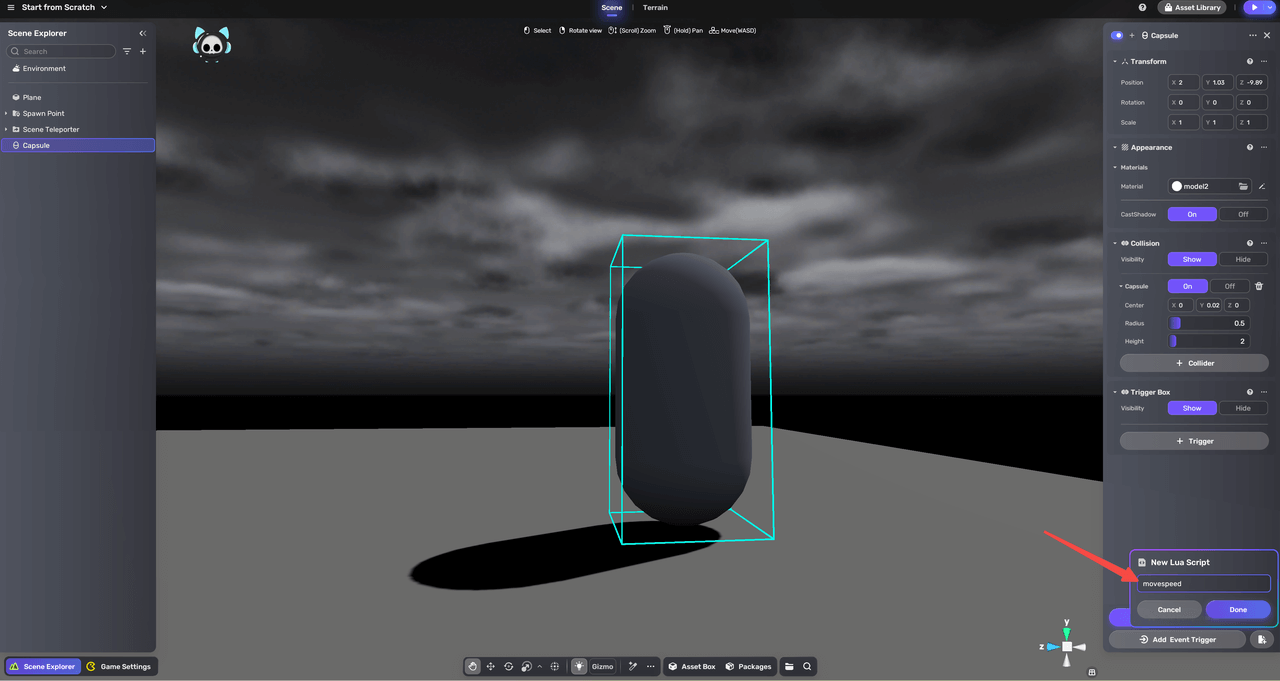
Script a component
Once you enter a script name, two Lua scripts are generated and automatically opened in Visual Studio Code:
{ComponentName}.luais used to implement the runtime logic.{ComponentName}.editor.luais used to define the component fields in the Properties window.
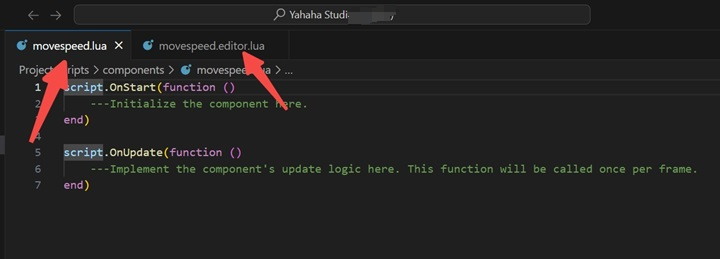
Let's start to edit the two scripts to customize logic to the capsule object.
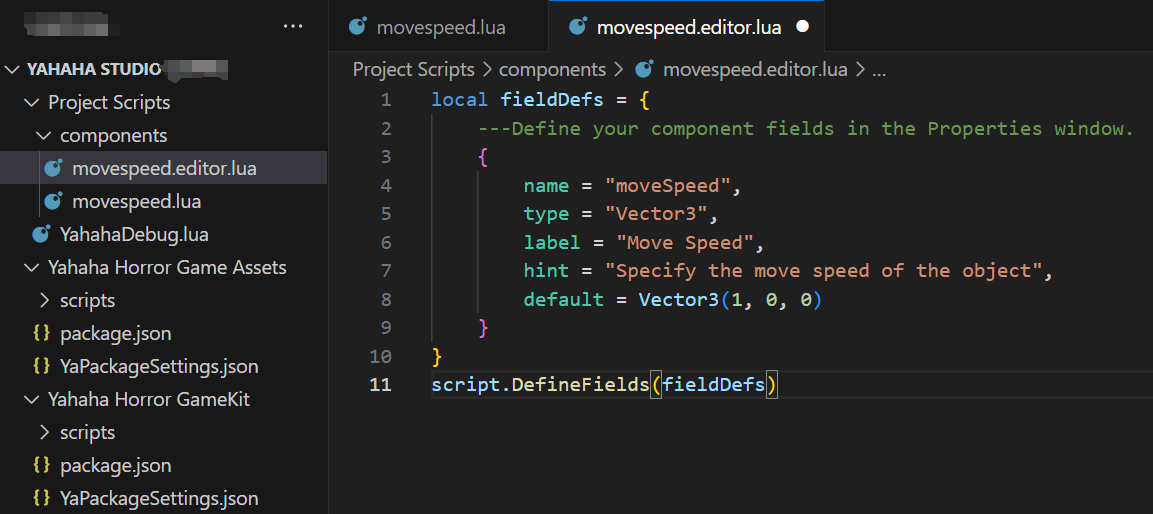
- In the movespeed.editor.lua script, define a Move Speed field.
local fieldDefs = {
    ---Define your component fields in the Properties window.
    {
        name = "moveSpeed",
        type = "Vector3",
        label = "Move Speed",
        hint = "Specify the move speed of the object",
        default = Vector3(1, 0, 0)
    }
}
script.DefineFields(fieldDefs)
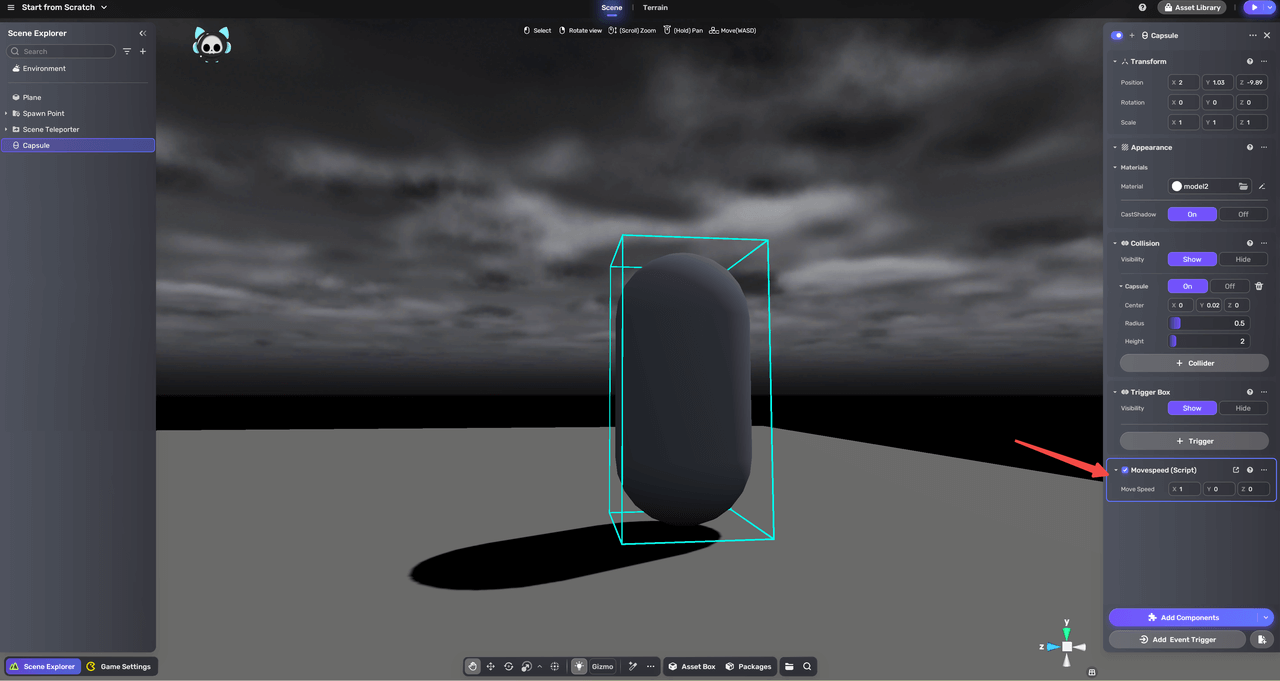
- Once you finish coding, return to YAHAHA Studio. The added Movespeed component will be displayed in the Properties window.
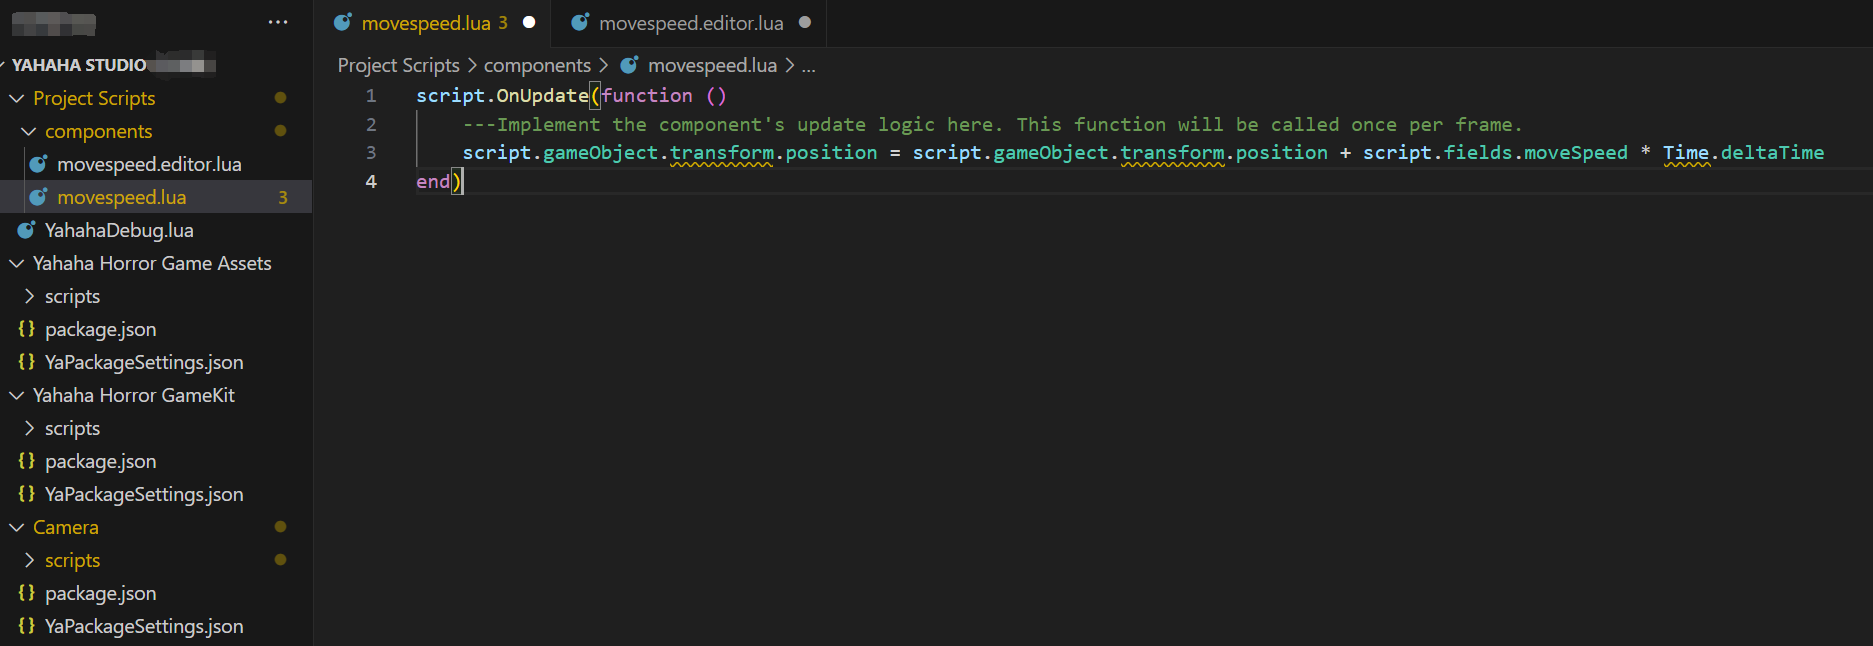
- Implement Update Logic: Open the movespeed.lua script, get the field value, and implement the component's update logic.
script.OnUpdate(function ()
    ---Implement the component's update logic here. This function will be called once per frame.
    script.gameObject.transform.position = script.gameObject.transform.position + script.fields.moveSpeed * Time.deltaTime
end)
Debug and test your script component
To avoid problems during the code compilation process, YAHAHA Studio recommends using the debugging extension EmmyLua. For more details, see Debugging Lua scripts.
Launch your custom component in YAHAHA Studio
The Movespeed component with Move speed logic is now ready and will be executed in YAHAHA Studio.
- Enter Play Mode: Click the Play button to enter the Play Mode.
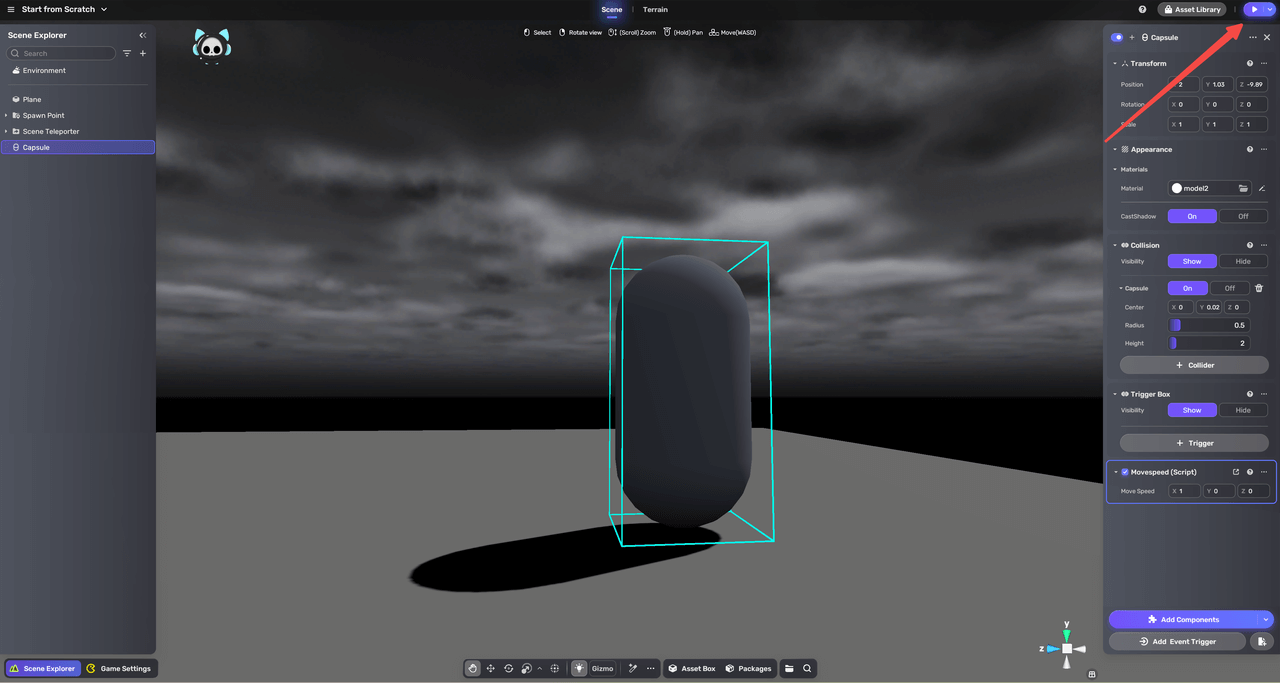
- Verify the Logic: Ensure the capsule object follows the logic configuration of the Movespeed component for motion.
On your own
Using what you have learned throughout this quick start guide, try to do the following:
-
YAHAHA Studio uses Lua language. Learn more about the Lua language by visiting Lua Reference Manual.
-
Learn more about the field types of components and how to use it: