Creating and using scripts
Starting from version 1.5.0, Horror Game Kit integrates Lua scripting. This integration allows you to create custom components for objects, modify their properties and behavior, and respond to user input effectively. Moreover, Lua scripts enable you to configure global settings and implement various gameplay features, giving you greater control over the design and interactivity of your horror game.
Creating scripts
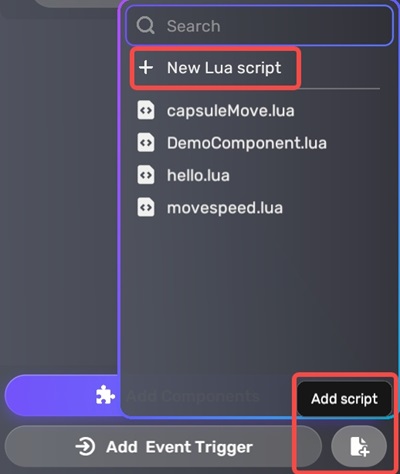
To create a new script, click the Add script button located at the bottom right of the Properties window. The new script will be created in the project scripts folder. You will be prompted to enter a name for the script file; it's recommended to choose a suitable name at this stage to avoid unnecessary edits later.

After you enter the component name, two Lua scripts will be generated and automatically open in Visual Studio Code for further editing:
{ComponentName}.luais intended for implementing the runtime logic.{ComponentName}.editor.luais designed to define the Property window fields.
Anatomy of script files
The {ComponentName}.lua file has the following content by default:
script.OnStart(function ()
    ---Initialize the component here.
end)

script.OnUpdate(function ()
    ---Implement the component's update logic here. This function will be called once per frame.
end)
The OnUpdate function callback is where you place code to handle the frame update for a YahahaObject, managing actions such as movement, trigger events, and processing user input throughout the gameplay. To ensure optimal performance, it is crucial to set up variables, read preferences, and establish connections with other YahahaObjects before the game begins. The OnStart function callback is invoked before gameplay starts, making it an ideal location for initialization tasks.
Each time you attach a component to a YahahaObject, a new component instance is created, operating within an independent sandbox. This sandboxing prevents interference between identical components attached to different game objects, ensuring smooth and reliable performance.
The default content of the {ComponentName}.editor.lua file is as below:
local fieldDefs = {
    ---Define your component fields in the Properties window.
    {
        name = "moveSpeed",
        type = "Vector3",
        label = "Move Speed",
        hint = "Specify the move speed of the object",
        default = Vector3(1, 0, 0)
    }
}
script.DefineFields(fieldDefs)
The provided code defines a custom field for a script component using a local variable called fieldDefs, which contains the field definitions in a table format.
A single field is defined with several attributes: the name is "moveSpeed," indicating its internal identifier; the type is "Vector3," specifying the data type; the label is "Move Speed," which serves as the display name in the Properties window; the hint offers a brief description ("Specify the move speed of the object"); and the default value is set to Vector3(1, 0, 0), representing a default movement direction.
The code concludes with a call to script.DefineFields(fieldDefs), which registers these fields with the YAHAHA Studio script system, making them accessible and editable in the editor's Properties window. This structure allows developers to create customizable components with intuitive interfaces, enabling users to easily adjust properties without directly modifying the script.
Controlling a YahahaObject
As noted above, a script only defines a blueprint for a Component and so none of its code will be activated until an instance of the script is attached to a YahahaObject. The script instance looks much like any other component in the Property window:

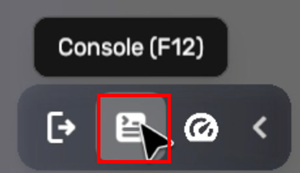
Once attached, the script will start working when you enter Play Mode and run the game. In Play Mode, you should see the debug log in the console of the bottom toolbar.
