Games
After you finish your making and save the change, you can publish your Project as a game.
Publishing a project
Publishing a project makes it publicly available to the Yahaha community. Once published, your project can be found in the Play section on YAHAHA Desktop (Desktop), where any Yahaha user can access, play, and share your game. This not only helps attract a larger player base but also serves as the first step toward distributing your game beyond Yahaha, potentially reaching platforms like Steam and Itch.io.
Prerequite: complete cloud build
If your project contains imported assets, before publishing it, make sure it has been saved and that the cloud build process is complete. Cloud Build compiles, builds, and packages all imported assets—such as scripts, model files, and more—enabling seamless access across devices through your Studio account.
Once the build is finished, you can either publish these assets to the Asset Library or share your entire game with the community.
Initiating cloud build
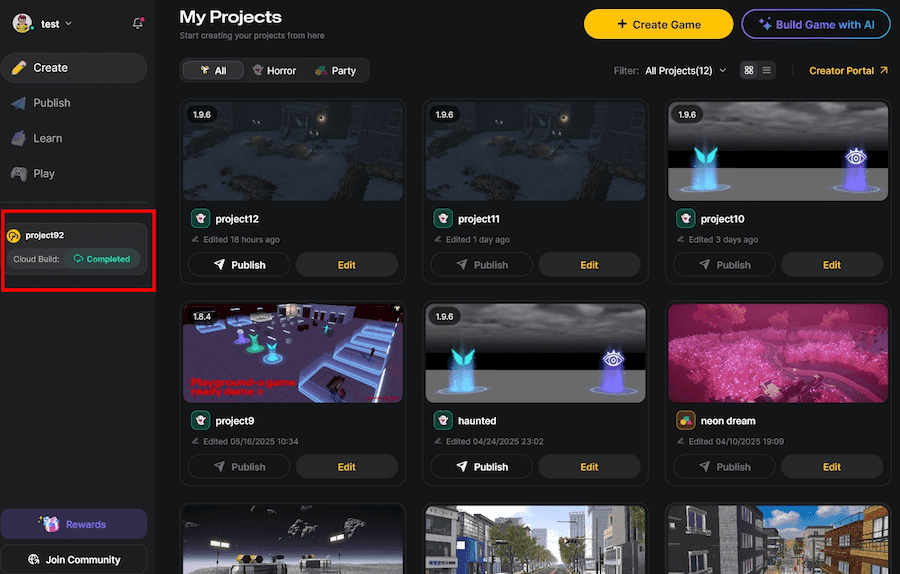
When you save your project with imported assets, the automatic cloud build process is triggered. Each imported asset initiates its own cloud build. To track the progress of your build:
- Status Window: Check the status window located on the right side of the Desktop. You can also click this window to open the project details page.
- Project Details: Alternatively, click on the project card to open the details page.
Each imported asset will trigger a cloud build. The build status will update through Waiting, Building to Finished. The Finished status remains visible for one day before it disappears.


Troubleshooting Cloud Build
If the cloud build fails, try again later if the issue is due to network errors. For persistent problems, contact our support team for assistance. Note that the number of assets in your project affects the build speed: more assets result in a longer build time.
Publishing steps
To publish your project:
-
Go to Create>Projects to find your Project.
-
Hover over the Project and click Publish.
-
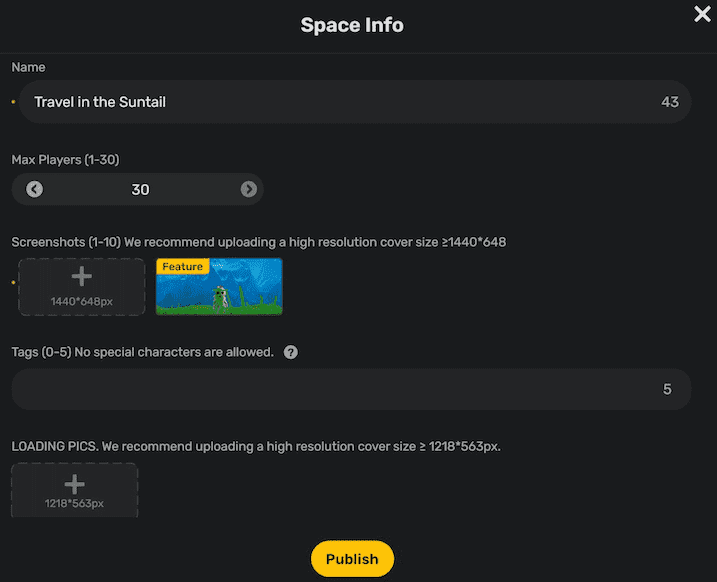
Edit the game information, then click Publish to publish the Project:
-
Name: The name of the Project.
-
Max Players: The maximum number of players allowed in the Project.
-
Screenshots: The screenshot(s) of the Project. Between 1 and 10 screenshots of the Project can be added with a resolution higher than 1440X648.
-
Tags: The tag(s) of the Project. No more than 5 tags can be added and special characters are not allowed in the tags.
-
LOADING PICS: An image cover for the Project with a resolution higher than 1218X563.
-
LOADING TIPS: Customizable tip(s) displayed to users upon loading the Project. You can add up to five tips, with each tip having a maximum character limit of 100.
-
Description: A brief description of the Project, between 0 and 500 words.
infoIf you used any assets from Asset Library, you will be asked to pay for them before publishing the Project. In our tutorial, the bridge model is a free asset, so we can purchase it successfully with no charge.
-
Sharing a Project
To share a published project:
-
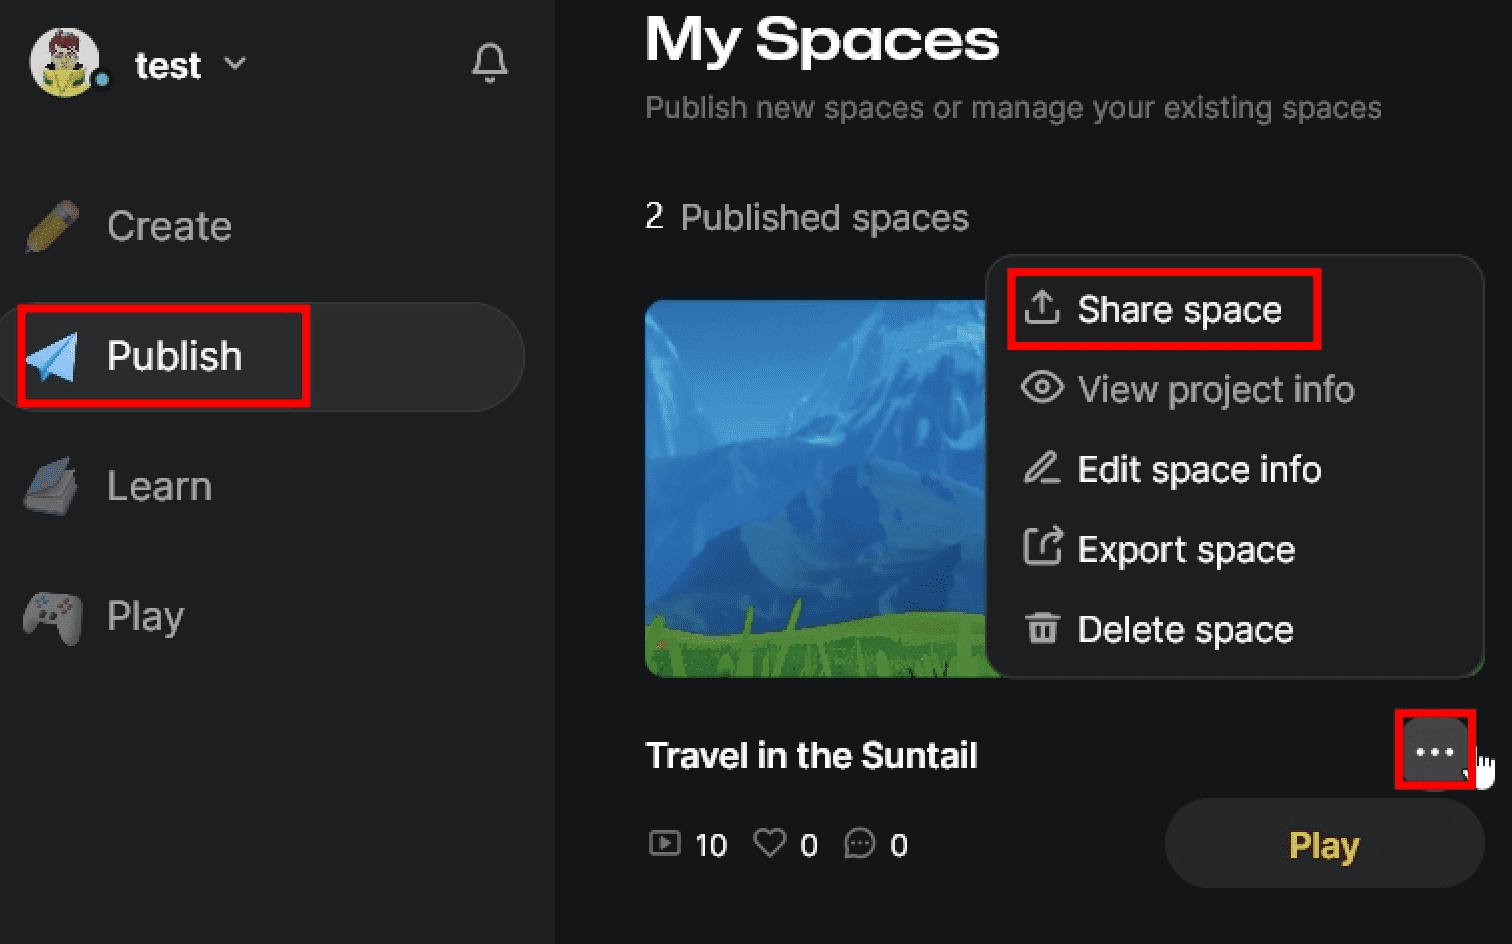
On Desktop, go to Publish and find your project.
-
Click the More button and select Share space. The project link will be copied to your clipboard. You can then share this link with friends. They can open the link in their Yahaha Desktop or App.
Updating a published Project
To update a published project, do either of the following in Desktop:
-
Method 1:
-
Click the avatar picture in the bottom left corner to open MY PROFILE.
-
Find the Project in the MY SPACES section and click it to enter the Space details page.
-
Click the Edit this Space button to start editing the Space information. Once you complete editing, click Save.
-
-
Method 2:
-
First, make sure you choose the right game kit in the top left corner.
-
Go to Create > Projects, hold the pointer over any Project, and click Publish.
-
In the Publish window that appears, find the Project in the UPDATE ASSOCIATED SPACES section if you clicked the exact Project in the last step, or in the UPDATE OTHER SPACES section if you chose a different Project.
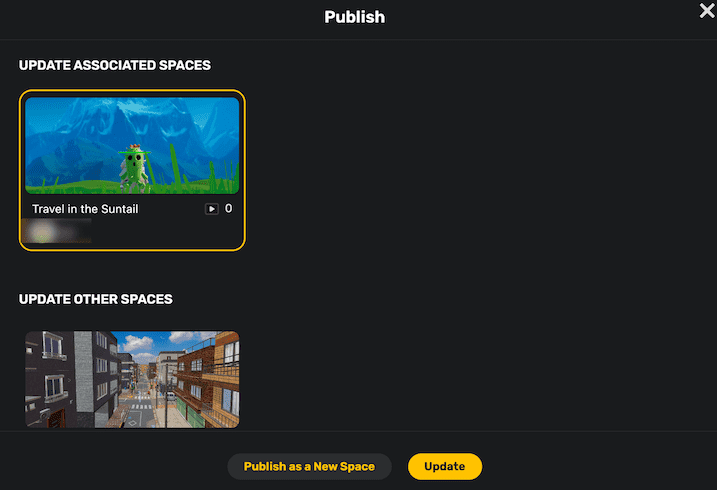
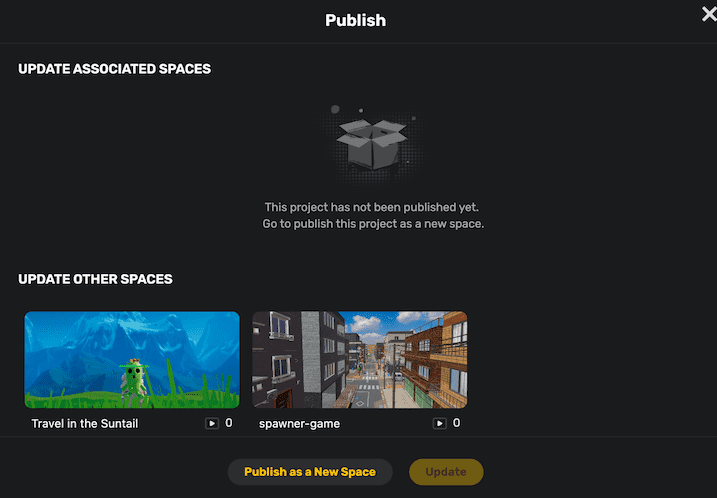
- After you select the Space, click Update to apply the changes. If you prefer to publish the edited Space as a completely new one, click Publish as a New Space.
-
Deleting a Project
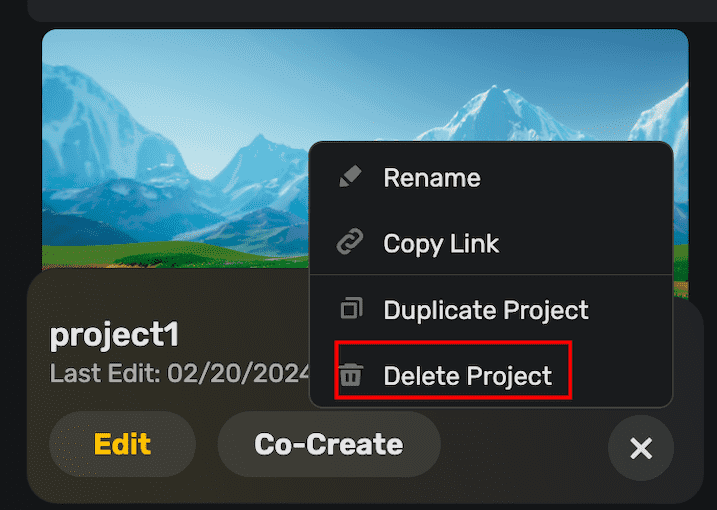
If you want to delete a Project, on Desktop through Create > Projects find the Project to delete, click the More button, and select Delete Project.
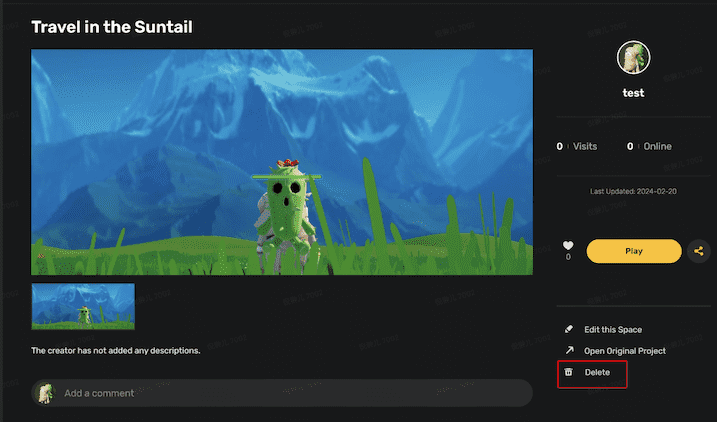
However, to delete a Space that you have published, find the space by visiting My Profile>MY SPACES, then click Delete.
Distributing a project
Once you publish a project, you can export the published version as a standalone file and release it on gaming platforms like Steam or Itch.io.
Exporting a project as a standalone
To export your published project as a standalone file:
-
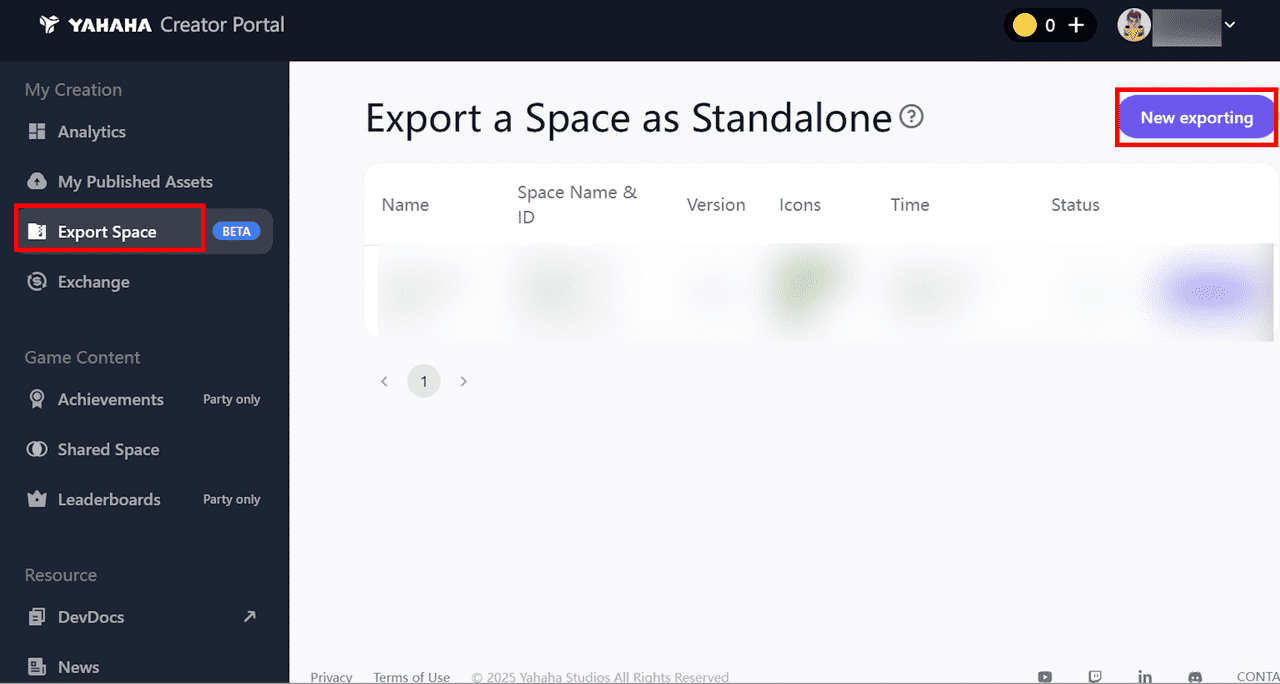
In Creator Portal, go to the My Creation section and click on Export Space. Then, select New Exporting to open the project information window.
-
In the Complete Exporting Info window, fill in the following information:
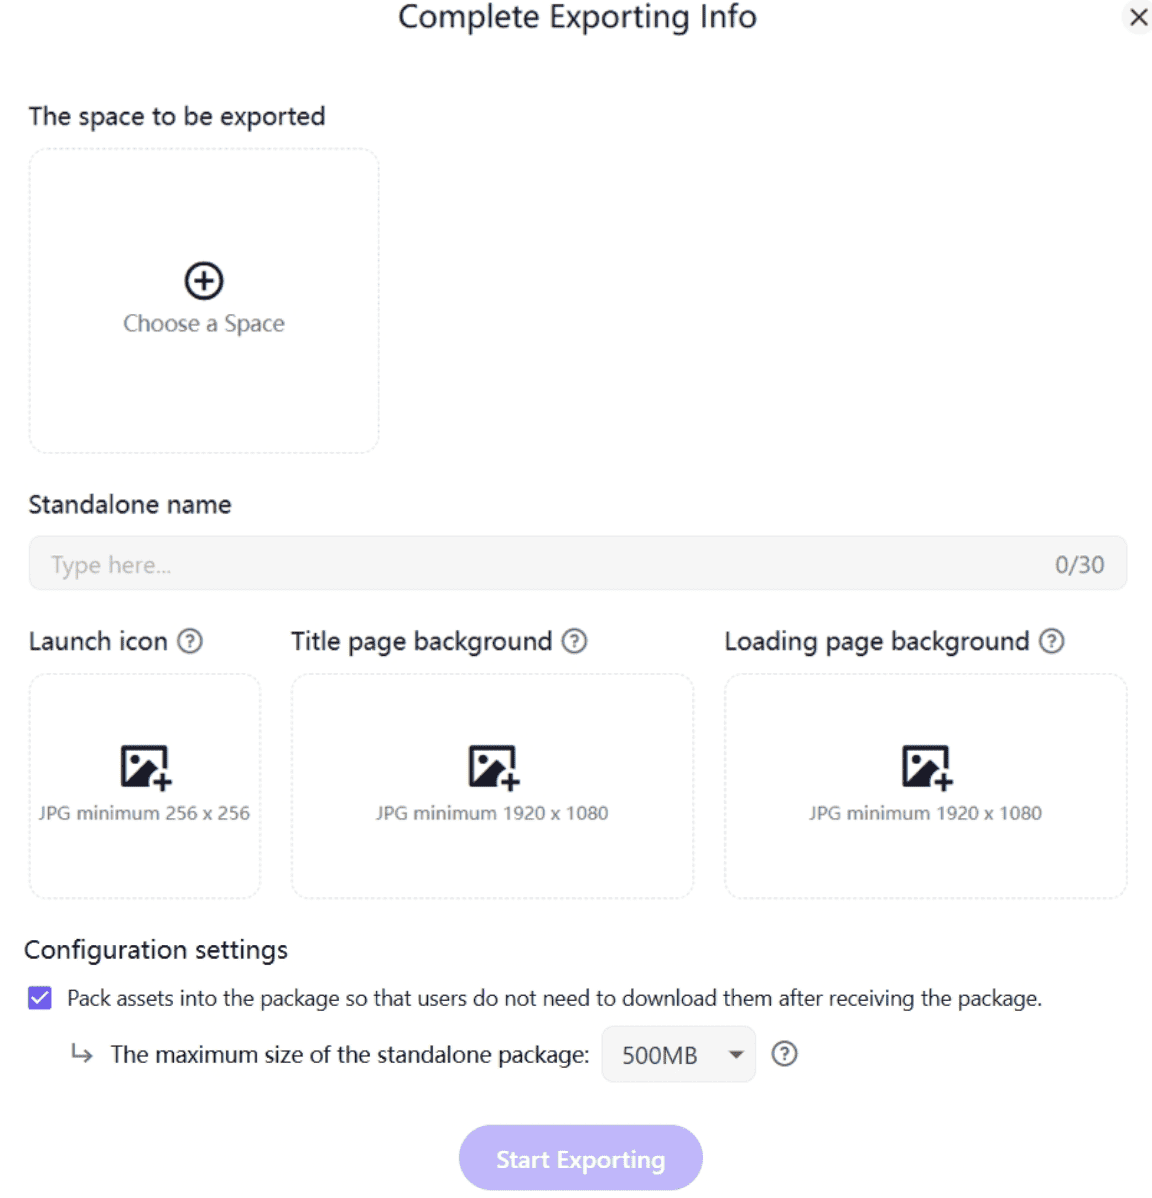
- The space to be exported: Choose a published space and select Export It.
- Standalone name: Enter a name for your standalone file. It should be no more than 30 characters and only include letters, numbers, dashes, and underscores.
- Launch icon: The icon for your standalone file. Upload a JPG file with a minimum resolution of 256 x 256 pixels.
- Title page background: The title screen of your game. Upload a JPG file with a minimum resolution of 1920x1080 pixels.
- Loading page background: The loading screen of your game. Upload a JPG file with a minimum resolution of 1920x1080 pixels.
- Configuration settings:
- Pack assets into the package...: Select the checkbox if you want to pack some or all assets into the standalone file to reduce game loading time.
- The maximum size of the standalone package: Choose from 500MB, 1GB, 1.5GB, 2GB, or NO LIMIT for your standalone file. This size limit applies only when the checkbox is selected.
-
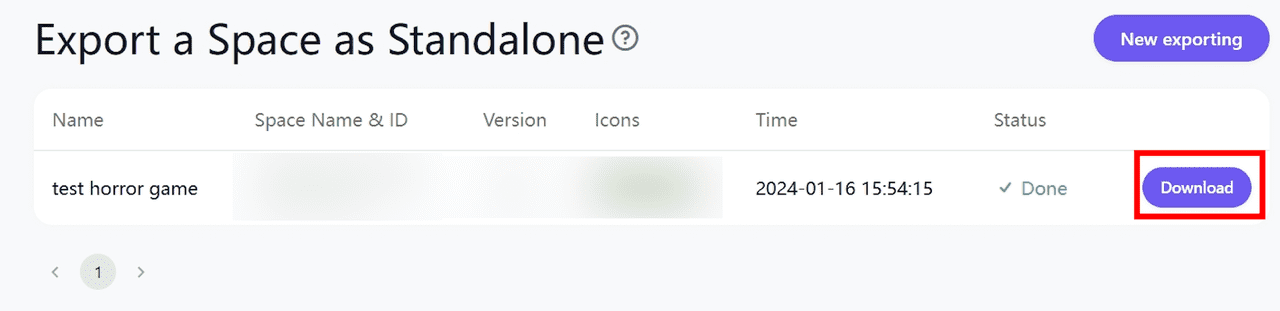
After filling in all project info, click Start Exporting to package your project.
-
Once the project is fully packaged, click Download to save it as a zipped file.
Upload a project to more platforms
When downloading the packaged project, a dialog with distribution instructions appears. You can choose Upload to Itch.io to visit the website directly, or view a video guide on how to distribute it on itch.

Related resources
To watch a video tutorial on packaging as standalone: