Prefabs
In YAHAHA Studio (Studio), prefabs serve as templates for YahahaObjects, allowing you to maintain consistent components and property values across your Project. By reusing prefabs, you can easily create and keep multiple prefab instances in sync within your Project.
Creating prefab resources
To create a prefab, follow these steps:
-
Select a YahahaObject in the scene.
-
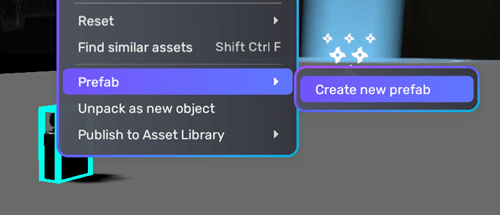
Right-click the YahahaObject and choose Create new prefab.
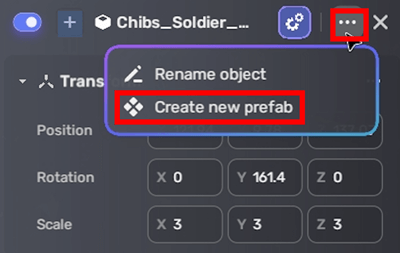
Alternatively, click the More icon in the prefab's properties window, then select Create new prefab.
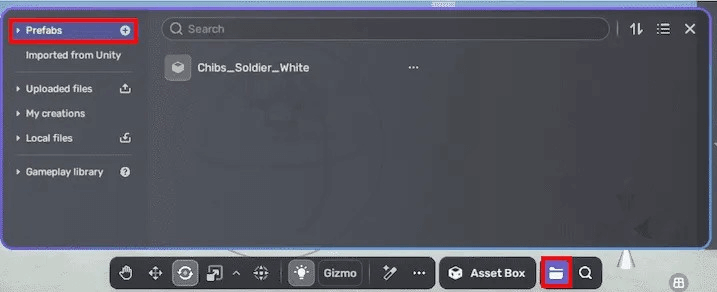
Once you create a prefab successfully, you can find it via My Resource > Prefabs.
Creating prefab instances
To place a prefab in your scene, locate it via My Resource > Prefabs, then click it to add an instance to your scene. This instance shares components and property values with the prefab resource. Applying prefabs saves you time to use a resource repeatedly, say, a soldier model across the scene.
To instantiate prefab content at runtime, follow these steps:
- Enable the Spawn used switch for the prefab you wish to instantiate.
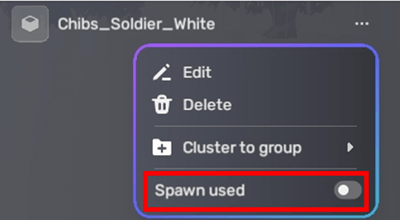
- Use an appropriate YaEntity Spawn method to create instances with varying levels of control over position, rotation, and scale during runtime. This allows for dynamic generation of prefab instances within your scene based on your desired parameters.
Editing prefabs
Editing a prefab resource means you're modifying its root, which is a regular YahahaObject. As a result, all instances of the prefab within the current scene will be automatically updated with these changes.
To edit the root of the prefab, take the following steps:
-
Find the prefab via My Resource > Prefabs.
-
Click the More button next to the prefab, and select Edit.
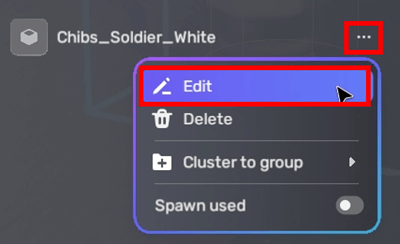
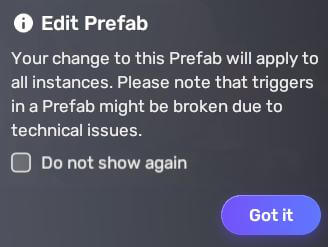
- In the confirmation dialog, click Got it to continue.
- In the properties window on the right side, edit the prefab properties, including the color, material, collider, and more components.
Deleting prefabs
Deleting a prefab resource will cause all instances of the prefab in the scene to lose their connection to the prefab. To delete a prefab, locate it in My Resource > Prefabs, click the More button next to the prefab, and select Delete. This action will affect all instances of the prefab within your scene.
Grouping prefabs
Organizing prefabs into groups allows for faster navigation and categorization. Create prefab groups such as Characters, SceneObjects, and Environment to optimize prefab management and quickly locate specific prefabs during game creation.
To create a group, go to My Resource and click the + icon next to Prefabs.
To add prefabs to a group, take the following steps:
-
Go to My Resource > Prefabs.
-
Locate the prefab and click the More icon next to it.
-
Select Cluster to group, then choose Create new group and cluster to add the prefab to a new group, or select an existing group if any.
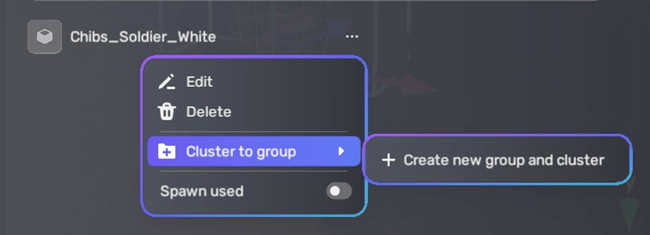
Once added to a group, the prefab will be displayed both under the group and under the Prefabs section in My Resource. Note that deleting a group will not remove the prefabs within the group from the Prefabs section.
Unpacking prefab instances Unpacking a prefab instance returns it into a YahahaObject. To unpack a prefab instance in the scene, select the instance and in the prefab's properties window, click the More button, then select Unpack Prefab.
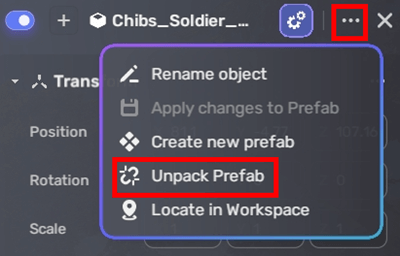
When you unpack a prefab instance, the resulting YahahaObject no longer has any link to the former prefab resource, which also will not be affected.