Lighting
The horror game template supports a lighting system that includes three types of lights: point lights, spotlights, and directional lights.
Point lights
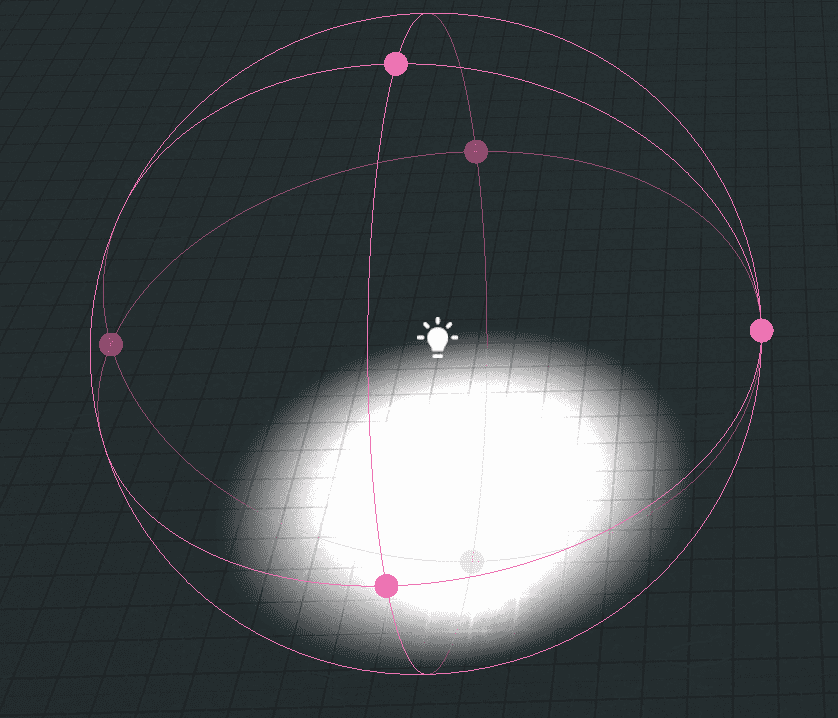
Point lights are lights that radiate in all directions from a specific point in space. They are commonly used to represent light sources such as light bulbs, torches, or candles. Point lights can be used to create a variety of lighting effects, from soft and diffuse to sharp and focused.
Spotlights
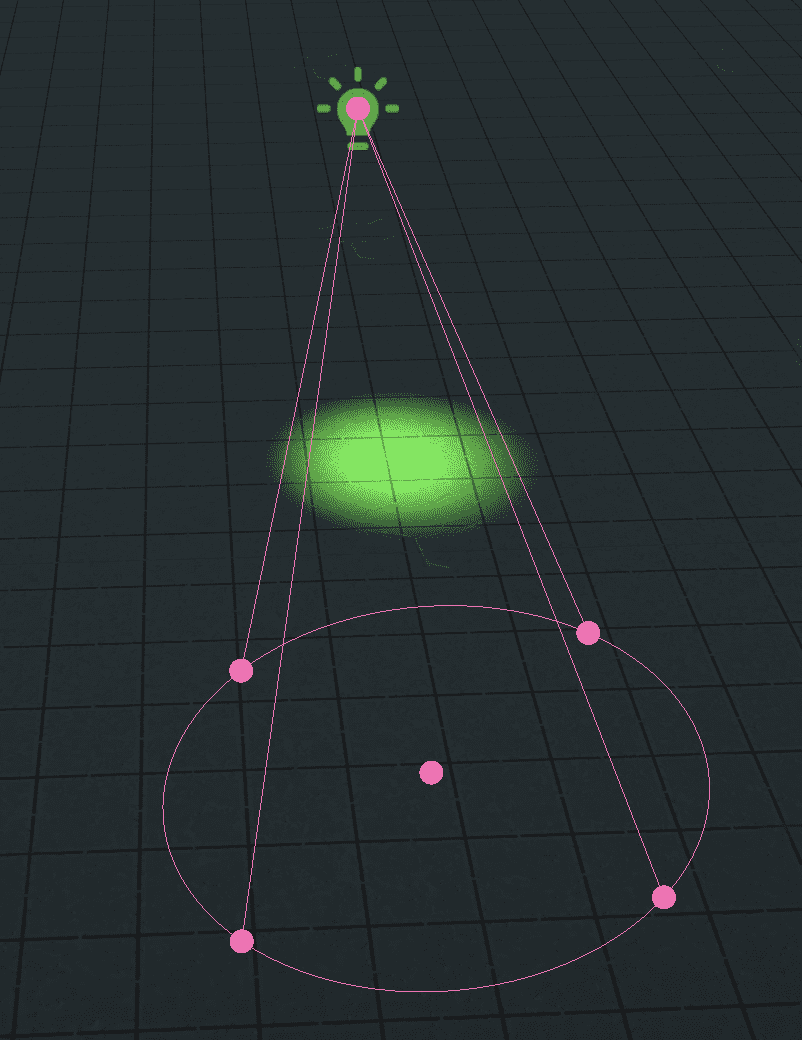
Spotlights are lights that emit light in a cone-shaped beam, much like a real-world spotlight or flashlight. They are commonly used to create focused beams of light, such as a spotlight on a stage or a flashlight beam in a dark room. Spotlights can be adjusted to control the width and intensity of the light beam, as well as the direction in which the beam is pointing.
Directional lights
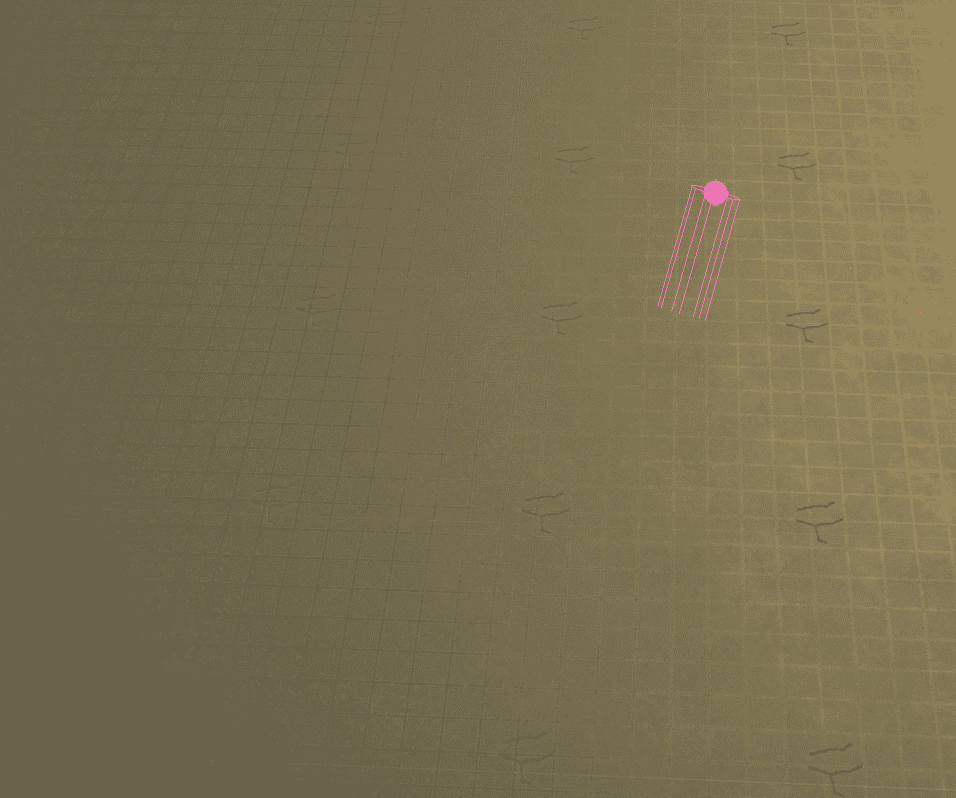
Directional lights are lights that emit light in a single direction, simulating light that comes from an infinitely distant source. They are commonly used to represent sunlight, as the sun is so far away that its light can be considered directional. Directional lights can be used to create a sense of global lighting or to simulate light that is coming from a specific direction, such as a sunbeam streaming through a window.
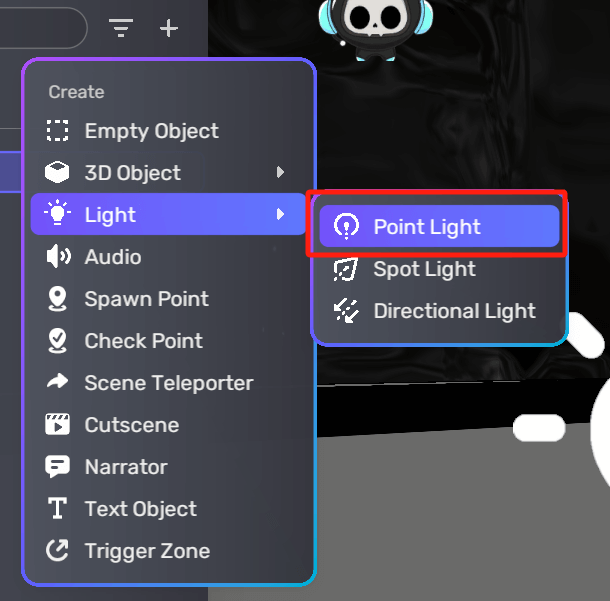
To create a light, in Scene Explorer, click the + icon, choose Light, and then choose the desired light type.
To edit a light, select the light and click the More icon to open its properties window. In the panel, continue to edit the Light component.
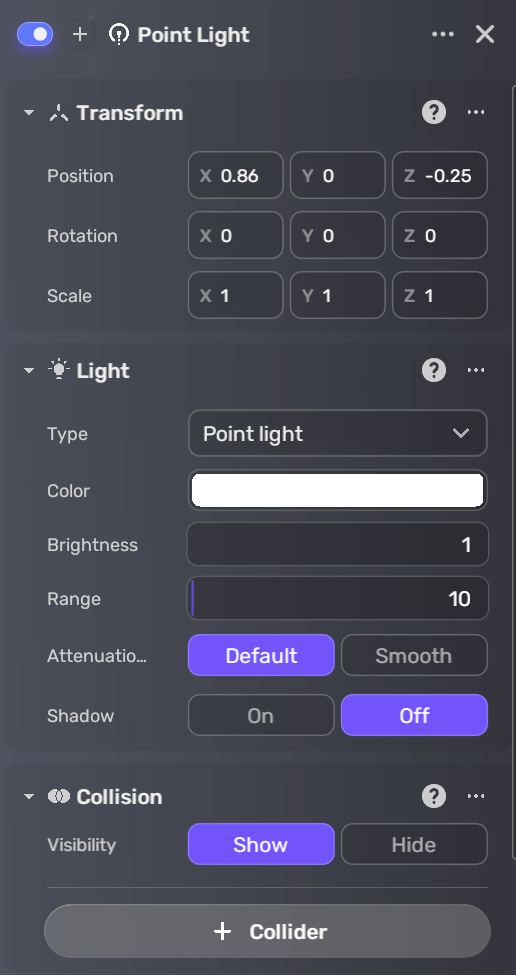
Here are the parameters of the Light component:
| Property | Description |
|---|---|
| Type | The type of light: Point Light, Spot Light, or Directional Light. |
| Color | The color of the light emitted by the point light. You can choose from several formats to specify the color, including a color wheel, a color picker, RGBA, RGB, RGB 0-1, or HEX. |
| Brightness | The intensity or strength of the point light's light. Ranges from 0 to 1000. Default: 1. |
| Range | The distance over which the point light's light will be visible. Beyond this range, the light will not be rendered. Ranges from 0 to 1000. Default: 10. This option is visible when Type is set to Point Light or Spot Light. |
| Angle | Determines the focus of the light beam emitted by the spotlight. Ranges from 1 to 179.99 degrees. Default: 30 degrees. This option is only visible when Type is set to Spot Light. |
| Attenuation mode | Determines how the light intensity is calculated for each point within the lighting range. For most lighting scenarios, select Default. If you want to maintain the light's penetration, choose Smooth. This option is only visible when Type is set to Spot Light or Point Light. For more information, see Light attenuation. |
| Shadow | Determines whether or not the directional light cast shadows on objects in the scene. Disabled by default. This option is only visible when Type is set to Directional Light. |
Light attenuation
YAHAHA Studio (Studio) provides two built-in light attenuation modes for point lights and spotlights: Default and Smooth. These modes define the model for distance-based attenuation of light intensity, determining how the light intensity is calculated for each point within the lighting range.
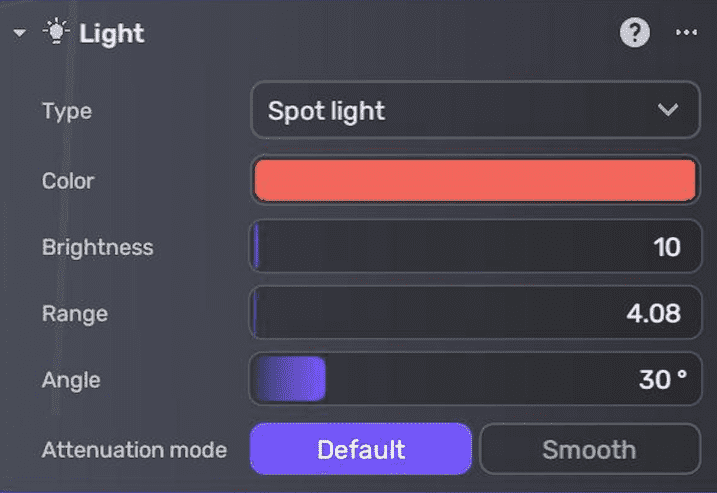
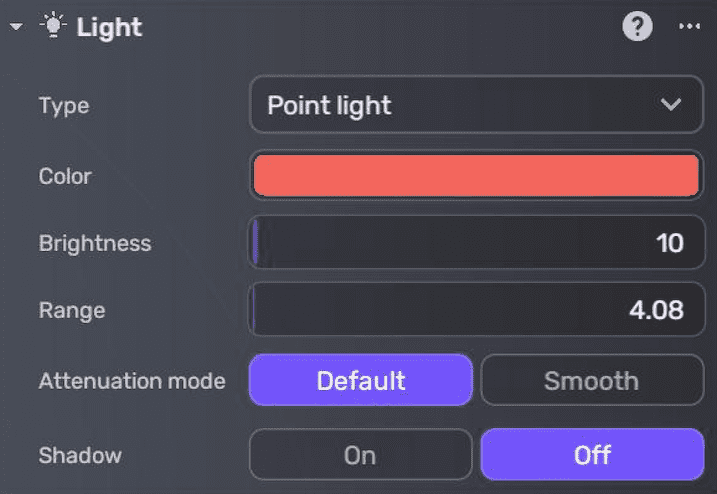
Attenuation modes
Formulas
The attenuation modes use the following formulas:
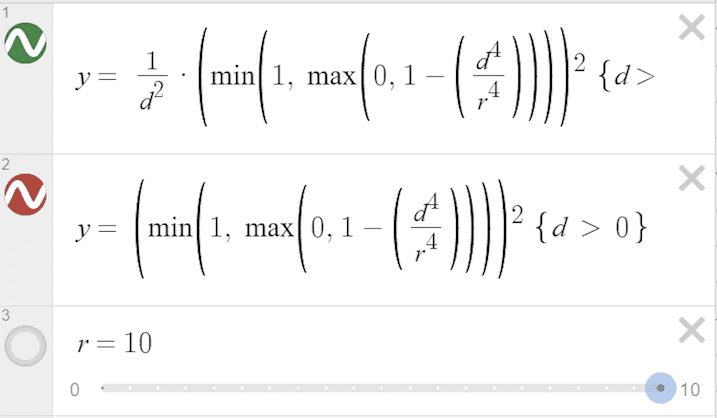
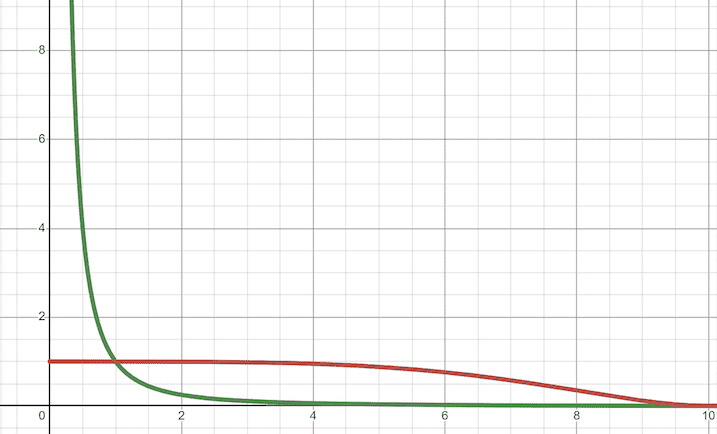
Default attenuation mode (green) and Smooth attenuation mode (red)
Where:
- d is the distance from the light where the light intensity gets measured.
- r is the current setting of the "Range" field.
- y is the calculated light attenuation coefficient.
Graphic summary
Below is a graph summarizing the attenuation type, with the green curve representing the Default mode and the red curve representing the Smooth mode:
Display comparison
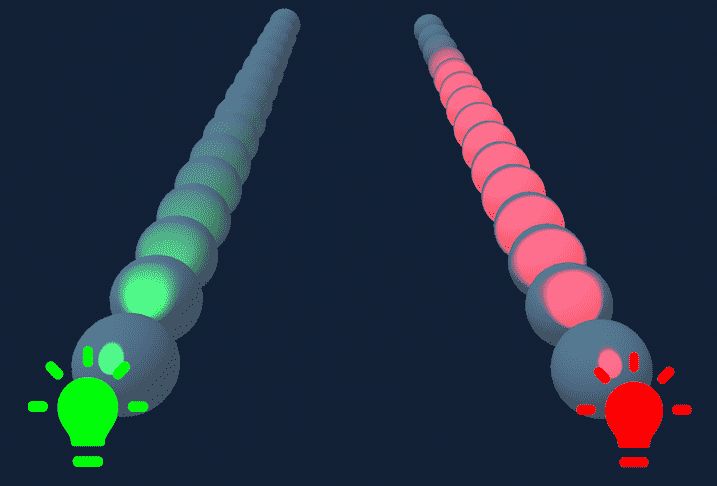
Taking spotlights as an example, when both lights have identical brightness, range, and angle values, the spotlight with the Default attenuation mode has higher light intensity at close distances and experiences faster attenuation with increasing distance. Conversely, the Smooth attenuation mode exhibits a more gradual decay of light intensity.
Here's a visual comparison of the default attenuation mode in green light and the smooth attenuation mode in red light:
Usage
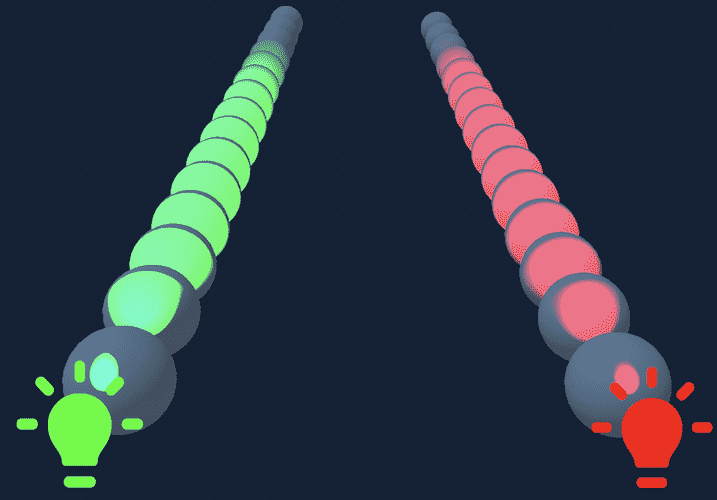
The Default attenuation mode is suitable for most lighting scenarios. However, the Smooth attenuation mode is a better choice when the light needs to maintain its penetration, such as in the case of flashlights or high-beam car headlights. Note that when using the Smooth attenuation mode to achieve the same lighting effect at greater distances, a lower brightness value may be required, while simultaneously avoiding overexposure in closer areas.
In the example below, the green spotlight uses the Default attenuation mode with a brightness value of 800, while the red spotlight uses the Smooth attenuation mode with a brightness value of 10:
Examples
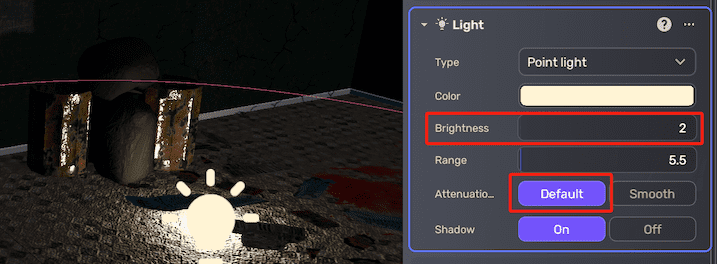
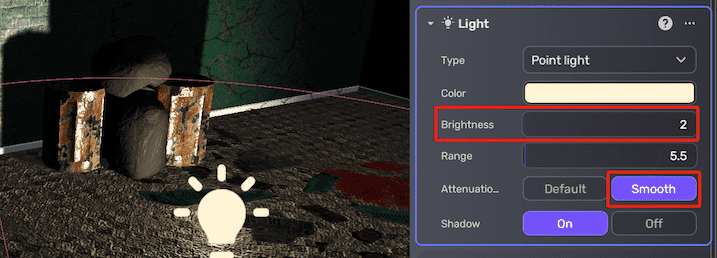
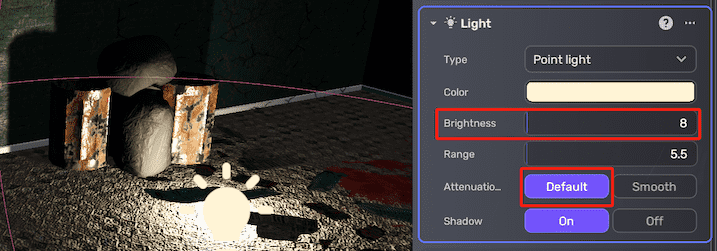
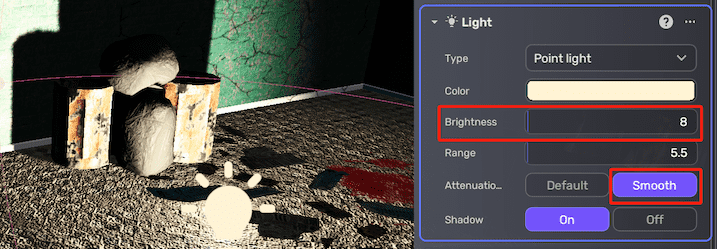
The following examples demonstrate how different attenuation modes affect lighting performance.
When the point light's brightness value is set to 2:
| Default | Smooth |
|---|---|
 |  |
When the point light's brightness value is set to 8:
| Default | Smooth |
|---|---|
 |  |