Cutscenes
Cutscenes are animated sequences that advance the story and immerse players in the narrative. The horror game kit supports cutscenes, allowing users to arrange different elements that make up a scene, such as activation events, character animations, audio clips, and camera angles, in a timeline editor.
-
Activation track controls when to activate a clip.
-
Animation Track enables you to create an animation clip or add existing animation clips and make edits. For creating and editing animations in Horror Game Kit, it's recommended to use Animation Track to achieve the desired results.
-
Audio Track allows you to add existing audio clips and make edits.
-
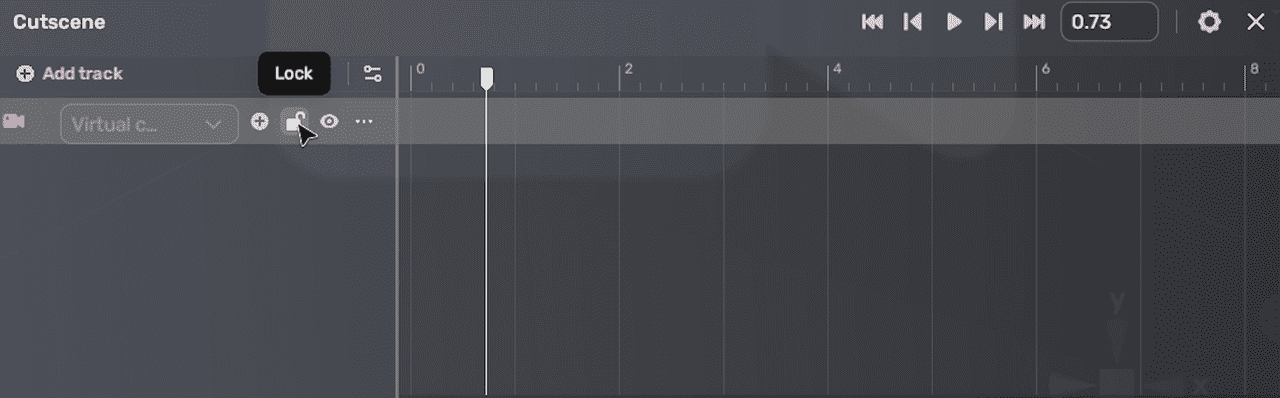
Virtual camera track allows you to control camera views.
This enables precise control over the timing, sequencing, and blending of various elements to create compelling cinematic content.
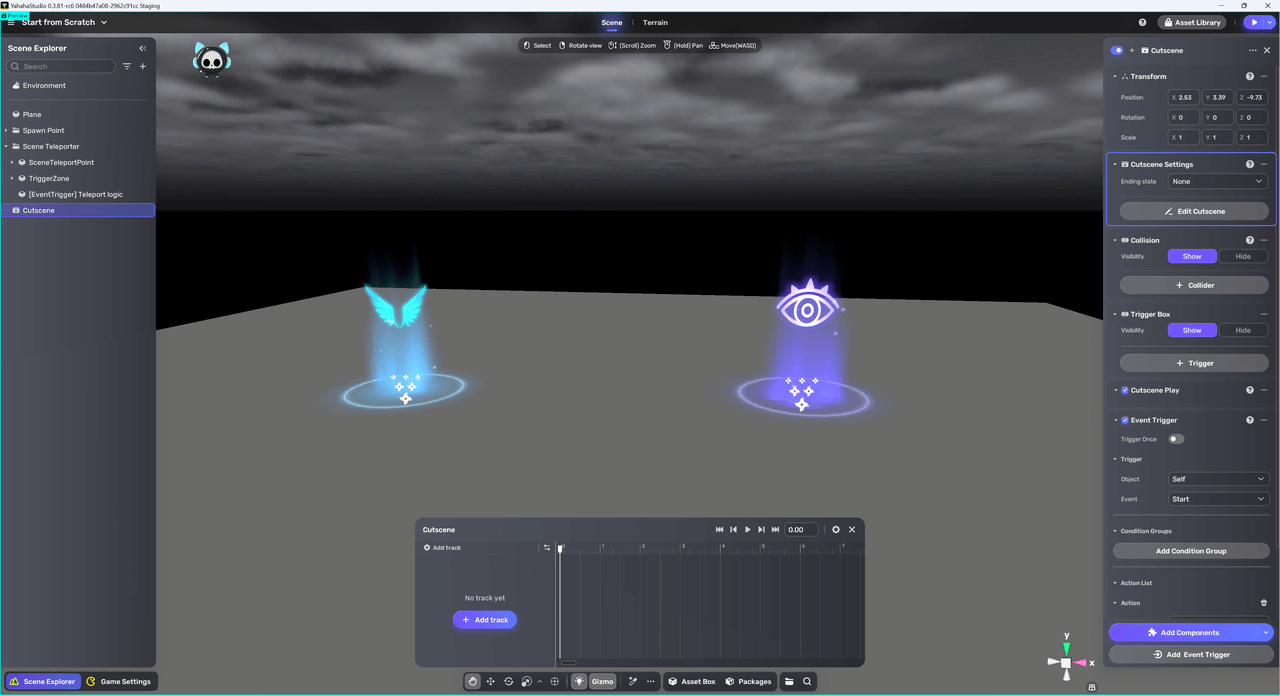
To use cutscenes, you create cutscenes, add timeline tracks, and then configure cutscenes, which includes setting the Event Trigger component and the ending state.
Creating cutscenes with timeline
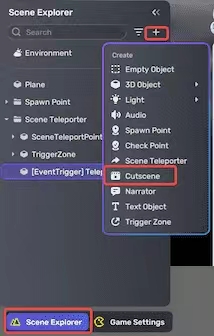
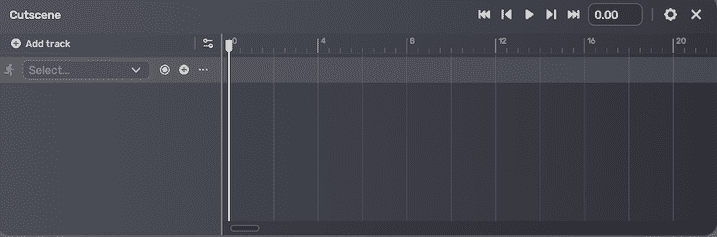
To create a cutscene, go to Scene Explorer, click the + icon, and choose Cutscene.
In the newly created cutscene, you will find the timeline editor in the center and its properties window on the right.
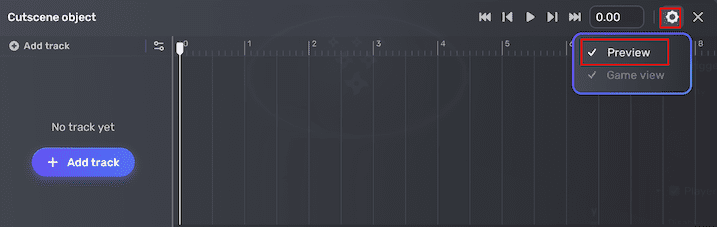
Note: When the timeline editor is open, you enter a Preview interface. In this interface, any changes made to objects that animation tracks are referencing are only for preview purposes and will not affect their current status in Scene Explorer. To exit the Preview interface, close the timeline editor or click the gear icon and unselect Preview on the editor.
Creating timeline tracks
With timeline tracks, creators manage the cutscenes with animation tracks, audio, and camera view to make up a scene. Different track types can be used together in one timeline to create complex and immersive scenes.
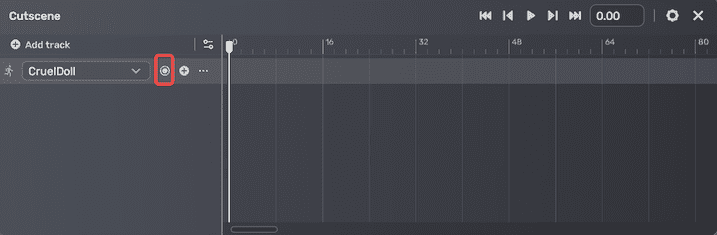
To create a timeline track, click + Add track in the timeline editor and select a type. Then you get an empty track of the desired type.
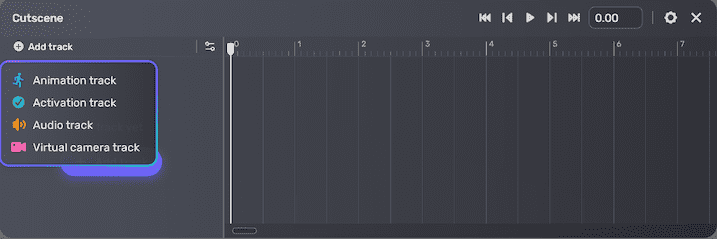
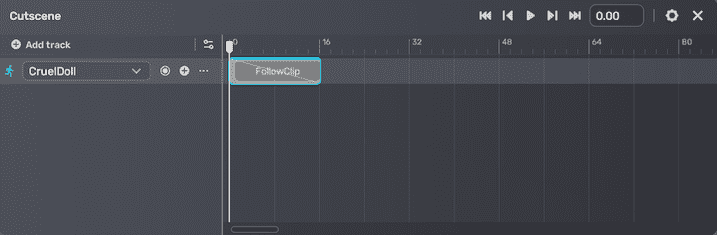
Animation tracks
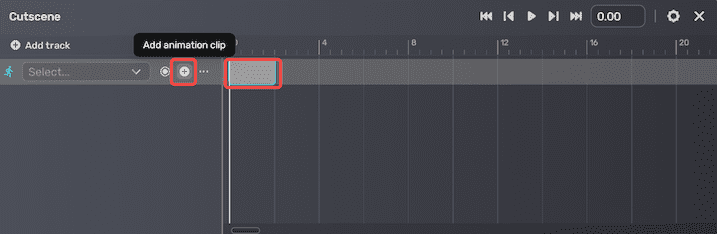
Select Animation track and you get an empty animation track on the timeline.
You can add two types of animation clips to the tracks: pre-recorded clips from Asset Library, or clips that you create yourself by keyframe recording the movements of objects.
To use pre-recorded animation clips from Asset Library to animate your humanoid models:
-
Click the + icon to add an animation clip.
-
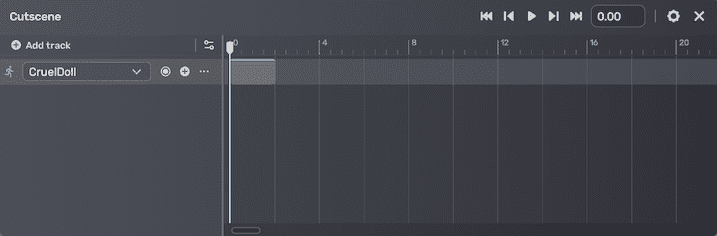
Drag the model to be animated to the track. You can continue to move the animation clip to the desired marker.
-
When you select the animation clip added, the Recorded window appears. In the Recorded window, choose the animation clip and set how to play the clip. If you're using a generic model, you should use the local animations that come with the model.
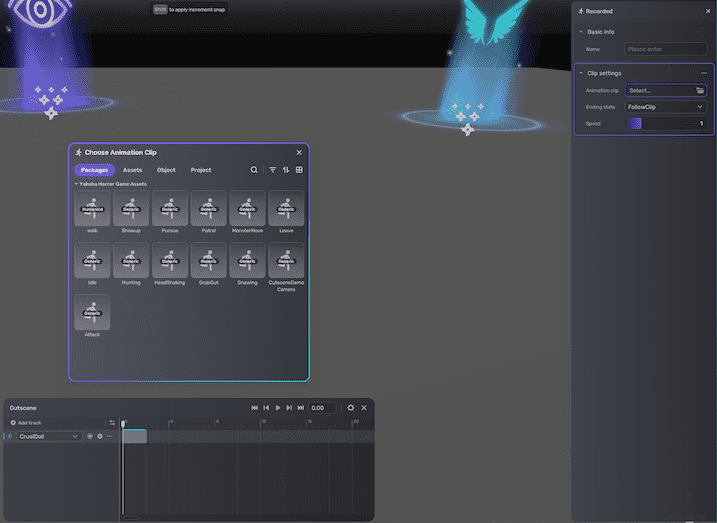
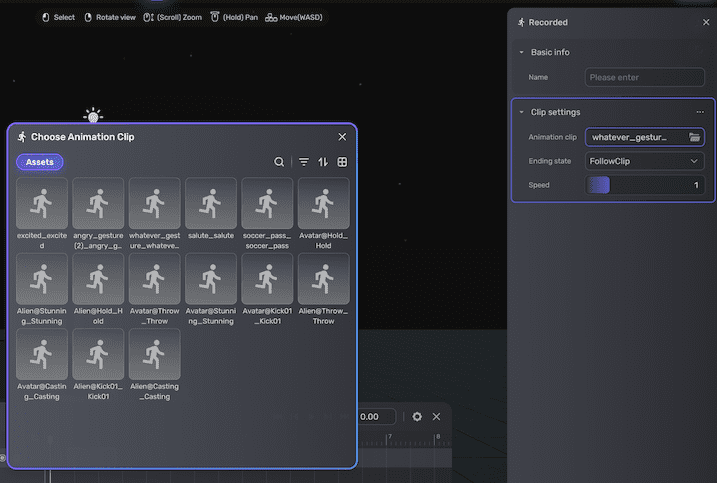
| Property | Description |
|---|---|
| Name | A unique identifier for the animation clip, displayed on the track for quick management. If left blank, it displays the animation file name. If neither is specified, the clip defaults to 'Animation'. |
| Animation clip | The animation clip from Asset Library that plays when triggered. |
| Ending state | Determines how it will behave once it reaches the end of the animation.
|
| Speed | The playback speed of the selected animation clip. Ranges from 0.01 to 5. Default: 1. |
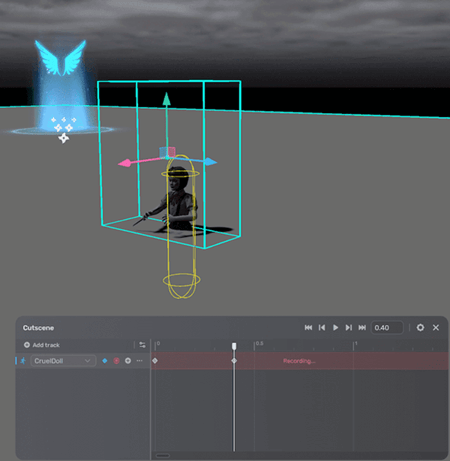
To create your animation clip by keyframe recording the movements of your model:
-
Drag the model to be animated to the empty track and click the dot to start recording.
-
To animate the model's movement, you keyframe its transform, rotation, and scale. For example, to record the CruelDoll's turn to face a different direction over 0.4 seconds, you move the playhead to the 0.4-second mark.
-
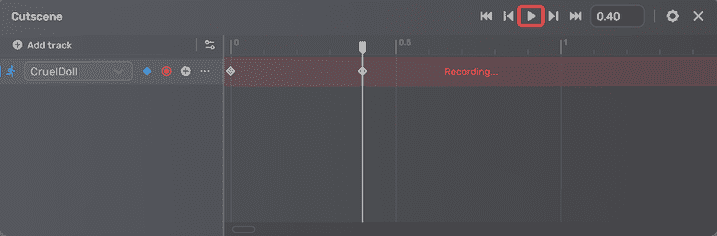
To preview, click the Play button or drag the playhead to move it between two points along the timeline.
-
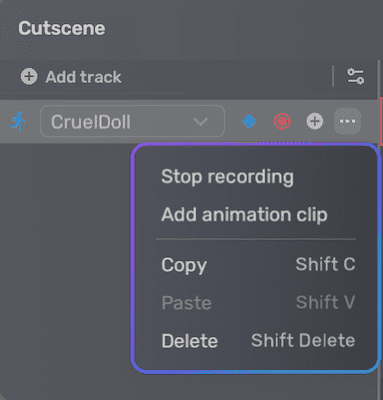
Click the red dot to stop recording. Alternatively, click the More button, then select Stop recording.
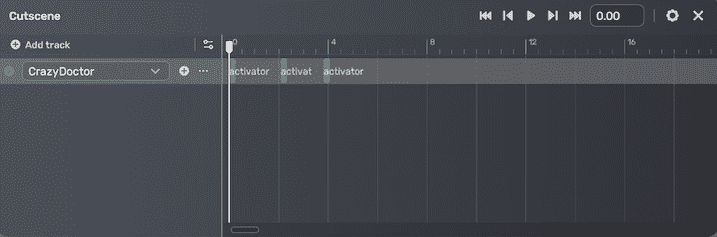
Activation tracks
Activation tracks enable the appearance or disappearance of objects at specific points by adding keyframes and adjusting their status.
To create an activation track:
-
After selecting Activation track, you get an empty activation track.
-
Add a model to the scene.
-
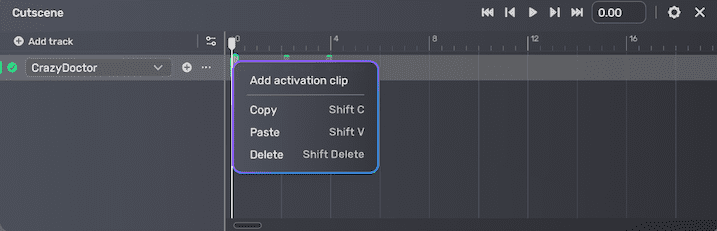
Drag the model to the track. Then click the + icon to add an activation clip.

-
In the properties window, enter a name for the clip for quick management (if not specified, it defaults to 'Active') and select whether to activate the model at the time mark. This will determine when the model becomes visible and starts animating.
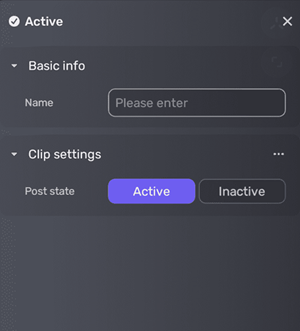
Note: Setting Post state to Inactive disables an object's collider and mesh. However, if you want to disable only the mesh or the collider, you can use an event trigger component instead.
-
Right-click on the clip and select Copy,then paste to the track. Repeat this process to create multiple keyframes in the timeline.
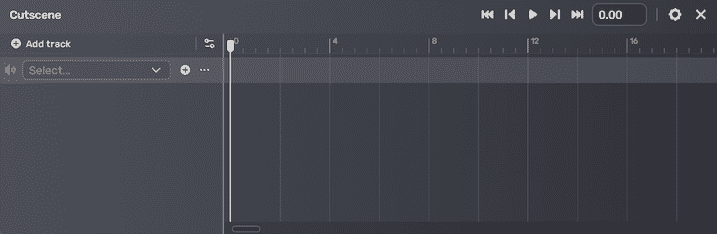
Audio tracks
Audio tracks allow an audio clip from Asset Library or that you upload to play at a certain point.
To create an audio track:
-
After selecting Audio track, you get an empty audio track.
-
If we want an audio clip to play when the player enters the trigger box of a ghost, we place the model CrazyDoctor to the scene.
-
Drag the model to the track and click + to add an audio clip. You can continue to drag the clip to the desired marker.

-
In the properties window, set the audio clip's properties.
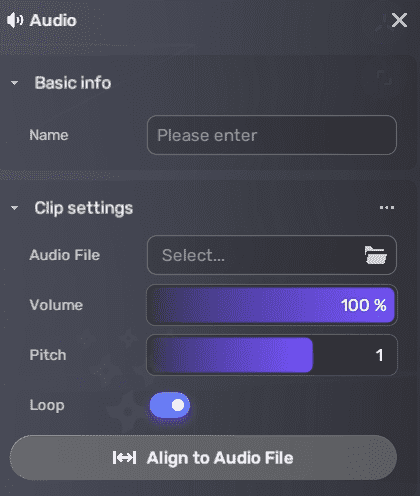 note
noteAll clip properties, except for the Name, can be copied, pasted, or reset by clicking the More button in the Clip settings section.
- Name: A unique identifier for the audio clip, displayed on the track for quick management. If left blank, it displays the audio file name. If neither is specified, the clip defaults to 'Audio Clip'.
- Audio File: Select the audio clip to play by choosing from the pre-recorded clips in Asset Library or by uploading your audio file. To upload a file, go to My Resource and select Uploaded files to begin uploading your audio in WAV, MP3, or OGG format. For more information, see Audio Importer.
- Volume: Controls the volume level of the audio clip. Ranges from 0 to 100% (default).
- Pitch: Controls the pitch of the audio clip. Ranges from -3 to 3. Default: 1.
- Loop: Enables continuous playback of the audio file within a clip. Disabled by default.
- When the audio file has fewer frames than the track:
- If Loop is enabled: the audio file loops continuously until the track ends, with remaining frames displaying the
Loopmessage. - If Loop is disabled: the audio file plays only once and does not extend beyond its length. Remaining frames display the
Holdmessage.
- If Loop is enabled: the audio file loops continuously until the track ends, with remaining frames displaying the
- When audio file has more frames than the track: any extra audio frames are ignored, whether the Loop toggle is on or off.
- When the audio file has fewer frames than the track:
- Align to Audio File: Automatically adjusts the clip's frame count to match the selected audio file's frame count. If the audio file overlaps subsequent clips, a prompt will appear. You must manually adjust those overlapping clips before reapplying this function.
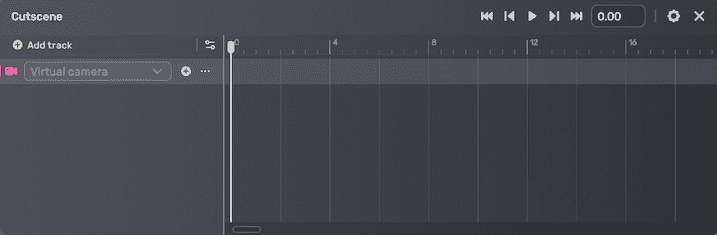
Virtual camera tracks
The virtual camera track shapes the player's point of view (POV) and enhances the visual storytelling in your horror game. In the horror kit, the main camera represents the default POV that players see. In contrast, a virtual camera track specifies the position and orientation that the main camera should move to, rather than provide additional cameras.
To create a virtual camera track:
-
After selecting Virtual camera track, you get an empty virtual camera track.
-
Click + to add a virtual camera. You can also drag the camera clip to the desired marker. When you click a camera clip, its view is displayed under the Game view.
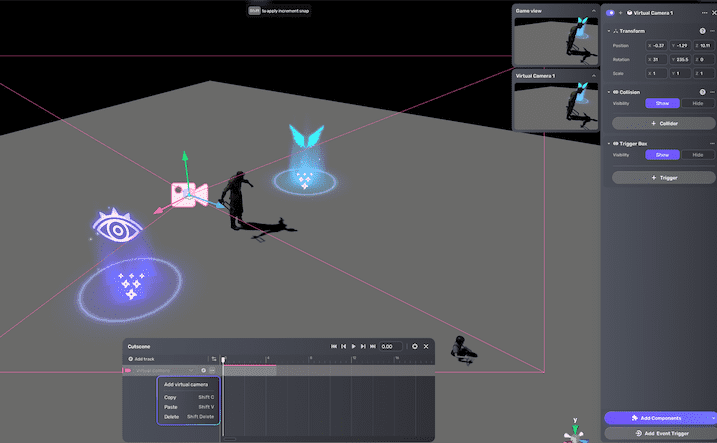
-
Select the new clip in the timeline and edit its properties in the properties window.
Property Description Name A unique identifier for the virtual camara clip, displayed on the track for quick management. If left blank, it displays the camera object name. Camera object Controls the player's viewpoint by allowing the selection of either the default camera or a custom virtual camera. You can click the Zoom to object  icon next to the camera object to highlight the object in the Scene Explorer and zoom in on it in the scene.
 - Main camera: The default camera used to provide the player's point of view (POV). This camera typically provides a standard, first-person view of the game environment.
- Virtual camera: A custom camera that can be positioned and oriented in specific ways to provide more control over the player's viewpoint. For instance, it might be used to offer a close-up view of a character or object, or to create a cinematic effect during a cutscene. New virtual cameras follow existing naming conventions and are assigned unique IDs within each cutscene. These IDs increment sequentially, filling any gaps that arise from deleted or renamed cameras. For example, if you have virtual cameras named Virtual Camera 1-10, and you delete Virtual Camera 8, the next new virtual camera you create will be named Virtual Camera 8. If you copy and paste this new camera, you will get Virtual Camera 8 (1), which indicates it is a copy rather than an original.
Follow Enable Controls whether to enable the camera to follow a specified object in the scene. Follow Object Determines a specified object for the virtual camera to follow. If the object moves, the POV dynamically follows. Offset The offset distance between the camera and the attached object. Look at Enable Controls whether to enable the camera to keep looking at a specified object in the scene. Look at Object Directs the virtual camera to focus on a particular object, allowing you to guide the player's attention to critical elements in the scene. FOV The field of view, controlling how much of the scene is visible. This is particularly useful for creating different visual effects and intensifying specific moments. Ranges from 30 to 60 degrees. Default: 60 degrees. Example of a main camera blended into a virtual camera both following and looking at a moving model:

Multiple tracks and clips
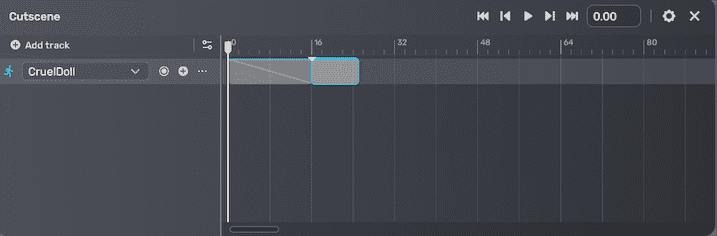
Blending two clips on the same track creates a smooth transition between clips. To achieve this, position a clip to overlap with an adjacent clip.
Attaching a clip to an adjacent clip results in an abrupt transition between them.
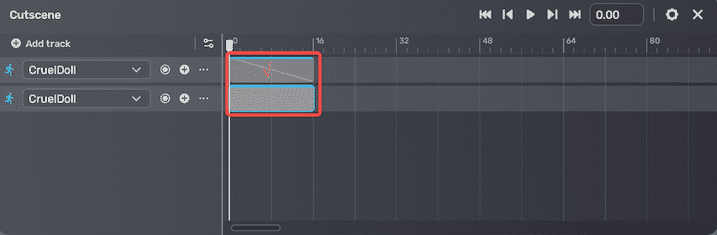
Multiple tracks on the same timeline will be played simultaneously.
The horror kit supports only one virtual camera track.
For animation tracks and activation tracks, if two clips of the same type control the same object at the same marker, and provide conflicting content, the clip on the first track overrides the clip on the second track. For example, if the first track contains a dancing animation clip, and the second track contains a running animation clip, the model will perform the dancing animation from the clip on the first track at the specified time.
Managing timeline tracks
You can lock/unlock and mute/unmute tracks in the timeline editor.
Locking tracks
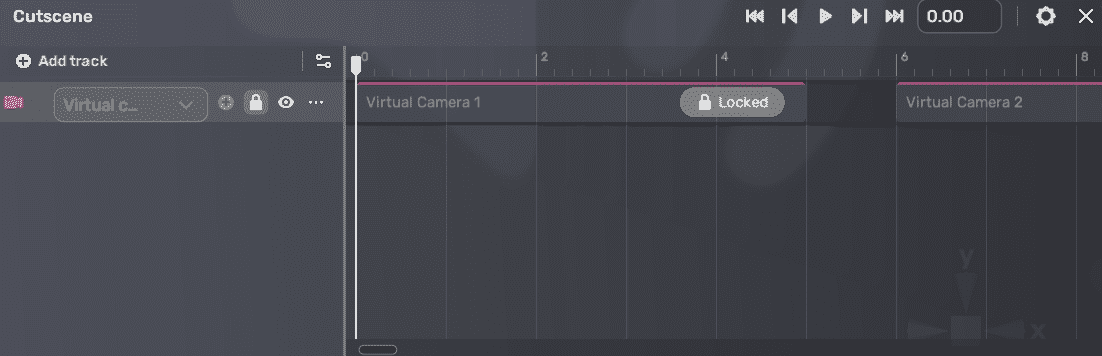
Locking a track prevents any editing operations on that track and its contents, ensuring that your work remains intact. This feature is particularly useful when you've completed setting up a track, such as a virtual camera, and want to avoid accidental modifications.
Locking and unlocking process
To lock or unlock a track, you can use one of the following methods:
- Toggle Lock/Unlock: Enable or disable the Lock toggle directly on the track.
- More options: Click the More icon on the track and select Lock or Unlock from the dropdown menu.
Once a track is locked, it will display an enabled lock toggle and the status Locked. A locked track cannot be selected, edited, or deleted until it is unlocked. However, you can still mute a locked track if needed, allowing you to control its playback without altering its contents.
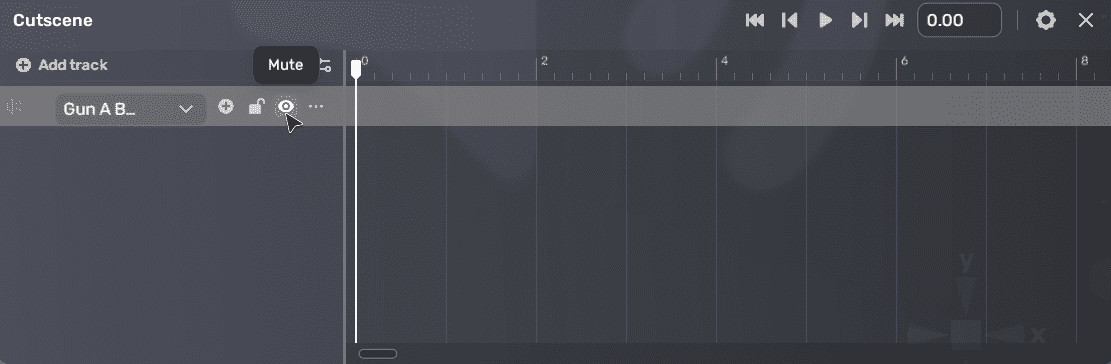
Muting tracks
Muting a track hides the effects of clip playback on that track. This feature is useful for silencing an audio track, for example, while you focus on editing other tracks and clips.
Muting and unmuting process
To mute or unmute a track, you can use one of the following methods:
- Toggle Mute/Unmute: Enable the Mute or Unmute toggle directly on the track.
- More options: Click the More icon on the track and select Mute or Unmute from the dropdown menu.
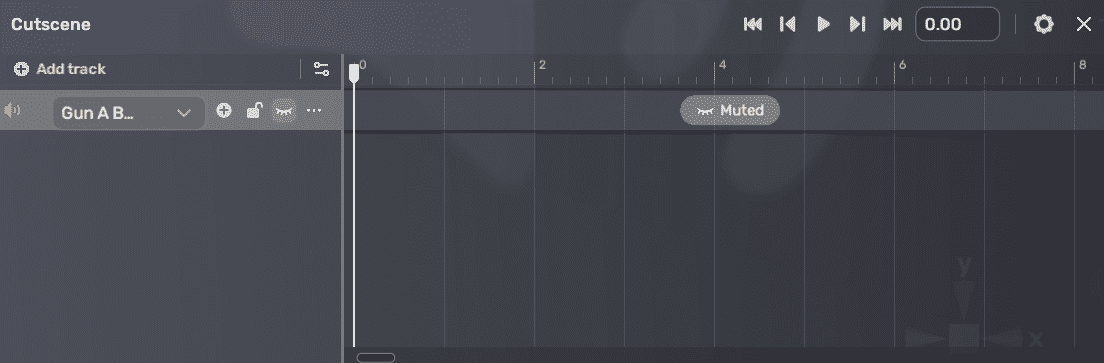
Once a track is muted, it will display an enabled muted toggle and the status Muted. A muted track remains fully editable; you can still select, edit, lock or delete it.
Conditions for normal playback
When working with muted tracks, keep the following conditions in mind for normal playback:
- Single track with Mute: If a cutscene has only one track and it is muted, the cutscene will NOT play normally.
- Multiple tracks with Mute: If a cutscene has more than one track and at least one track contains clips, it can still play normally even if one of the tracks is muted.
- All tracks muted: If a cutscene has multiple tracks but all of them are muted, the cutscene will not play normally.
Configuring cutscenes
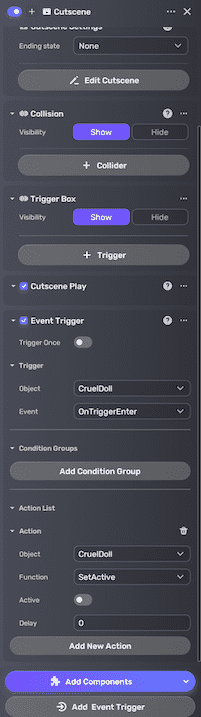
Once you've finished setting up your timeline track, the next step is to determine how to trigger it in the cutscene's trigger action component and finish other settings.
-
Open the cutscene's properties window by clicking the More button.
-
In the Event Trigger component, for example, to trigger the timeline track when the player gets near an NPC, set Object to an NPC, Set Event to OnTriggerEnter, Action to the Object and Function to SetActive. For more information on the component, see Event Trigger.
-
In the Cutscene Settings component, select an option for Ending state. This option determines the status of the referenced object after all timeline tracks have finished playing: None restores the object to its status before the cutscene was played, Hold maintains the last status of the object as it was at the end of the cutscene, or Loop causes the cutscene to replay, returning the object to its initial status at the start of the cutscene.

-
Additionally, you can adjust the size and position of the trigger box around the NPC model to ensure that the player enters the trigger area as intended.
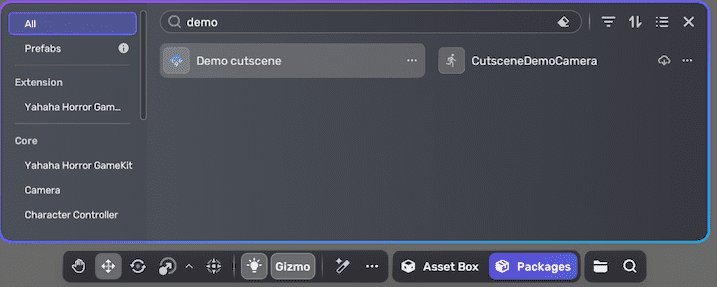
Example: Demo cutscene
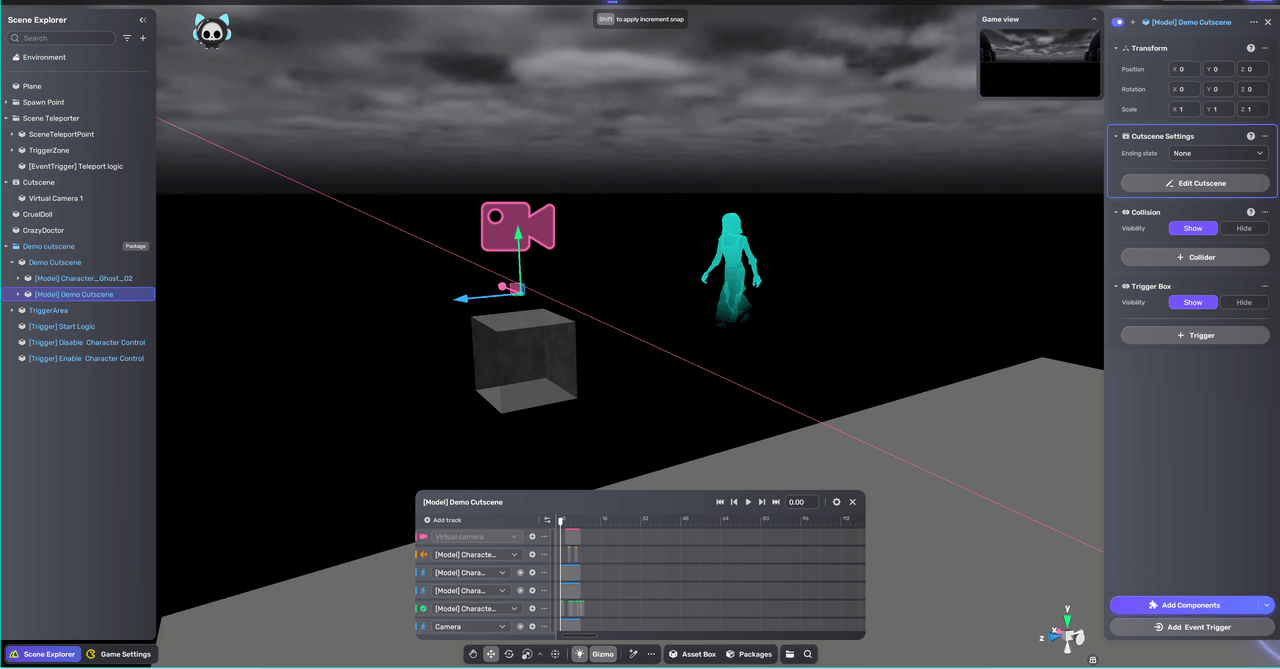
Open the Packages window. Select All and search Demo cutscene. A demo cutscene is available for a quick look at how to combine all track types.
After playtesting, you can view the hierarchy of the cutscene in Scene Explorer.
Editing cutscenes with timeline
To start editing a cutscene, select the cutscene and click the More button to open its properties window.
To edit the timeline tracks, in the cutscene's properties window, click Edit Cutscene in the Cutscene Settings component to open the timeline editor.

To copy or delete a track, click the More icon in the timeline and click Copy or Delete.
Note that compared to version 1.0, Horror Game Kit 1.5 has the following changes to cutscenes:
-
The Trigger action component has been restructured to the Event Trigger component.
-
The Cutscene Play component no longer includes the Disable Interact setting, which previously blocked keyboard and mouse input in-game. A Global Action called BlockPlayerInput has been introduced as a replacement.