Importing UI packages from FairyGUI into Yahaha
In YAHAHA Studio (Studio) you can import UI packages from FairyGUI, a cross-engine, designer-friendly UI editor to customize your user interfaces (UIs) further. This guide provides step-by-step instructions on how to export UI packages from FairyGUI using a plugin and import them into Studio.
Preparations
- Download FairyGUI and set it as your default external UI editor in Studio. Go to Menu > Preferences > External Editors, then specify the UI editor path to the downloaded FairyGUI.
- Download Yahaha FairyGUI Plugin (version 1.0.5 or above) to help move UI packages from FairyGUI to Yahaha.
- Create a FairyGUI (FGUI) project with the type set to Unity and include the UI packages you want to export. If you're new to the UI editor, explore the official documentation for more guidance.
Currently, the following FairyGUI UI elements are not yet supported for import into Studio:
- Skeletal animation
- Loader(3D)
- Fonts: Text created with FairyGUI must use fonts that Studio supports. For a list of all supported fonts in Studio, refer to fonts.
Exporting UI packages from FairyGUI using a plugin
Yahaha FairyGUI Plugin cannot be used across multiple FairyGUI projects. To export UI packages within a project, you must add the downloaded plugin to that project's dedicated plugin folder by following these steps:
Adding Plugin in FGUI project
-
In FairyGUI, open the project that contains the UI package to be exported.
-
Display the built-in Plug-in view by selecting Tool > Plug-In or View > Plug-In.
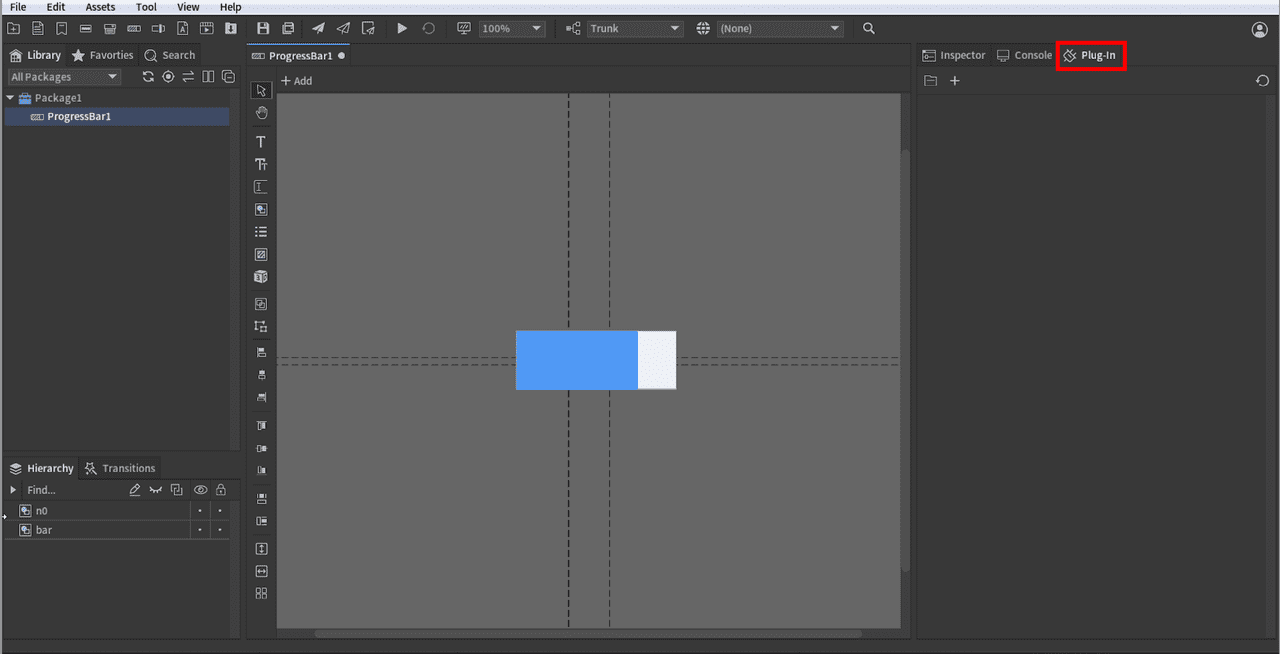
-
In the Plug-In view, click Open plug-in folder to access the default plugins directory where all plugins for the project is placed.
-
Copy and paste the downloaded plugin into the plugins directory, then extract it into a FOLDER.
-
Back to the Plug-In view, click Reload All to make our plugin visible.
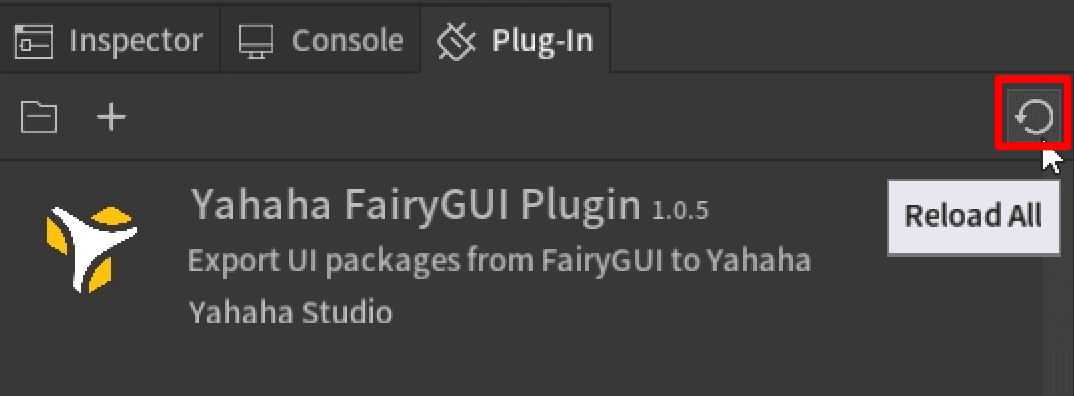
Exporting UI package as ZIP file
After adding the plugin, you can export the project's UI packages as ZIP files. However, you can only export one UI package at a time. To export a package, first pack it, then compress it into ZIP format.
Packing UI package
- To start packing, choose either of the following ways:
-
Right-click the package and select Publish...(Yahaha).
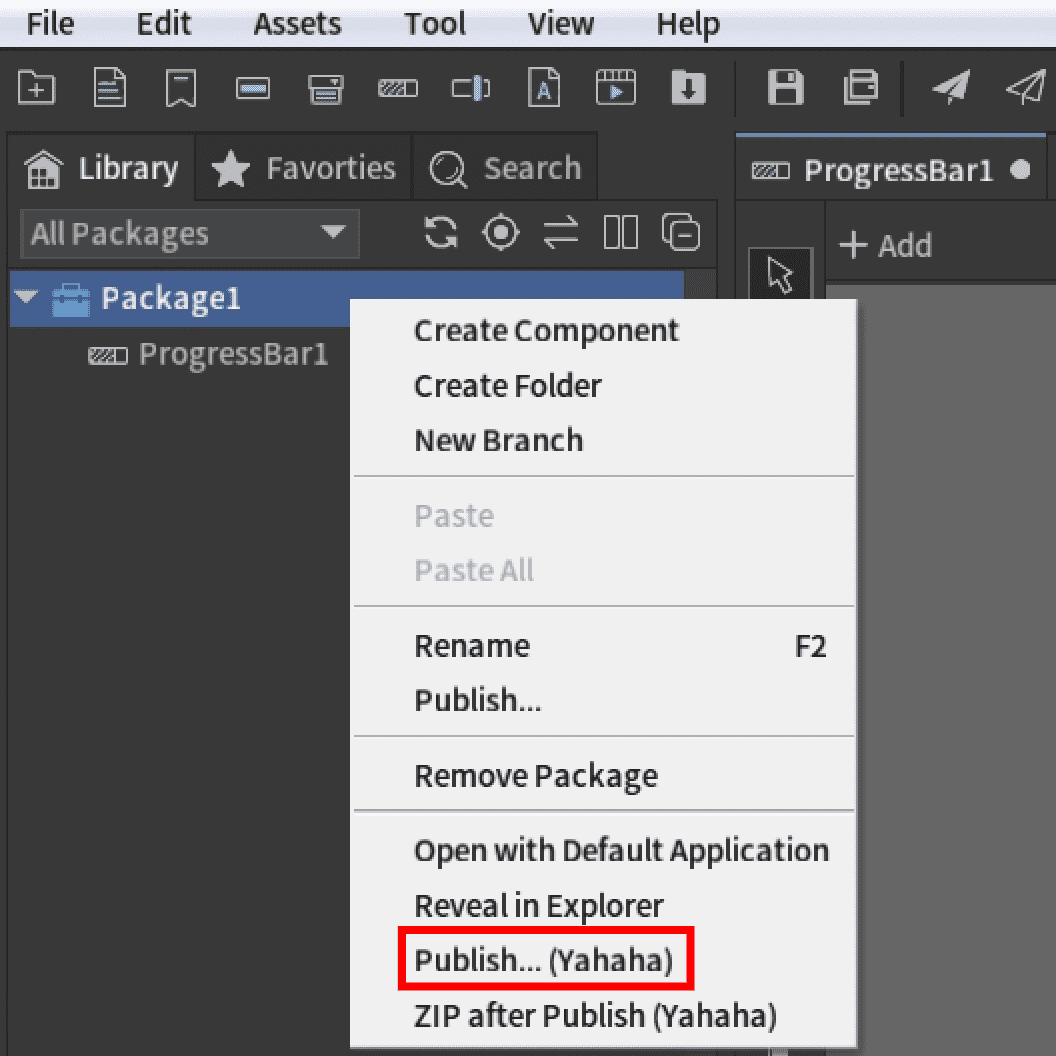
-
Or select the package, click Tool > Publish... (Yahaha).
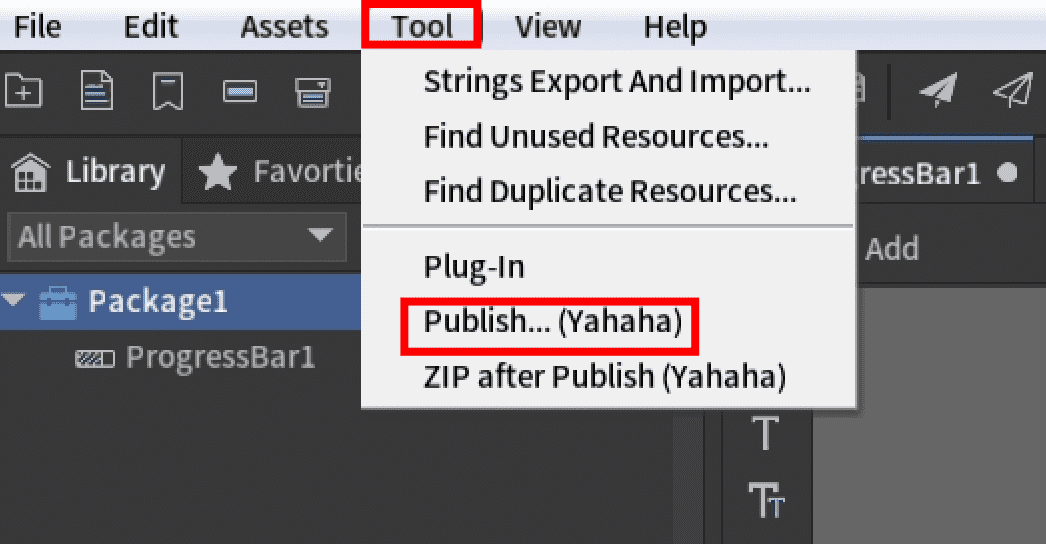
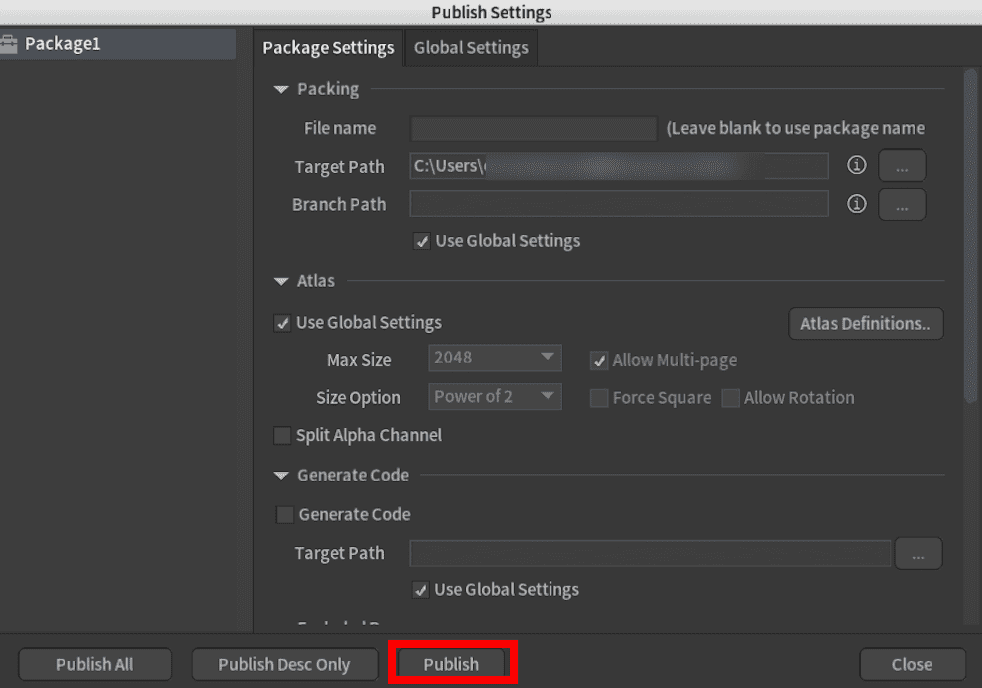
- In the prompted Publish Settings window, specify a target path, complete other settings, and click Publish.
Compressing the packed package into ZIP format
After packing the UI package, repeat the first step of packing, but this time, select Zip after Publish (Yahaha) instead.
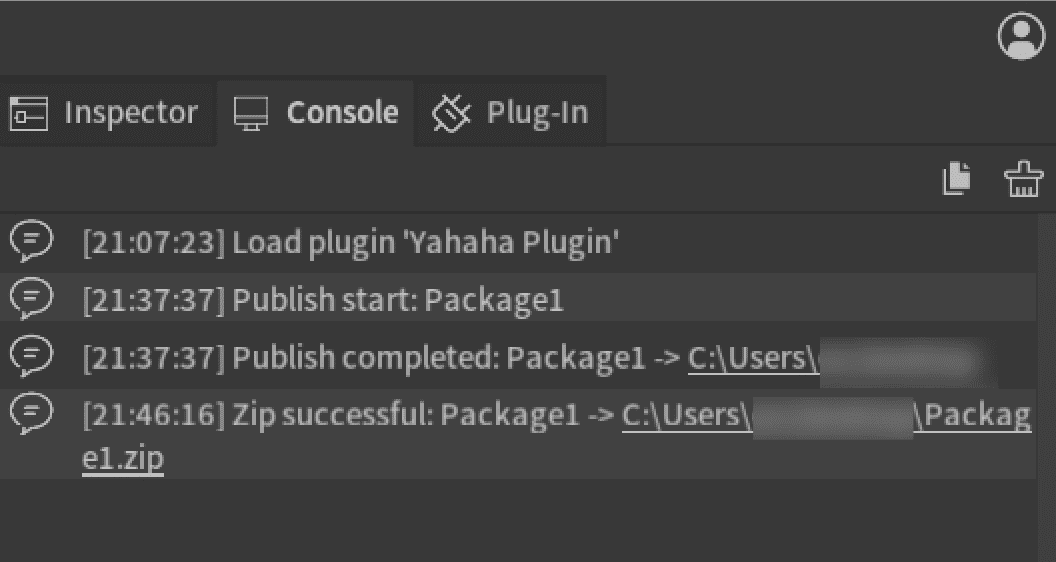
Once complete, go to the Console view and click the file path to quickly find the zipped UI packages alongside the packed files.
Importing UI package into Studio
To import a UI package in ZIP format:
-
Open My Resources > Local files > UI packages, then click Import.
-
In the prompted window, select and then confirm the UI package to be imported.
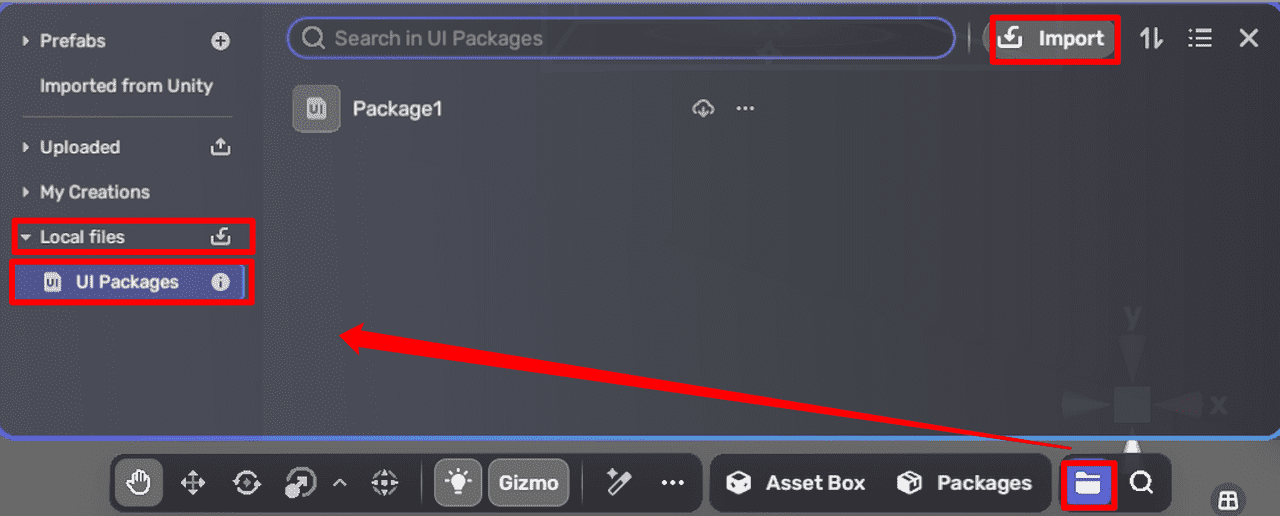
Once done, you can manage your UI packages here.